
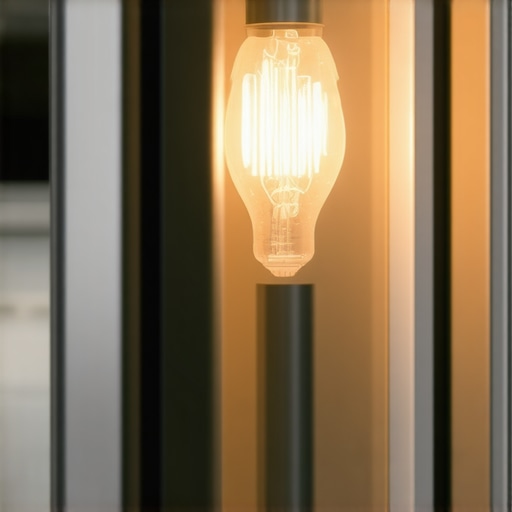
There was this one evening when I reached into my fridge and noticed the light flickering erratically—about as much as a strobe light at a night club. Frustration and curiosity hit me at once. I’d always taken my household appliances for granted, assuming they’d just work without fuss. But that flickering light? It became my personal puzzle, and I knew I wasn’t alone in this struggle.
Ever experienced that annoying flicker whenever you open your fridge door? It’s not just a minor annoyance; it could be signaling an underlying electrical issue that, if ignored, might lead to bigger problems or even fridge failure. Spotting the cause early can save you time, money, and unexpected breakdowns. Trust me—after digging around and going through some missteps (more on that later), I learned exactly what’s behind that mysterious flicker and how to fix it myself.
The Real Reason Your Fridge Light Flickers
What I initially thought was just a loose bulb turned out to be something more insidious—an aging or malfunctioning electrical connection. The flicker often signals that the light bulb’s socket is losing contact or that the fridge’s switch, which detects when you open the door, isn’t functioning properly anymore. Such issues can be caused by worn-out components, a power surge, or even dirt and corrosion building up over time. Interestingly, according to appliance experts, flickering lights aren’t usually a sign of a dying bulb but often point to electrical connections that need attention.
At first, I tried swapping out the bulb—an easy fix I’d recommend. But when the new bulb flickered just like the old one, I realized the problem was deeper. Before diving into complex repairs or calling in a pro, I want to make sure we’re on the same page about what’s really going on behind that flickering glow and what you can do to address it safely and effectively.
Is Fixing a Flickering Fridge Light Truly Worth It?
Early on, I made a common mistake—assuming that a simple bulb replacement would solve all issues. It’s tempting to just swap out parts or ignore the problem altogether, hoping it’ll self-correct. But that approach can sometimes lead to more frustration—or even damage. Troubleshooting the flicker might sound complicated, but with the right guidance, you can often solve it yourself. If you’d prefer to skip the hassle of DIY, trusted repair services like those listed on warranty-backed appliance services are a reliable option for prompt, professional help. So, let’s explore the causes and solutions that will turn that flickering light into a thing of the past.
Safely Access the Fridge Interior
Start by unplugging your fridge to eliminate any electrical hazards. Use a sturdy step stool or a stable chair to reach the light assembly safely, as working at height can be risky. Remember, safety first—never work on electrical components while the appliance is connected to power.
Identify and Inspect the Light Bulb and Socket
Remove the light cover by unscrewing or prying it open gently. Carefully take out the bulb and inspect it visually for signs of burnout or damage. With a multimeter set to continuity mode, test the bulb if unsure—if it doesn’t beep, replace it. While doing this, also examine the socket for corrosion, dirt, or loose connections, which can cause flickering.
Clean and Secure Electrical Contacts
Use a dry cloth or a small brush to clean corrosion or dust from the socket contacts. If corrosion is severe, gently scrape it off with a non-metallic tool or replace the socket if necessary. Tighten any loose wires or contacts to ensure a firm connection—imagine them like tight bolts holding pieces together, which prevent flickering.
Test the Switch Mechanism
The door switch toggles the light on and off when you open or close the fridge door. Locate the switch, usually near the door frame, and inspect for damage or misalignment. Use a multimeter to test continuity when pressing the switch—if it’s faulty, replacing it will restore consistent lighting. Think of it as a gatekeeper that ensures the light only turns on when intended.
Replace Faulty Components
If the bulb and switch are in good condition, but flickering persists, replace the faulty component. Use a replacement part matching your fridge’s model, available online or at local appliance stores. When installing, ensure all connections are firm, similar to how puzzle pieces fit snugly together. Follow installation instructions carefully, and double-check before reassembling the light cover.
Reassemble and Verify Your Fix
Reconnect the power cord and plug in the fridge. Open and close the door to observe if the light now remains steady—that’s how you know you’ve successfully eliminated the flicker. To prevent future issues, consider scheduling regular maintenance or inspections, especially if your appliance is aging.
For more detailed guidance on appliance troubleshooting or professional repair options, visit our expert guide or contact trusted local technicians through reliable service providers. Remember, tackling electrical fixes safely ensures your appliance functions optimally for years to come.
 When it comes to appliance repair, many people rely on surface-level solutions and misconceptions that can cost them time, money, or even safety. Let’s debunk some of the most pervasive myths and reveal the hidden nuances that even seasoned homeowners often overlook.
First, a widespread belief is that same-day service always means a straightforward fix with minimal cost. While quick turnaround is appealing, the truth is that some issues require more diagnostic work or specialized parts, which might extend repair time or inflate costs. For example, some repair companies employ tactics to upsell unnecessary services, so always verify their diagnosis through trusted sources like same-day service experts. Rushing into repairs without proper assessment can lead to short-lived fixes or further damage.
Another common misconception involves warranties. Many assume that a warranty covers all repairs and replacement parts, but in reality, most warranties are limited and specific—covering only certain components or labor within a time frame. Misusing or misunderstanding warranty coverage often results in unexpected expenses. For instance, some homeowners forget that improper installation can void their warranty entirely—highlighting the importance of professional, certified installation services like professional installation guides. Ensuring your warranty remains valid requires attention to detail and awareness of these terms.
Moreover, there’s a tendency to think that appliance repairs are best left to the manufacturer or overly expensive specialists. But this ignores the expertise of third-party repair shops that often offer warranty-backed services at a fraction of the price. With proper training and quality parts, these technicians can be just as reliable, especially with companies that adhere to the highest industry standards. Be cautious, however, of choosing providers who lack transparency—always check reviews and credentials, and don’t hesitate to see if they offer guarantees such as those described in trusted service guarantees.
One sneaky mistake many make is assuming installation is a simple plug-and-play task. Proper installation is critical—not just for functionality but also for safety and warranty preservation. Incorrectly installed appliances can leak, overheat, or malfunction, leading to costly repairs or dangerous hazards. Always insist on certified installers who follow manufacturers’ specifications, and remember, a good installation is an investment to prevent future headaches. Check out installation best practices for comprehensive advice.
Finally, advanced users might ask: “How do I identify subtle signs of fixture failure that aren’t obvious, and avoid costly emergency repairs?” The answer lies in regular maintenance and attention to small anomalies—like unusual noises or slight inefficiencies—that often precede major breakdowns. Experts recommend a proactive approach, as discussed in maximizing warranty benefits during emergencies, which not only saves money but also extends your appliance’s lifespan.
Remember, being well-informed can make all the difference in appliance care. Don’t fall for oversimplified solutions or misconceptions that can lead to future issues—it’s worth investing time in understanding the complexities and ensuring you’re making smart choices. Have you ever fallen into this trap? Let me know in the comments.
Keeping It Running: Tools I Recommend for Long-Term Appliance Care
Maintaining appliances over time requires a combination of the right tools and consistent habits. Personally, I rely on a digital multimeter with auto-ranging capabilities—it’s my go-to device for quickly diagnosing electrical issues like faulty switches or burned-out components. The Fluke 117 is compact yet precise, enabling me to test voltage, continuity, and resistance without fuss, making troubleshooting more efficient.
Another indispensable tool is a cordless heat gun. I use it to soften adhesive seals or gently warm components before disassembly, reducing the risk of damage. It’s especially handy when dealing with stubborn adhesive or frozen connections. Paired with a set of fine precision screwdrivers—preferably magnetic—it makes disassembly straightforward, even in tight spaces.
For cleaning contacts and removing corrosion, I swear by a small set of brushes and contact cleaner spray. In my experience, electrical contacts often cause flickering or intermittent operation, and a quick clean restores optimal conductivity. Using alcohol-based contact cleaner ensures no residue that could attract dirt over time, prolonging the longevity of connection points.
To keep track of repair histories, I use digital record-keeping apps, recording each repair, parts replaced, and maintenance date. This habit helps predict when components might fail and plan preventive maintenance, effectively extending appliance lifespan. Additionally, subscribing to manufacturer firmware updates—especially for smart appliances—ensures firmware-related bugs are patched, improving overall reliability.
Anticipating the Future of Appliance Maintenance
Looking ahead, I see a trend toward smart diagnostic tools that connect directly to your phone, providing real-time health reports of your appliances. Imagine an app that not only alerts you to issues but also suggests specific tools required for the fix. Embracing these innovations will make maintenance easier and more precise for homeowners and professionals alike.
How do I maintain appliance systems over time?
Developing a routine of regular inspections and proactive cleaning significantly reduces failure risk. For instance, cleaning refrigerator coils annually with a vacuum or brush prevents overheating and efficiency loss. Scheduled professional check-ups can catch minor issues before they escalate, saving time and money. Remember, keeping your appliances in top shape isn’t just about tools—it’s about habits and knowledge. For expert guidance on installing or upgrading your appliances properly, consider consulting this comprehensive guide. Why not try calibrating your oven temperature with a reliable infrared thermometer? This simple step can improve baking results and extend the appliance’s life, saving you from costly repairs in the future.
Discover Why Overconfidence Can Trip You Up
One of the hardest lessons I learned was that assuming a simple bulb change will fix all issues can lead to frustration. It’s tempting to overlook deeper electrical connections, which are often the real culprits behind flickering lights. Embracing patience and thorough diagnosis prevents small problems from ballooning into costly repairs, ensuring your appliance maintenance is both effective and safe.
Trust the Right Tools — and Know When to Call a Pro
Having a quality multimeter and a trusty set of screwdrivers transformed my DIY approach. But I also realized that some tasks—like dealing with complicated wiring or potential safety hazards—are best handled by professionals. Knowing your limits and partnering with warranty-backed repair services like trusted experts can save you time and safeguard your home.
Embracing Ongoing Care Seems Simple, but It’s Powerful
Regularly inspecting and cleaning your appliances might seem mundane, but these habits prevent sudden breakdowns. Simple steps like cleaning coils annually or checking seals can extend lifespan and improve efficiency. Remember, the secret ingredient to lasting appliances isn’t just investment in tools—it’s consistent care rooted in understanding what makes your machines tick.
My Gut Feelings About Hidden Appliance Risks
- Ignore strange noises, and you might get costly surprises later. Listening carefully can alert you early to issues before they escalate.
- Don’t underestimate small inconveniences like a slow preheat time—they often signal underlying problems that, if unaddressed, could lead to failure.
- Engage with professional content—like expert guides—to deepen your knowledge and boost confidence in handling repairs safely.
Tools and Resources That Changed My Approach
For anyone serious about DIY repair, I recommend investing in a Fluke 117 multimeter for electrical testing—it’s reliable and user-friendly. A cordless heat gun helps with gentle disassembly, reducing damage risk. Contact cleaners and brushes are essential for maintaining good connections, while keeping a repair journal helps track your appliance’s health. To explore professional help when needed, trusted providers listed on this platform are invaluable.
Your Next Step in Appliance Confidence
Taking control of your appliance maintenance isn’t just empowering—it’s essential for long-term savings. With patience, proper tools, and knowledge, you can troubleshoot many issues yourself, saving money and reducing downtime. Remember, every repair is a step toward becoming an expert in keeping your home running smoothly. Are you ready to give DIY a try, or do you think it’s time to bring in the professionals? Share your thoughts below and let’s learn together!