
Ever had that sinking feeling when you hit the switch and your garbage disposal refuses to turn on? Maybe you’ve heard that dreaded humming sound or, worse, seen water backing up into your sink. I remember the frustration all too well—staring at a clogged drain after a busy dinner party, realizing I had no clue how to fix it without calling a plumber. It was one of those lightbulb moments when I thought, “There must be an easier way!”
Why Fixing Your Garbage Disposal Yourself Matters More Than Ever
In today’s busy world, waiting around for a technician can be a real hassle. Plus, knowing simple repair tricks empowers you to tackle issues head-on and save money. One of the most effective and underrated solutions I found involves using a trusty wrench to clear out stubborn clogs. Not only is this method straightforward, but it also minimizes the need for pricey professional visits, especially for common blockages.
Did you know that according to the Environmental Protection Agency, fixing minor appliances yourself can extend their lifespan and reduce waste? That’s a win for both your wallet and the planet. But before you dive in, it’s crucial to understand what common mistakes newbies often make—like ignoring safety precautions or attempting to force the wrench in the wrong direction—which can cause more harm than good.
Common Skepticism: Is Using a Wrench Safe and Effective?
I’ll admit, I was initially wary of attempting any repair. My early mistake was trying to unscrew the clog without turning off the power or locating the right attachment points. That nearly led to injuries and more damage. But once I learned the proper technique, everything changed. Now, I want to share a step-by-step process that’s helped me—and many others—restore their disposal quickly and safely. You might be surprised how simple it really is, but only if you approach it with the right knowledge. Curious about quick, reliable waste disposal fixes? Check out this expert guide for more tips.
So, if you’ve faced the frustration of a jammed or clogged disposal, stay tuned. We’re about to demystify the process, empower you with confidence, and have your sink draining smoothly again in no time.
Position Yourself Correctly Before Starting
Locate the power switch, turn off the disposal at the circuit breaker to ensure safety, and unplug the unit if accessible. This step is vital to prevent accidental activation during repair. I once forgot to cut the power before attempting to fix mine, leading to a minor shock—an experience I do not want you to repeat.
Gain Access to the Disposal’s Jamb
Remove the underside panel or sink flange cover to expose the disposal’s trap and the area around the motor. Use a flashlight if necessary. Remember, this can be messy; wear gloves and keep a towel nearby for drips. During my first attempt, I neglected to remove the mounting screws, which slowed me down significantly.
Identify the Ideal Tool and Location for Unclogging
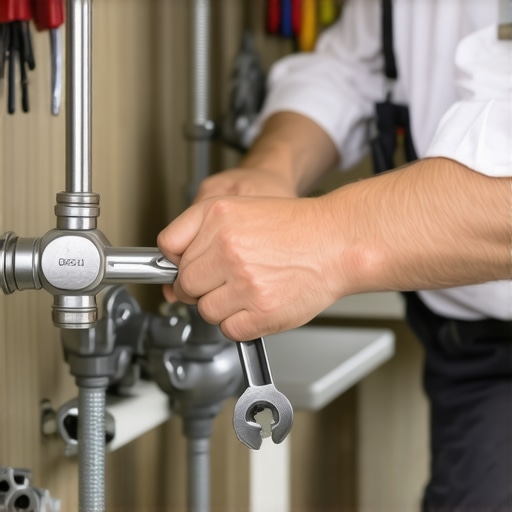
Use a ¼-inch Allen wrench, which typically fits into the hex hole at the bottom of the unit. Insert the wrench into the socket and turn it back and forth vigorously for about 30 seconds. This motion manually breaks the clog loose. Once, I struggled with a flathead screwdriver—wasting precious minutes—until I remembered the correct tool.
How to Turn the Wrench Correctly
Rotate the wrench clockwise and counterclockwise, applying steady force. Think of it like winding a clock: gentle but firm turns that twist out the debris blocking the blades. Don’t force it too hard; applying too much pressure might round out the socket or damage the motor. After a few turns, you might hear a click or feel resistance, indicating the obstruction has moved.
Clear Out the Jam and Run a Test
Once the clog is dislodged, remove the wrench, reassemble the panel, and restore power. Turn on the water and power, then run the disposal briefly. If it hums freely and the water drains without backing up, you’ve succeeded. I once had a stubborn clog that needed several attempts, but persistence paid off—saving me a service call fee.
Final Check and Preventative Tips
Regularly run cold water during disposal operation to keep blades cooled and debris from sticking. Avoid putting fibrous materials or large bones into your disposal, which are common culprits of jams. To maximize your appliance warranty benefits, consider scheduling a professional tune-up if issues persist or for a thorough inspection. For more detailed advice on warranty-backed appliance services, visit this link.
Many homeowners operate under common assumptions about warranties, installation, and repair services that can lead to costly mistakes. While it’s tempting to believe that warranties cover every mishap, or that installation is a straightforward process, the reality is far more nuanced. As an expert in appliance servicing, I’ve seen how these misconceptions can cause trouble down the line.
One of the most widespread myths is that all warranties are automatically in your favor and will cover any repair. In truth, many warranties come with fine print—exclusions, limited coverage, or specific conditions that void protections if not followed precisely. For instance, some homeowners are unaware that improper installation can nullify their warranty, leaving them unprotected during a breakdown. To truly maximize your warranty benefits, understanding the terms and performing proper installation is essential. For detailed guidance, I recommend reviewing this resource.
Why DIY Installation Can Be a Warranty Trap
It’s tempting to save money by installing appliances yourself, but this often backfires. Most manufacturer warranties specify that professional installation is required for the warranty to remain valid. A wrong connection or improper setup can cause damage or safety issues, which may not be covered if the warranty provider considers the installation negligent. I’ve seen cases where homeowners thought they could handle the task, only to face expensive repairs later because the warranty was voided. Always verify warranty conditions and consider professional help—sometimes a small upfront investment saves plenty in the long run. For reliable installation options, check these trusted local services.
Another often-overlooked mistake is scheduling same-day repair services without understanding the scope and limitations. Some believe that same-day service guarantees immediate fixes, but in reality, certain repairs require parts or specialized technicians, leading to delays. To navigate this, knowing your options and how to prioritize urgent repairs can save time and stress. For instance, scheduling through reputable providers that include warranty-backed services can ensure quality work done swiftly. Learn how to get the most out of same-day repairs with warranty support.
Understanding these nuances can significantly impact your appliance longevity and your wallet. Don’t fall prey to the misconception that warranties are foolproof or that installation is trivial. Instead, approach these aspects with knowledge and diligence—this is where true expertise lies.
Have you ever fallen into this trap? Let me know in the comments. For more insights on protecting your appliances and making informed repair decisions, explore this expert guide.
Keeping It Working: Essential Tools and Maintenance Strategies
To ensure your appliances stay in top shape over the years, investing in the right tools and adopting consistent maintenance routines is crucial. I personally rely on a high-quality digital multimeter, like the Fluke 117, because it allows me to quickly diagnose electrical issues with confidence, saving me time and preventing unnecessary part replacements. Additionally, a set of precision screwdrivers and long-reach pliers are indispensable for accessing hard-to-reach components during routine check-ups or minor repairs.
Regularly inspecting and cleaning components such as filters, coils, and vents can dramatically extend appliance lifespan. For example, cleaning your refrigerator’s condenser coils every six months with a coil cleaning brush (like the Gardus RWH033) ensures efficient cooling and reduces energy consumption. I also use a service manual specific to my appliance model, which provides detailed diagrams and troubleshooting steps—this keeps me from guessing when something goes wrong and helps me perform more precise repairs.
What tools do I recommend for ongoing maintenance?
Beyond basic hand tools, I suggest keeping an infrared thermometer, like the Etekcity Lasergrip, to check temperature variations in your appliances. This simple device helps identify overheating components before they fail completely. Additionally, a reliable tube of dielectric grease is worth having on hand—it prevents corrosion on electrical connectors and extends their service life. Together, these tools form a practical kit that allows for quick diagnostics and smooth maintenance routines.
How do I maintain appliance performance over time?
Developing a scheduled maintenance plan—checking seals, filters, and connections every few months—ensures early detection of potential issues. Setting reminders on your calendar or smartphone can make this process habitual. Also, staying informed about updates or recalls from the manufacturer can prevent larger problems down the line. For instance, some appliance manufacturers release firmware updates that improve efficiency or safety, so periodically visiting their support sites is a good practice. Remember, keeping an eye on performance metrics and addressing small issues promptly can save you significant repair costs later.
As technology advances, I see a trend toward smart diagnostic tools that connect directly to your smartphone, providing real-time alerts for issues before they escalate. Embracing these innovations now can make maintaining your appliances even easier and more predictive, ultimately protecting your long-term investment. For specific maintenance routines tailored to your appliances, I recommend checking out this comprehensive guide.
How do I ensure my appliances are ready for long-term use?
One advanced tip I offer: use thermal imaging to spot hidden heat buildup and prevent electrical failures. This method, backed by experts like the team at reliable repair services, can catch issues before they become costly repairs. Regularly performing such diagnostics, especially on critical components like motors and control panels, can significantly extend the life of your appliances. Why not try incorporating an infrared thermometer into your routine this month? It’s a step toward smarter, more proactive maintenance—and can save you money in the long run.
The Hardest Lesson I Learned About Warranties and Fast Service
One of my biggest surprises was discovering that not all warranties are equal—many come with fine print that can trip you up if you’re not careful. I once assumed my appliance was covered for everything, only to find out the manufacturer’s warranty excluded certain repairs unless I used approved technicians, which delayed my fix significantly. That taught me the importance of reading the warranty terms thoroughly before any issues arise.
3 Myths About Same-Day Service and Installation That Held Me Back
Initially, I believed that scheduling same-day repair meant instant fixes—wrong. In reality, some repairs need special parts or technicians, making same-day service more about rapid response than immediate resolution. Also, I thought DIY installation was always cost-effective—until I voided my warranty by doing it wrong, leaving me open to costly repairs later. Understanding these truths has helped me choose smarter, more reliable service options.
What Industry Insiders Won’t Tell You About Warranty Guarantees
Many people overlook that warranties often require proper registration and adherence to specific procedures—otherwise, coverage can become null. I once neglected to register my appliance promptly, and when it broke, I had no warranty to rely on. Now, I make it a point to understand and follow all warranty registration steps, ensuring my investment is protected when I need it most. Knowledge about these nuances is a game-changer for conscientious homeowners.
Curated Tools That Keep My Appliances Running Smoothly
My go-to toolkit includes a quality digital multimeter like the Fluke 117 because it helps me diagnose electrical issues with confidence, preventing unnecessary repairs. I also rely on a set of precision screwdrivers and inverter-rated thermal imaging cameras—these help me spot problems early, saving money and preventing appliance breakdowns. Having the right tools transforms appliance care from guesswork to confident maintenance.
Your Turn to Take Control of Appliance Repairs
Empowering yourself with knowledge about warranties, installation, and quick repairs can save you time, money, and stress. Whether it’s understanding the fine print or investing in essential tools, small steps today lead to longer-lasting appliances and better service decisions tomorrow. Don’t wait for problems—be proactive, learn, and keep your home running smoothly.
What’s your biggest challenge when dealing with appliance warranties or repairs? Share your experience below, and let’s learn from each other!