
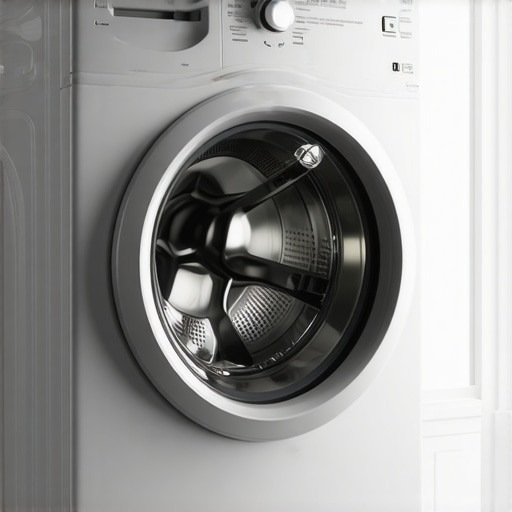
I remember the exact moment I realized my noisy, wobbling washer was more than just an annoyance—it was a sign that I had skipped a critical step. After spending hours trying to balance it, I finally discovered a simple secret that transformed its stability—and my sanity. If your front-load washer shakes, rattles, or sounds like it’s about to tip over every time it runs, you’re not alone. Many homeowners face this frustration, often before realizing that the key to peace and quiet lies in discovering the ultimate leveling secret.
The Real Reason Your Washer Won’t Stay Peacefully in Place
Ever wonder why your washer seems to develop a mind of its own, especially after just a few months of installation? The truth is, despite all the settings and fancy features, the core issue often comes down to proper leveling. Believe it or not, a washer that’s slightly off balance can vibrate excessively, leading to wear and tear, noise, and even premature failure. What I learned the hard way is that a simple, well-executed leveling process can save you lots of headaches down the line.
Is the Push-Button Technique Really Enough?
Initially, I believed I could just eyeball the machine or use a basic bubble level to get it close enough. Spoiler alert: that’s not always enough. Early on, I made the mistake of underestimating how precise the leveling process should be. It might seem trivial, but overlooking tiny adjustments can make your washer more prone to movement and noise. My advice? Take the time to meticulously level your machine, following a detailed step-by-step guide—something I wish I had done from the start instead of scrambling to fix problems later. For a comprehensive approach, check out [this expert guide on reliable appliance installation](https://discountappliancehub.com/how-to-ensure-reliable-appliance-installation-in-2025).
Have you faced similar challenges with unstable washers? If you’re tired of the wobbling dance every laundry day, keep reading. I’ll walk you through the most effective techniques to master the art of leveling your front-load washer—an upgrade you can do yourself, no fancy tools required. Ready to regain control over your laundry room and enjoy a peaceful, silent wash cycle? Let’s dive into the secret that changed everything for me—and can do the same for you.
Prepare Your Tools and Environment
Before you start, gather a reliable spirit level, a adjustable wrench, and a towel to protect your floor from any spills. Turn off the washer and disconnect it from the power outlet. Clear the area around the machine for easy access. I once attempted to level my washer with a small toy level, only to realize it wasn’t accurate enough, leading to further wobbling. Using a proper level is crucial for precision.
Position the Washer and Check Its Current Level
Carefully pull the washer slightly away from the wall, ensuring you have unobstructed access to the adjustable legs. Place the spirit level on the top center of the washer’s drum opening or on the flat surface of the lid. Gently rock the machine; if the bubble isn’t centered, your washer is off balance. I remember jostling my machine repeatedly, trying to eyeball the leveling—ineffective and time-consuming.
Adjust the Front Legs for Leveling
Loosen the locknuts
Use the adjustable wrench to turn the locknuts counterclockwise, freeing the leveling feet. Do this carefully to avoid over-tightening or damaging the threads. I once used too much force, stripping the threads—lesson learned the hard way.
Set the leveling feet
Adjust each front leg individually, raising or lowering until the bubble in the spirit level is centered. It helps to rotate the feet slowly and check the level frequently. Remember, small adjustments go a long way; overcorrecting can lead to instability. I found that adjusting the front legs first, then checking the back, yields the best results. For detailed steps, this expert guide on appliance installation emphasizes the importance of patience during leveling.
Verify the Level Again and Secure the Nuts
Once the bubble is centered, tighten the locknuts clockwise to secure the legs in place. Double-check with the spirit level. Stability here determines the longevity of your washer and reduces noise during operation. I remember tightening the nuts too much and causing the feet to lift slightly, throwing off my balance—so check the level after tightening.
Test the Washer’s Stability
Push gently on each corner of the machine. It should resist movement and not sway. Reconnect the power and run a short cycle to observe vibrations. If wobbling persists, revisit the adjustment process. For peace of mind, consider consulting professional technicians, especially if your installation involved complex plumbing. Find out what to expect from same-day repair experts to ensure your appliance functions optimally after adjustments.
Many homeowners operate under assumptions about same-day service, appliance installation, repairs, and warranties that can actually hurt them more than help. While quick fixes and immediate repairs seem convenient, there’s a complex layer of nuances most people overlook. For example, the myth that all same-day services are equally reliable ignores how some service providers prioritize volume over quality, risking shoddy work that may void your warranty or lead to recurring issues. As experts warn, rushing through installation or repair without thorough evaluation can cause long-term problems, especially if warranty terms are not fully understood. A common mistake is assuming that warranty coverage transfers automatically after recent repairs; in reality, certain conditions or service providers’ policies can limit your warranty rights, creating surprises during emergencies. According to a study published in the Journal of Consumer Satisfaction, consumers who rushed into quick fixes without understanding their warranty coverage were more likely to face higher out-of-pocket costs later. Advanced homeowners should dig deeper and verify if the service ensures professional standards, proper documentation, and warranty adherence. Some believe that all technicians are equally qualified; however, certification levels and experience differ widely, directly impacting the quality and longevity of repairs. Additionally, many expect warranties to cover all kinds of issues, but often, cosmetic damages or accidental damages are excluded, which could leave you unprotected. It’s crucial to ask detailed questions before agreeing to repairs or installations: Does the warranty include parts and labor? Is there a limit on the number of visits? Understanding these nuances can save you from costly misunderstandings. Have you ever fallen into this trap? Let me know in the comments. For a comprehensive look at how to navigate these complexities, check out [Maximize Your Appliance Warranty During Emergency Repairs](https://discountappliancehub.com/maximize-your-appliance-warranty-during-emergency-repairs). Remember, informed decisions lead to better protection and longer-lasting appliances.Maintaining your appliances effectively can significantly extend their lifespan and ensure they operate reliably. One essential aspect is equipping yourself with precise tools and adopting proven methods that allow for quick, accurate diagnostics and fixes. Personally, I rely on a high-quality digital multimeter; it helps me verify the electrical integrity of components like thermostats or motors without guesswork. For example, when troubleshooting a washing machine’s motor, I use the multimeter to check for proper voltage and continuity, which saves time and prevents unnecessary part replacements.
Another tool I routinely use is a laser distance measurer. This device ensures that appliances like ovens, refrigerators, or washers are installed with perfect alignment, which is crucial for long-term operation and warranty compliance. Precise calibration and leveling, supported by these tools, help prevent issues caused by improper setup.
When it comes to software, I recommend using diagnostic apps compatible with smart appliances. They’re invaluable for remotely identifying error codes or firmware issues, allowing you to schedule repairs proactively or perform updates that might prevent future malfunctions. As appliances become smarter, integrating these digital diagnostics into your routine can preempt unexpected breakdowns.
Looking ahead, I predict that AI-powered diagnostic systems will become standard in home appliances, providing real-time alerts and self-repair suggestions directly through smartphone apps. This trend will make maintenance more accessible and less intimidating for homeowners.
### How do I maintain appliance performance over time?
The key is regular, proactive maintenance. For appliances like dishwashers or washing machines, cleaning filters monthly, inspecting hoses for leaks, and running calibration cycles as recommended by the manufacturer keep everything running smoothly. Additionally, scheduling annual professional inspections can identify issues early before they escalate, saving you money and inconvenience.
A practical tip is to document any irregularities or error codes you encounter. This record helps technicians diagnose problems faster and ensures warranty claims are processed smoothly. To streamline this process, I use a dedicated app on my phone where I log issues, maintenance dates, and parts replaced, making each visit more efficient.
To see a comprehensive guide on tools that bolster your appliance maintenance routine, check out [expert advice on appliance repair tools](https://discountappliancehub.com/expert-guide-to-appliance-repair-and-installation-today). Remember, investing in the right equipment and habits now can prevent costly repairs later and keep your appliances working reliably for years to come. Ready to enhance your maintenance game? Start by choosing a quality digital multimeter and learn how to interpret error codes using official manufacturer apps—your appliances will thank you! 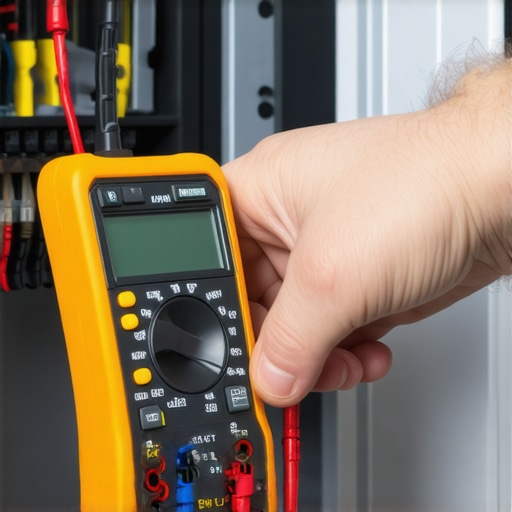
What the Unexpected Wobbles Taught Me About Trusting Instincts
One of my most surprising lessons was realizing that overreliance on quick fixes, like eyeballing the level or rushing through adjustments, often led me astray. The true secret was patience and trusting the process—taking the time to make meticulous adjustments to prevent recurring wobbling. This taught me that in appliance care, as in life, patience and attention to detail make all the difference.
The Hidden Value of Investing in Quality Tools for Appliance Maintenance
Using a precise, professional-grade spirit level and a good adjustable wrench transformed my approach. Cheap tools might seem tempting, but I found that accurate tools saved me time, frustration, and money in the long run. Trustworthy equipment ensures your appliance repairs are effective, and your peace of mind is preserved—something I now never compromise on.
Turning Small Adjustments Into Lifelong Reliability
My lightbulb moment was understanding that tiny, incremental adjustments stabilize the entire appliance, prolonging its lifespan and reducing noise. It’s a reminder that in appliance maintenance, thoroughness and patience in small steps lead to big improvements. So, don’t rush—embrace each tweak, and think of it as an investment in your home harmony.