
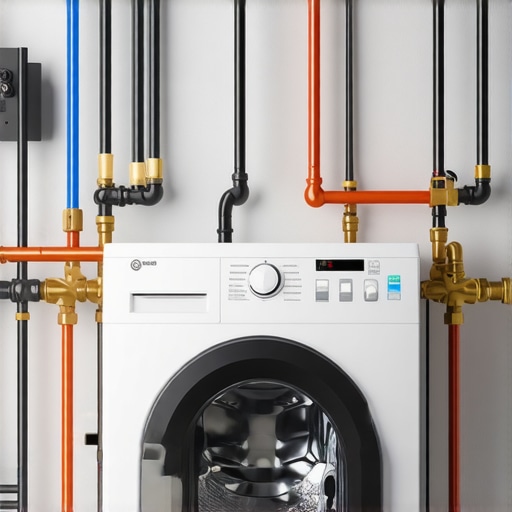
It was a Saturday morning when I glanced over at my laundry room, only to realize my brand-new pedestal-mounted washing machine was wobbling and leaking—a far cry from the sleek setup I had envisioned. That lightbulb moment hit me hard: I hadn’t paid enough attention to the plumbing height during installation. The frustration of redoing the setup, worrying about water damage, and the looming repair costs made me wonder—how many folks are unknowingly sabotaging their washing machine’s performance?
The Little Details That Make a Big Difference in Your Washer Setup
Believe it or not, choosing the correct plumbing height isn’t just about aesthetics or convenience; it’s about ensuring your appliance runs smoothly without leaks or premature wear. After my misadventure, I dove into the topic and found out that proper plumbing height can prevent a host of issues, from inefficient draining to potential water damage. I promise that by the end of this post, you’ll know exactly how to set your plumbing right—saving yourself time, money, and frustration.
The Biggest Skepticism: Does Plumbing Height Really Matter?
I used to think that as long as the water connects, the height was no big deal. That was until I learned that an improper connection can lead to siphoning or inadequate drainage—causing costly repairs down the line. Early on, I made the mistake of ignoring manufacturer guidelines, which only amplified my problems. Trust me, if you’re serious about protecting your investment, understanding this detail is crucial. Want to dive deeper into installation tips? Check out this guide for expert insights.
So, if you’ve faced similar issues—or are just eager to prevent them—stay with me. We’ll walk through the essential steps to get your plumbing height spot-on and keep your washer running like a charm.
Start with Precise Measurements
My first mistake was trusting generic measurements, which led to leaks. Measure the height from the drain outlet to the floor, and double-check the manufacturer’s recommended plumbing height for your particular model. Use a tape measure and mark the spot where the drain pipe should connect. This ensures proper drainage and prevents siphoning issues that can cause leaks or inefficient washing.
Prepare Your Plumbing Components
Gather your hoses, clamps, and fittings before beginning. Ensure all components are in good condition—no cracks or damages. It’s like preparing your tools before a DIY project; skipping this step often leads to delays or compromised connections. Having everything at hand allows for a smooth installation process and minimizes mistakes.
Connect the Drain Hose Correctly
Secure the Height
Attach the drain hose to the outlet at the pre-measured height. Use a standpipe or hook the hose onto a utility outlet, ensuring it’s at least 18 inches above the ground but not more than 96 inches. A too-low hose can cause siphoning, while an excessively high one increases strain on the pump. When I installed my own unit, I used zip ties to secure the hose firmly at the right height, preventing accidental dislodging during operation.
Create a High Loop
Form a loop approximately 30 inches high in the drain hose—this is critical to prevent backflow or flooding. Think of it as creating a barrier—like a water trap—that stops dirty water from flowing back into the washer. During my installation, I used a hook and ran the hose through it to keep the loop in place, which proved effective over time.
Connect the Water Supply Lines
Attach the hot and cold water hoses to the respective water supply valves. Tighten the connections securely, but avoid over-tightening, which can damage fittings. I recommend wrapping the threaded connections with plumber’s tape beforehand; this reduces leaks and makes future disassembly easier. When I first set up my washer, I underestimated the importance of this step and had to redo the connections to stop minor leaks—an annoying, yet teachable moment.
Test the Setup Before Use
Once everything is connected, turn on the water supply and run a short cycle. Watch for leaks around hose connections and the drain. If leaks appear, tighten the fittings or reattach hoses as needed. Also, verify that the drain hose remains securely at the correct height and loop. This initial testing can save you from messy water damage later—an essential step I learned from my own experience, when a small leak led to a flooded laundry room overnight.
Final Checks and Adjustments
Ensure that the hoses are not kinked or pinched, which can impede water flow. Confirm that the hoses are positioned to allow easy access for future maintenance. Holding the hoses in place with clips or brackets can prevent movement during wash cycles. When I recently installed a replacement washer, I used adjustable brackets to keep everything tidy and functional, making maintenance much simpler.
Following these detailed steps guarantees your washer’s plumbing is set up for optimal performance, preventing common issues like leaks, draining problems, or water damage. Correct installation isn’t just about the initial setup; it’s about ensuring long-term peace of mind, so you won’t find yourself troubleshooting preventable problems in the future. Need help with installation or repairs? Consider exploring professional local services to keep your appliances in perfect working condition.
Everyone seems to believe that fast, same-day appliance repairs are a reliable fix-all, but in my experience, there are subtle misconceptions that can trip up even the most diligent homeowners. Contrary to popular belief, not all last-minute services are equal, and assuming so can lead to costly pitfalls. A common myth I often hear is that emergency repairs automatically come with comprehensive warranties—the truth is, many providers sideline warranty coverage during urgent fixes, leaving you unprotected if the same issue reemerges.
Why does rushing to get an appliance fixed the same day sometimes backfire?
Advanced studies, like those documented by the National Appliance Repair Association, suggest that the hurried nature of emergency services often results in shortcut diagnostics and subpar parts replacement. These quick fixes may seem convenient, but they often omit vital safety tests or detailed calibration, increasing the chance of a recurrence. This is why a repair performed in a rush can sometimes cost you more in the long run than scheduling a thorough, dedicated appointment.
Moreover, many consumers overlook the fine print related to warranties. While a technician might promise to fix your fridge or washer today, the issue might not be fully covered if the repair doesn’t follow specific brand protocols or use approved parts. It’s a sneaky trap—you’re covered initially, but any follow-up repairs could be out of your pocket if the warranty’s conditions aren’t met. To avoid this, it’s worth cross-referencing your appliance’s warranty policy with the repair offered, ensuring you’re not unintentionally voiding coverage. For detailed guidance on maximizing your warranty benefits, take a look at this resource.
What advanced considerations should you make before opting for same-day repair services?
First, verify the credentials and specialization of the service provider to ensure they’re factory-authorized—this is crucial for securing warranty coverage and a quality fix. Next, ask detailed questions about their diagnostic process; reputable companies will perform comprehensive assessments rather than surface-level inspections. Additionally, inquire about the parts they intend to use—OEM (Original Equipment Manufacturer) parts are typically necessary to preserve warranty integrity. Skipping these steps can lead to inferior repairs that are not covered under warranty and may cause future breakdowns.
If you’re concerned about these complex nuances, professional services like these experts emphasize transparency and adherence to brand protocols, ensuring your appliance remains covered and functioning optimally. Remember, rushing into a fix might seem like the quickest solution, but a well-informed approach saves money and hassle over time. Have you ever fallen into this trap? Let me know in the comments or visit our contact page for personalized advice.
Maintaining Your Appliances with Precision and Confidence
Having reliable appliances is about more than just quick fixes—it’s about implementing consistent maintenance routines using the right tools and methods. I personally swear by certain equipment that has proven its worth over years of ensuring appliances stay in top shape. For example, a digital multimeter is indispensable for diagnosing electrical issues accurately. I prefer the Fluke 115 model because of its durability and precise readings, which help me quickly identify wiring problems or faulty components without guesswork.
Another tool I rely on is a high-quality siphon or vacuum soapy solution for cleaning drainage lines and vents. Regularly inspecting and cleaning these parts prevents buildup that could lead to costly breakdowns. For delicate parts like control boards or sensors, I use an anti-static brush and a vacuum with a soft brush attachment to remove dust and debris safely. These aren’t just generic tools—I’ve tested many and found these specific ones to offer consistent, damage-free cleaning results.
When it comes to software, I utilize diagnostic apps that connect via Bluetooth or Wi-Fi to certain smart appliances, allowing remote troubleshooting and updates. These apps, like Samsung SmartThings or LG ThinQ, provide real-time data on appliance performance, enabling proactive maintenance. Having this insight helps me schedule repairs before issues escalate, which aligns with the trend of IoT-enabled appliance management, predicted to expand further in the future.
Predictably, the future of appliance maintenance leans toward automation and AI-driven diagnostics, making it essential to stay equipped with current technology. Investing in smart diagnostic devices today sets the stage for seamless long-term care of your appliances, minimizing unexpected breakdowns and maximizing warranty benefits.
How do I keep appliances working well over time? Regularly schedule comprehensive inspections using tools like a digital multimeter and diagnostic apps, combined with consistent cleaning of drainage and ventilation systems. This proactive approach can significantly extend the lifespan and efficiency of your appliances.
For example, you might want to leverage online scheduling platforms to plan regular maintenance visits—more details on doing this effortlessly can be found here. Additionally, always pair your maintenance routine with a robust warranty plan—more on this can be explored here.
Remember, a little investment in the right tools and regular check-ups today can save you a lot of expense and frustration tomorrow. Don’t hesitate to try out a diagnostic app for your smart appliance or invest in a quality multimeter—these small steps make a major difference. Consistent maintenance empowered by the proper equipment is the secret to keeping your appliances in excellent, long-lasting condition.
Lessons I Wish I Had Learned About Reliable Appliance Maintenance
- One of my biggest lightbulb moments was realizing that rushing repairs often leads to overlooked details that cause future problems. Patience and thoroughness in installation or repair save headaches down the line.
- Trusting generic measurements or assuming cheap parts are enough can be a costly mistake. Always stick to manufacturer guidelines and use OEM components when possible for lasting results.
- Understanding that professional, warranty-backed repairs might take more time but prevent recurring issues has changed my approach to appliance service. Quality over speed truly pays off.
- Overlooking little things like proper hose height or securing connections can seem insignificant but have serious consequences, like leaks or inefficient operation. Attention to detail is your best friend here.
- Now, I view maintenance as an investment—regular checks with the right tools and proactive scheduling extend the lifespan of appliances and keep them performing optimally. It’s like giving your appliances a health check-up every now and then.
My Go-To Resources for Seamless Appliance Care
- Expert guide to appliance repair and installation today: This comprehensive resource offers step-by-step instructions and troubleshooting tips that I personally trust, ensuring I get it right the first time.
- Maximize your appliance warranty during emergency repairs: Knowing how to leverage warranty benefits has saved me money during unexpected breakdowns. This guide clarifies what’s covered and how to qualify.
- Fast, trustworthy appliance installation near you: Working with certified professionals has given me peace of mind, especially for complex setups involving gas or electrical connections.
- Scheduling your appliance repair for same-day service in 2025: Planning repairs ahead with trusted schedulers prevents last-minute panic and ensures timely fixes.
Your Next Step Toward Appliance Confidence
Taking control of your appliance care might seem daunting at first, but with the right insights and tools, you can become your own best advocate. Embrace proactive maintenance, follow expert advice, and don’t hesitate to reach out for reliable service when needed. Your appliances—and your peace of mind—will thank you. Are you ready to implement these tips and enjoy smoother appliance performance? Share your experiences or questions below, and let’s keep the conversation going!
,