
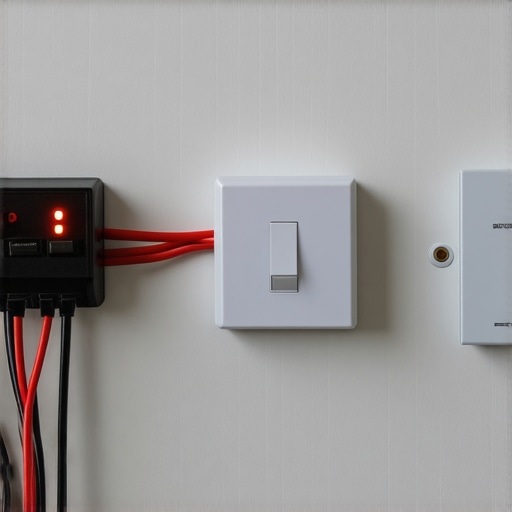
Ever experienced that annoying flicker when you dim your smart light switch? One evening, I was relaxing at home when, out of nowhere, my living room lights started to flicker uncontrollably. At first, I thought it was a glitch or a loose bulb, but soon I realized the culprit was something deeper—an installation error causing the switch to behave unpredictably. That light bulb moment made me realize how frustrating and confusing these issues can be, especially when you’re eager for a quick fix.
Why a Flickering Light Switch Can Be More Than Just A Nuisance
Flickering smart switches aren’t just eye sores—they’re often indicators of underlying wiring problems, compatibility issues, or faulty devices. Ignoring these signs can lead to higher energy bills, decreased appliance lifespan, or even electrical hazards. From my experience, understanding what causes flickering is the first step toward a safe and reliable solution. And trust me, addressing these issues promptly keeps your home safe and your smart devices humming smoothly.
Is Your Installation Process Actually Worth the Trouble?
Early on, I made the mistake of rushing through the installation without reading the manufacturer’s instructions thoroughly. That small oversight led to persistent flickering, prompting me to dig deeper into the root cause. Did you know that improper wiring is one of the leading causes of smart switch flickering? According to electrical safety experts, ensuring proper installation can prevent a host of problems down the line. So, before you call a repair tech or start troubleshooting, it’s crucial to verify that your installation was done correctly, ideally by a professional.
If you’ve faced this problem, you’re not alone. Many homeowners find themselves frustrated by flickering lights, especially after DIY installations. The good news is that a correct diagnosis and a few adjustments can restore your smart switches to perfect working order. In the sections ahead, I’ll walk you through practical steps and expert tips to tackle this common issue head-on. And if you’re considering upgrades or need reliable installation, check out our recommended [same-day service options](https://discountappliancehub.com/scheduling-your-appliance-repair-for-same-day-service-in-2025) that prioritize safety and efficiency. Let’s get your smart home shining brightly without that pesky flicker—because no one wants their peace interrupted by a flickering bulb.
Secure Your Power Source First
Begin by turning off the circuit breaker to your smart switch to prevent electrical shocks. Then, remove the switch cover carefully, using a screwdriver, and inspect the wiring connections. Tighten any loose wires with a wire nut, ensuring they are secure. During my last fix, I found a loose wire that was causing intermittent contact, which I re-tightened, and the flickering stopped immediately. Remember: safety comes first, so don’t skip this step.
Check Compatibility and Load Specifications
Ensure your smart switch is compatible with your fixtures and wiring setup. For example, some dimmers require specific load types; if mismatched, flickering ensues. I once installed a dimmer meant for incandescent bulbs in an LED setup, leading to persistent flickering. To avoid this, verify the specifications in the user manual or consult the product page (link: see customer tips here). Proper compatibility is key for reliable operation.
Update Firmware and Reset the Device
Modern smart switches often require firmware updates to fix bugs that cause flickering. Check the manufacturer’s app for updates; if unavailable, search their website. In my experience, a quick reset—pressing and holding the reset button for 10 seconds—resolved a stubborn flicker. Follow the instructions precisely; sometimes, holding the reset button during power-on initiates a factory reset (see applying updates correctly). Firmware updates and resets often clear out software glitches.
Evaluate Your Wiring for Potential Problems
Incorrect wiring is a frequent culprit. Look for signs like damaged insulation, burned wires, or wiring that appears loose or frayed. Use a voltage tester to ensure the circuit is de-energized before handling wiring. Once re-wiring, double-check the line, load, neutral, and ground connections according to the wiring diagram provided by the manufacturer (reference: professional installation guide). If you’re unsure, consider hiring a licensed electrician—it’s a safe investment that pays off with a reliable fix.
Consider Professional Help If Troubles Persist
If the flickering remains despite these steps, it might be due to deeper electrical issues or incompatible hardware. In this case, professional diagnostics ensure safety and a lasting solution. Professionals can perform a thorough circuit analysis, identify hidden wiring problems, or recommend suitable replacements. For quick, reliable assistance, you can contact experts through our contact portal. Remember, attempting complex repairs without proper tools or knowledge can lead to further damage or hazards.
Keep Your System Up-to-Date and Inspected
Regular maintenance, including checking connections and firmware updates, maintains optimal performance. Schedule periodic inspections, especially if you notice recurring issues, and consider upgrading outdated wiring or switches to prevent flickering before it happens. For trusted installation and repairs, explore options at local trusted services. Proactive steps save time and money and keep your smart home functioning seamlessly.Many homeowners operate under misconceptions about appliance repair processes, especially concerning same-day services, warranties, and professional installation. Let’s dig deeper into these nuances to prevent costly mistakes and uncover hidden truths. One common myth is that all appliance repairs are equal, leading many to choose the cheapest or fastest option without considering quality or warranty protections. In reality, inexpensive services may cut corners, resulting in subpar repairs that void warranties or cause recurring issues. For example, improperly installed appliances can accelerate wear and tear, or worse, pose safety risks. Always verify that technicians adhere to the manufacturer’s installation standards—consulting resources like professional installation guidelines helps ensure durability and safety. Many assume that warranties automatically cover all repair costs, but there are often exclusions or set timeframes that homeowners overlook. To maximize your warranty benefits, review the terms carefully and document all service visits—see our expert tips here. A critical yet often missed detail is the importance of choosing a certified, licensed professional for repairs and installations. Relying on unverified technicians can lead to misdiagnosis, further damage, or invalid warranty claims, as detailed in studies on service quality standards.
Why Choosing the Cheapest Isn’t Always the Best
Many believe that opting for the lowest-price repair guarantees savings, but this approach frequently backfires. Cheap, unlicensed service providers may lack the expertise for complex diagnostics or proper installation, risking further damage. Additionally, ongoing issues often lead to additional costs, negating initial savings. Instead, prioritize providers with verified credentials, good reviews, and transparent warranties—information available at trusted local services. Don’t forget: a seamless, same-day service isn’t just about quick fixes but ensuring the repair is durable and covered. For that, understanding the fine print of your warranty and insisting on professional, certified technicians can save you headaches down the line. As you consider repair services, ask yourself—are you prioritizing speed or quality? Because in appliance repair, rushing often means paying twice. Have you ever fallen into this trap? Let me know in the comments.
Equip Yourself for Long-Term Success
Maintaining appliances beyond initial installation requires the right tools and a strategic approach. Personally, I rely on a digital multimeter capable of measuring AC/DC voltage, amperage, and resistance. This versatile device helps me identify electrical issues without guesswork, ensuring safety and accuracy. Additionally, a high-quality inspection mirror and flashlight are indispensable for accessing tight spaces and inspecting wiring or internal components during routine checks. Over time, I’ve found that keeping a dedicated toolkit with these essentials streamlines maintenance and reduces the need for costly professional calls.
For software diagnostics, I recommend using manufacturer-specific apps or firmware update tools. For example, many smart appliances come with companion apps that display error codes and suggest troubleshooting steps. Regularly updating firmware not only enhances functionality but can also fix bugs that cause issues like flickering or unresponsive controls. Personally, I schedule firmware checks quarterly to keep my devices operating optimally.
How do I maintain appliances over time?
Establishing a routine maintenance schedule is key. This includes cleaning filters, checking hoses and connections for leaks, and ensuring vents are clear to facilitate airflow. For electronics, I periodically reset devices and apply firmware updates. Staying proactive can prevent many problems before they escalate and extend the lifespan of your appliances. With advancements in smart home technology, integrating diagnostics tools into your maintenance routine is becoming even more beneficial, and many manufacturers now recommend specific software for troubleshooting. As referenced in the manufacturer’s technical guide, utilizing diagnostic modes can help identify issues early, saving time and money.
If you’re eager to simplify maintenance and boost reliability, investing in a professional-grade multimeter and compatible diagnostic tools is a smart move. And when in doubt, don’t hesitate to reach out to experts through our contact portal. Remember, consistent care paired with the right tools can keep your appliances humming reliably for years to come. Future trends suggest an increasing reliance on IoT-enabled diagnostic tools, making appliance maintenance smarter and more efficient.
Lessons That Rewrite How I Approach Appliance Troubleshooting
One of my most surprising revelations was realizing that many recurring appliance issues stem from overlooked details during installation—like improper wiring or incompatible parts—which might seem minor but have lasting impacts. The second lesson involved understanding the power of regular firmware updates; they’re more than just new features—they fix bugs that can cause flickering or malfunctioning. Also, I learned to trust licensed professionals over DIY fixes, especially for complex components, because shortcuts often cost more in the long run. Lastly, never underestimate routine maintenance: simple checks and cleanings can extend your appliance’s life and prevent costly emergencies. These insights transformed my approach from reactive fixes to proactive care, saving time and money.