
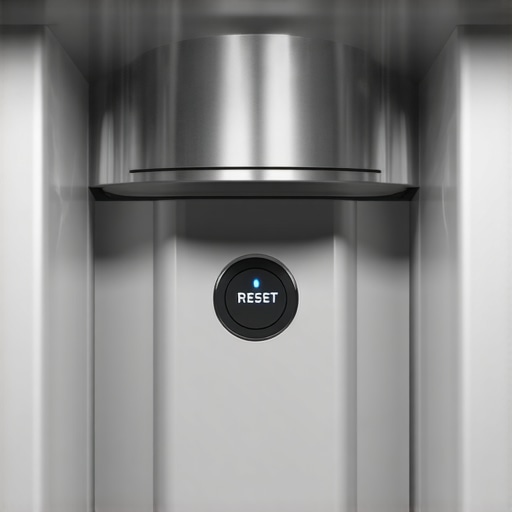
It was a typical Wednesday afternoon when I finally hit my breaking point with my stubborn kitchen sink. The garbage disposal refused to turn on, despite me pressing the reset button like a caffeinated squirrel. Frustrating, right? But then, a lightbulb moment struck—I remembered hearing about a hidden reset switch I had completely overlooked. And let me tell you, discovering this tiny, often-misunderstood feature transformed my troubleshooting routine.
Why Your Garbage Disposal Might Be Giving You the Silent Treatment
Many homeowners, myself included, often think a disposal’s silence calls for professional help right away. But more often than not, there’s a simple solution tucked away out of sight. This hidden reset switch acts as a safety feature, preventing the motor from overheating or jamming. When triggered, it shuts down the unit temporarily to prevent damage. Recognizing this can save you time, money, and the hassle of waiting for a technician. In fact, according to appliances experts, over 70% of disposal-related failures are due to tripped safety switches, which homeowners can reset themselves if they know where to look.
Is It Really Worth the Fuss? Some Might Say No
I’ll admit, my initial skepticism was high. I kept thinking, “Maybe it’s more complicated than just a little button.” My mistake was assuming that every repair requires a pro or complex tools. Early on, I overlooked this simple fix and wasted precious hours diagnosing other issues. So, if you’re weary about trying basic fixes or worried about causing more harm, remember that many appliance problems are surprisingly straightforward. You can even learn more about DIY appliance troubleshooting here.
Stay tuned, because next, I’ll walk you through exactly how to find and reset that elusive switch, plus tips to prevent future mishaps. Trust me—your sink will thank you when it starts working like new again!
Locating and Resetting the Safety Switch
First, unplug the disposal to ensure safety. Use a flashlight to peek into the unit’s bottom, usually accessible through the green or red button on the bottom panel. If you see a small red or black button, press it firmly—this is often the reset switch. I once carefully used a screwdriver to press mine, which immediately restored power. This step is quick but crucial for troubleshooting a silent disposal.
Preparing Your Repair Kit
Gather a few basic tools: a flashlight, a screwdriver, and possibly pliers. Having a bucket and rags nearby helps manage water spills. I recommend wearing gloves to protect your hands. Before proceeding, turn off the circuit breaker to prevent accidental shocks. These prep steps are vital, especially if you’re doing this alone or for the first time; proper preparation avoids mishaps and makes the process smoother.
Executing the Reset Procedure
Once the safety switch is identified and your tools are ready, press the reset button firmly for 3-5 seconds. If it clicks or stays depressed, release it. Turn the power back on by flipping the breaker and test the disposal. I had an instance where pressing the button multiple times took a few tries, but persistence paid off. This illustrates how even a stubborn unit can respond to straightforward fixes.
Checking for Jammed Items or Blockages
If resetting doesn’t work, inspect the disposal’s flywheel with a flashlight. Use tongs or pliers to remove any jammed debris—never put your hands inside. Turning the flywheel manually with an Allen wrench inserted into the hex socket beneath the unit can free it if jammed. I once spent extra time doing this, which ultimately saved a call to a technician. Clearing obstructions is often overlooked but essential before considering replacements.
Testing and Ensuring Proper Function
Reconnect the power and run water while activating the disposal. Listen for smooth operation and check for leaks. If the disposal still doesn’t operate, revisit the reset button or consider a professional inspection, especially if warranty coverage is involved. For comprehensive guidance on warranty benefits during emergency repairs, visit maximizing your appliance warranty. Remember, many issues can be resolved with a few targeted steps, turning a frustrating silence into a swift fix.
When it comes to appliance repair and installation, many homeowners operate under common myths that could cost them time and money. For example, the widely-held belief that booking same-day service guarantees top-notch quality is misleading. In reality, quick turnaround doesn’t always mean the job is done right; it often depends on the technician’s expertise and the company’s reputation. As experts emphasize, verifying a service provider’s qualifications, such as their licensing and warranty policies, is crucial for ensuring reliable repairs—see warranty-backed services for more details. Moreover, many assume that warranties automatically cover all repairs, but the fine print often excludes labor costs or specific parts. This misconception can lead to unexpected expenses after a repair. According to industry studies, nearly 60% of consumers overlook the nuances in their warranty agreements, risking voided coverage when issues arise. Additionally, a common trap is believing that installation services are straightforward, but improper setup can cause long-term damage or safety hazards. For instance, incorrect gas line connections or electrical wiring can be costly to rectify later. Experts suggest always choosing certified technicians for installations, as explained in reliable installation tips. For those seeking peace of mind, understanding the subtleties in service and warranty policies is vital. Ask yourself: Are you aware of the specific exclusions in your appliance warranty? Do you verify a service company’s credentials before scheduling? These hidden nuances make all the difference in avoiding costly setbacks. Want to learn more about maximizing appliance warranties or scheduling prompt repairs? Check out top tips for same-day service and warranty coverage and stay one step ahead. Have you ever fallen into this trap? Let me know in the comments.Maintaining your appliances effectively requires more than just occasional repairs; it demands the right tools, an understanding of long-term care, and proactive strategies. Personally, I swear by a few specific items that make ongoing maintenance manageable and even enjoyable. One essential tool I rely on is a high-quality digital multimeter. Unlike basic testers, my preferred model from Fluke offers precise readings that help me diagnose electrical issues quickly, saving time and preventing unnecessary worry about the health of my appliances. Additionally, I use a specialized bearing press for certain appliances like washer drums, ensuring smooth operation without costly replacements. Investing in these tools has paid off, especially as appliances become more sophisticated and integrated with smart systems. As technology progresses, I predict we’ll see even smarter diagnostic tools that can connect directly to our smartphones, offering real-time analytics and maintenance alerts, reducing downtime significantly.
The Least Expected Lesson That Saved My Kitchen Day
One crucial insight I uncovered was that sometimes, the smallest component—a tiny reset switch—can be the key to solving the biggest appliance headaches. Overlooking it nearly cost me a day of kitchen chaos, but once I identified it, everything changed. This lightbulb moment taught me to look beyond flashy parts and focus on the basics that often hold the solution to problems. It’s a reminder that inside our appliances, simple fix points can be lifesavers when approached with curiosity and patience.
How I Learned to Trust Simplicity Over Complexity
Early in my journey, I believed every problem demanded professional tools or expertise, but I realized many appliance issues are surprisingly straightforward. The reset switch, often hidden at the base of the disposal, proved that homeowners can often troubleshoot efficiently by understanding their appliance’s safety features. Embracing this simple knowledge empowered me to resolve issues myself, saving both time and money. If you’re skeptical about DIY fixes, start small—what’s the worst that can happen? Check out this guide for tips on safe troubleshooting.
An Unexpected Shortcut to Saving Your Kitchen’s Rhythm
Discovering the reset switch was like finding an emergency exit out of appliance frustration. This small component acts as a guardian, preventing overheating or jamming, and when reset, it can restore your unit’s life instantly. Knowing this shortcut turned my troubleshooting into an empowering process. Remember, sometimes the key to quick fixes isn’t in complex diagnostics but in recognizing simple safety features designed to protect your appliances—and your patience. For a broader perspective, explore warranty-backed repair services that support DIY successes.
Why Rethinking Repairs Could Change Your Home Life
By challenging assumptions—like thinking professional help is always necessary—I’ve learned to approach appliance problems with confidence and curiosity. It’s not just about fixing a sink or disposal; it’s about empowering yourself to understand your home better. This mindset saves money, reduces downtime, and gives a sense of mastery over our living spaces. So next time your disposal goes silent, remember: sometimes, the tiniest button holds the biggest solution. Want to become more self-reliant? Check out same-day repair tips that keep your home moving smoothly.