
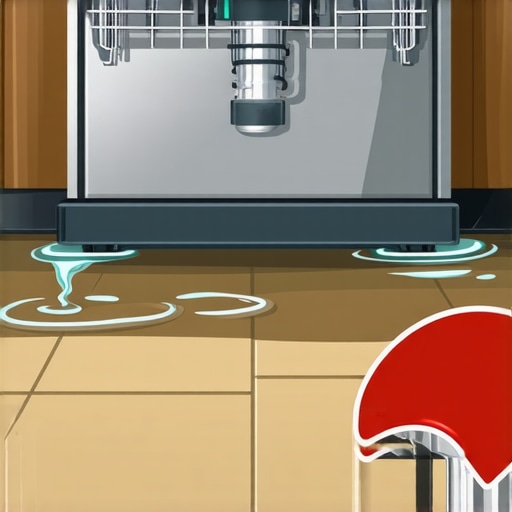
I remember the exact moment I discovered water pooling under my dishwasher—standing there mid-clean cycle, frustration bubbling over as I realized I was about to face another costly plumber visit. That lightbulb moment made me dig deep into understanding what really causes this messy inconvenience, and let me tell you—it’s often simpler than you think. If you’ve ever had the unpleasant surprise of finding a small lake forming beneath your appliance, you’re not alone. Many homeowners shrug it off as a minor leak, only to discover it becomes a recurring headache.
The Real Culprit Behind Water Pooling under Your Dishwasher
It’s tempting to assume a leak means a broken hose or a faulty seal, but the root cause often lies elsewhere. What I’ve learned through personal experience and from seasoned appliance experts is that a clogged or malfunctioning drain hose or air gap is usually behind persistent water issues. These components can get clogged with food debris or mineral buildup, obstructing proper drainage. When this happens, water that should be expelled during the rinse cycle instead pools at the bottom, threatening to spill over.
Security and reliability of your dishwasher depend heavily on these simple but crucial parts functioning correctly. Ignoring minor drainage problems can escalate into significant damage, including mold growth and water damage to your kitchen floor. That’s why understanding and addressing this main cause is vital for maintaining your appliance’s health and your peace of mind.
Have you noticed your dishwasher leaking more than usual or standing water at the bottom after cycles? If so, you’re likely facing this hidden yet common problem.
For a quick deep dive into how to handle appliance issues properly and ensure your warranties are protected, check out how to maximize your appliance warranty during emergency repairs. Now, let’s move past the symptoms and into the practical steps to diagnose and fix this pesky problem—saving you money and headaches down the line.
Inspect the Drain Hose for Blockages
Next time I faced this issue, I started by unplugging the dishwasher and pulling it out carefully. I found the drain hose, which looks like a flexible tube at the back, was clogged with mineral deposits. To clean it, I detached the hose with a pair of pliers and flushed it with hot water. If you see debris or mineral buildup, clean thoroughly or replace the hose if damaged. Regular inspections here prevent future leaks and keep drainage smooth.
Check the Air Gap Assembly
The air gap, usually a small cylinder near the sink, prevents backflow. I removed the cap and cleaned out any food particles that might be blocking airflow. Sometimes, a simple rinse with vinegar clears stubborn clogs. This step can prevent water from backing up into the dishwasher, avoiding pooling issues.
Test the Drain Pump Functionality
I then listened for the drain pump, which sounds like a humming during drainage. If it’s silent or making strange noises, it might be faulty. I tested the pump by activating the drain cycle with the dishwasher open, using a multimeter to check for power. Replacing a malfunctioning pump is straightforward but crucial to prevent water from draining properly.
Examine the Door Seal and Gaskets
In my experience, sometimes water leaks due to worn-out door seals. I examined the gaskets around the door for cracks or residue. Cleaning with warm soapy water or replacing damaged seals keeps water from escaping or pooling underneath. This simple check often resolves minor leak issues caused by poor sealing.
Ensure Proper Leveling and Installation
Lastly, I confirmed the dishwasher was perfectly level. An uneven unit can cause water to pool at the bottom. Using a carpenter’s level on the door, I adjusted the feet until the unit sat flat. Proper installation also involves securing all connections firmly to prevent leaks during operation. For detailed installation tips, refer to this comprehensive guide. Proper setup is critical to avoid recurring water issues and to preserve your warranty coverage.Many homeowners assume that choosing same-day service or warranty coverage means they can simply sit back and relax, trusting that everything will be handled effortlessly. However, in my experience, there are nuanced pitfalls and misconceptions that often trip up even the most vigilant consumers. Let’s dig deeper into these common myths and reveal the advanced mistakes people often overlook.
Why Quick Fixes Sometimes Come at a Cost
Everyone touts the importance of fast repairs, but the reality is that haste can compromise quality. Many service providers rush through diagnostics to meet same-day promises, which can lead to overlooked issues. For example, a technician might replace a visible faulty part without investigating underlying causes like improper installation or hidden systemic failures. This shortcut risks recurring problems, ultimately costing you more in repairs down the line. To avoid this trap, always verify that your technician adheres to thorough diagnostic protocols—something you can confirm by checking this expert guide.
The Hidden Nuance of Warranties That Most Miss
Many believe that warranties cover all kinds of damages and repairs—think again. The fine print often excludes routine maintenance, cosmetic damages, or issues caused by improper usage. A common mistake is assuming that a warranty will cover wear and tear or accidental damage, which usually isn’t the case. Furthermore, third-party warranties or extended plans sometimes have limited labor coverage, leading to unexpected out-of-pocket expenses. For a clear understanding, review this comprehensive overview.
Advanced Mistake: Overlooking Installation’s Role in Longevity
One of the most overlooked aspects is the importance of proper installation. Even minor deviations—such as improper leveling, inadequate ventilation, or incorrect electrical wiring—can significantly shorten an appliance’s lifespan and void warranties. Many assume that professional installation is a one-and-done process, but the nuances like verifying levelness or correct connections matter immensely. Skipping these steps can lead to costly damage or failures, despite having a valid warranty. For top tips on installation, see this recommended guide.
Furthermore, beware of the ‘quick fix’ mentality that tries to patch issues temporarily without addressing root causes. An advanced mistake is relying solely on superficial repairs, which often leads to recurring problems. For example, replacing a leaking hose without inspecting the source or underlying pressure issues can provide only a temporary solution.
Have you ever fallen into this trap? Let me know in the comments. By understanding these nuances and common pitfalls—especially the less obvious ones—you can make more informed decisions about same-day service, warranty usage, and installation practices, ultimately saving time and money.Maintaining your appliances efficiently over the long term requires the right tools and a proactive approach. One essential item I rely on is a high-quality digital multimeter, like the Fluke 115. I use it for quick diagnostics—checking power supply, testing switches, or verifying continuity—saving time and avoiding unnecessary repairs. Investing in a digital thermometer also helps me monitor the temperature of appliances such as ovens or refrigerators, ensuring they’re operating within optimal ranges and preventing future breakdowns. For software, I depend on diagnostic apps compatible with smart appliances, allowing me to run remote checks and identify issues before they escalate.
Regular maintenance schedules are crucial. I set reminders to clean filters, inspect door seals, and clear vents, which can be easily tracked using a maintenance calendar app tailored for home appliances. Additionally, keeping a detailed repair log—whether in a physical notebook or digital document—helps me track recurring issues and prepare better for professional services.
As appliances become smarter, integration with home management systems like Samsung SmartThings or Google Home enables me to receive alerts about irregular performance or pending maintenance needs directly on my phone, facilitating early intervention.
Prediction-wise, I see this trend of smart diagnostics accelerating, making proactive maintenance more accessible. Future tools might even predict failures before symptoms appear, thanks to AI-driven analytics embedded in appliance firmware. To prepare for this shift, I recommend staying updated with the latest diagnostic tools and software updates from your appliance manufacturer.
How do I maintain appliances over time?”
It’s vital to schedule regular inspections and use specialized tools like a multimeter or smart diagnostic apps to identify issues early. Also, implementing a systematic cleaning routine and keeping detailed records can prevent minor problems from becoming costly repairs. For comprehensive guidance, check out this expert guide.
To get started, I recommend trying a simple but effective hack: use your multimeter to verify that your outlets are providing correct voltage, especially if you notice inconsistent appliance performance. This can catch electrical issues before they cause part failures or damage.
By integrating specialized tools into your maintenance routine, you extend the life of your appliances, maximize warranty benefits, and reduce unexpected repair costs. Regular checks using key diagnostic equipment are your best defense against appliance downtime—give it a try today to see the difference it makes.
Throughout my journey troubleshooting appliances, I uncovered insights that transformed my approach from reactive to proactive. One of the most valuable lessons was realizing that the real power lies in understanding the nuances—like the significance of proper installation or how to interpret warranty fine print—which often aren’t covered in generic guides. Recognizing these subtle factors meant I could prevent recurring issues and make smarter choices, saving time and money long-term.
Side Steps That Made a Big Difference in My Repairs
– I learned that verifying the accuracy of the initial diagnosis is crucial; rushing through assessments often leads to overlooked problems and repeated visits. – Using diagnostic tools such as a multimeter not only speeds up troubleshooting but also provides peace of mind, ensuring that repairs address the root cause rather than surface symptoms. – Paying attention to minor details like leveling the appliance can prevent leaks and uneven wear, extending the life of the unit. – Knowing the warranty conditions intimately helped me avoid common pitfalls, such as voiding coverage through improper installation or neglecting routine maintenance tasks. – Engaging with trusted resources like this expert guide provided me with tips that are often overlooked by quick-service providers.
Tools and Resources That Changed My Game
– A high-quality digital multimeter, like the Fluke 115, became my go-to for quick electrical troubleshooting, saving time on guesswork. – Diagnostic apps compatible with smart appliances help identify issues remotely, letting me plan repairs before technician visits. – Maintenance scheduling apps keep regular tune-ups on track, preventing small problems from escalating into costly failures. – Reading comprehensive guides on installation, such as this resource, taught me the importance of proper setup—something many ignore until it’s too late. These tools empower homeowners to take charge of their appliance health confidently.
Embrace Your Power to Keep Appliances Running Smoothly
– The evolution of smart diagnostics hints at a future where proactive maintenance is standard, but the current key is knowledge—being aware of subtle signals and best practices. – Regularly check and maintain components, and don’t hesitate to reach out for professional help when needed, armed with a clear understanding of what to expect. – Remember, the difference between a simple fix and a costly overhaul often hinges on early detection and proper installation. Taking action now ensures your appliances serve reliably for years to come. Are you ready to implement these insights and reclaim control over your appliance maintenance journey? Let me know below.