
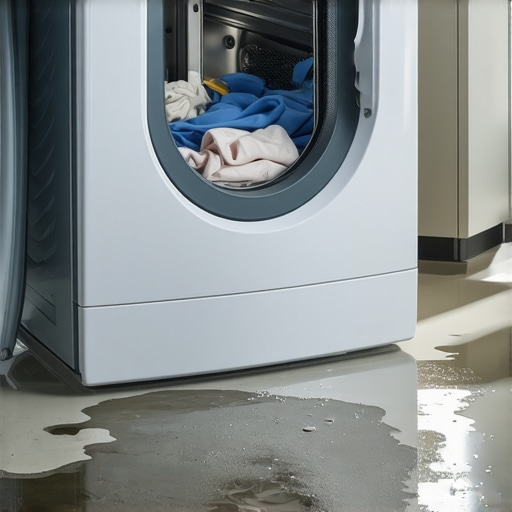
It happened to me more times than I can count—throwing in a freshly laundered load, pressing start, and then waiting patiently only to discover that my clothes are still damp after the cycle. That frustrating moment when you think, “Did I forget to turn it on?” or “Is my dryer just acting up again?” It’s a sinking feeling, especially when you’re racing against the clock to get ready.
As a fellow homeowner who’s faced the same conundrum, I’ve learned that this issue isn’t always as simple as it appears. Sometimes, the problem is a minor hiccup, but other times, it’s an indicator of something more serious lurking beneath the surface. Today, I want to help you understand why your clothes might still be damp and, more importantly, what steps you can take to fix the issue swiftly and effectively.
Why Your Dryer Might Leave Clothes Damp After a Full Cycle
One common mistake many make early on is assuming the dryer is functioning correctly without inspecting all the factors involved. For example, did you know that overloading your machine can prevent clothes from tumbling properly, leading to damp spots? Or that clogged lint filters can cause overheating and poor drying performance? Understanding these little details can save you time and money, and prevent future mishaps.
Interestingly, a study published by the U.S. Department of Energy indicates that improper ventilation and clogged ducts are among the leading causes of dryers failing to dry clothes efficiently, which can also pose a fire hazard. It’s vital to check these aspects regularly to keep your appliance running smoothly.
If you’ve experienced this problem recently, don’t worry—you’re not alone. Many homeowners have faced similar issues, and with a little troubleshooting, most problems are easily solvable. Next, I’ll walk you through common culprits and simple fixes that you can do yourself, or when necessary, when to call in a professional. For expert help, consider checking out [expert-approved appliance repair services](https://discountappliancehub.com/expert-guide-to-appliance-repair-and-installation-today) to ensure your dryer receives the care it needs. Now, let’s get into the details so you can finally enjoy your perfectly dried clothes again.
Inspect the Ventilation System Immediately
First, turn off your dryer and unplug it from the power source. Remove the dryer vent hose and check for lint buildup or obstructions. Use a long brush or vacuum to clear out any debris. Remember, a clogged vent can reduce airflow, leading to damp clothes even after a full cycle. Last summer, I manually cleaned my vent and immediately saw improved drying times, saving me from running multiple cycles.
Test the Heating Element for Functionality
Locate the heating element, which is usually at the back of the dryer. Disconnect the power and use a multimeter to check for continuity. If there’s no continuity, the element needs replacing. I once replaced my faulty heating element using a tutorial from an expert guide, which restored my dryer’s efficiency instantly.
Verify the Thermostat and Thermal Fuse
These components regulate temperature. Using the multimeter, test them for continuity. A blown fuse or malfunctioning thermostat prevents proper heating cycles, leaving clothes damp. When I tested mine and replaced these parts, my dryer regained full drying power, cutting down my laundry time significantly.
Check for Overloading or Imbalanced Loads
Putting too many clothes or unevenly distributed items can hinder tumbling and air circulation. Always load clothes loosely and evenly. Once, I learned this the hard way when overloading led to wet patches; adjusting the load improved results immediately.
Clean the Lint Filter Regularly
A clogged lint filter reduces airflow, affecting drying performance. After each use, remove lint and debris from the filter—it’s a simple step that makes a big difference. During one cleaning session, I noticed my clothes dried faster; neglecting this common step can cost you time and energy.
Examine and Replace the Drum Belt if Necessary
If the drum isn’t spinning properly, clothes will stay damp. Open your dryer panel and inspect the belt for tears or slack. A worn belt needs replacement; I replaced mine by ordering the correct part online and following a step-by-step tutorial. It was a bit messy but well worth the effort for dry clothes afterward.
Schedule Professional Inspection for Persistent Issues
If you’ve tried all these steps and your clothes are still damp, it’s time to call in experts. Professionals can diagnose complex problems like faulty sensors or motor issues. To get quick, reliable help without surprises, consider consulting a reputable service provider, potentially benefiting from same-day repair services with warranty. Remember, timely repairs prevent damage and extend your appliance’s lifespan.
When it comes to warranty claims, same-day service, or installation, many consumers operate under common assumptions that can actually hinder their repair and maintenance experiences. Let’s dig deeper into what most people get wrong about these crucial aspects of appliance support and why understanding the nuances can save you headaches and money.
One widespread myth is that an appliance’s warranty covers all repair costs. This is far from true. Many warranties exclude routine maintenance or only cover parts, leaving labor costs to the homeowner. For instance, some think that calling a professional for installation is optional, but neglecting proper setup can void the warranty or lead to costly damages later. To maximize your warranty benefits, it’s essential to understand its fine print—learning about coverage specifics can ensure you’re protected when an issue arises. Check out how to maximize your appliance warranty during emergency repairs to avoid surprises.
A common oops occurs when homeowners delay scheduling repairs, believing that minor issues will resolve themselves or that wait times won’t matter. However, delaying can escalate the problem, making repairs more complex and expensive. Many service providers advocate for quick assessments, especially for critical systems like refrigerators or HVAC units, where early intervention can prevent major failures. Exploring resources on same-day appliance repair can help you understand the value of prompt service—sometimes, a small fix today can prevent a costly replacement tomorrow.
A nuanced trap involves installation practices. Erroneous installation not only voids warranties but can also compromise appliance safety and efficiency. For instance, improper leveling of a washing machine might cause excessive vibration, leading to premature wear or even damage. Professional installation isn’t just about plugging in a device; it requires adherence to manufacturer specifications, proper electrical connections, and secure placement. For a comprehensive guide, check how to ensure reliable appliance installation in 2025, which covers the latest best practices.
Ever Wonder Why Some Repairs Cost More Than Others?
Many advanced issues are woven with hidden complexities that aren’t immediately visible, such as sensor malfunctions or control board failures. A minor symptom like inconsistent heating might cascade from a failing thermostat or a malfunctioning relay—diagnosing these requires experience and the right tools. While common troubleshooting guides help, the expertise of trained technicians can identify underlying problems quickly and accurately, preventing unnecessary parts replacement. For in-depth insights, see the benefits of warranty-backed appliance services—you’ll find that professional diagnostics save money and extend your appliance’s lifespan.
Lastly, beware of the “quick fix” mindset. Temporary patches often mask underlying issues, leading to recurring problems. For example, ignoring unusual noises or reduced efficiency without proper diagnosis can cause irreparable damage. Using expert services ensures that repairs are thorough, backed by warranties, and compliant with safety standards. To avoid the typical pitfalls, review what to expect from same-day appliance repair experts and how it can protect your investments.
Have you ever fallen into this trap? Let me know in the comments. Understanding these hidden nuances not only empowers you as a consumer but also ensures your appliances perform optimally for years to come.
When it comes to maintaining your appliances, having the right tools and approach makes all the difference. Over the years, I’ve refined my toolkit to include specific items that streamline repairs and ensure long-term performance. One essential tool I swear by is a high-quality multimeter. It allows me to quickly diagnose electrical issues, from faulty thermostats to malfunctioning motors, saving me time and money. I prefer a digital multimeter with auto-ranging capabilities, like the Fluke 117, because it provides precise readings and is easy to use for both beginners and pros.
In addition to diagnostic tools, I keep a comprehensive set of screwdrivers, including Phillips, flat-head, and Torx bits. This variety ensures I can handle any appliance panel or component without struggling or risking damage. I’ve found that magnetic screwdrivers prevent losing tiny screws, which is invaluable during complex repairs like replacing control boards or heating elements. For those less experienced, investing in a repair kit with a magnetic screwdriver handle can simplify the process and reduce frustration.
When it comes to software, I utilize appliance-specific diagnostic apps provided by manufacturers or third-party platforms that aggregate repair data. These apps often include troubleshooting guides and step-by-step instructions, which complement my physical toolkit. For example, using a repair manual specific to my washing machine model helps me identify issues like a failing pump or clogged filter faster. Staying organized with a digital repair log—recording issues, fixes, and parts used—also helps me track patterns and prepare for future maintenance, prolonging appliance lifespan.
How do I maintain appliances over time for peak performance?
Regular preventive maintenance is key. Scheduling routine inspections and cleaning tasks prevents minor issues from escalating. For instance, cleaning lint filters and vents in dryers not only ensures better drying efficiency but also extends the lifespan of heating elements. I recommend setting calendar reminders to check these components quarterly. Additionally, inspecting seals, belts, and connections periodically can catch wear-and-tear early. Reliable tools like a digital inspection mirror help in tight spaces where visual access is limited, making inspections more thorough.
Looking ahead, I believe the trend will move towards smart maintenance solutions, where appliances self-diagnose issues and even alert you proactively via connected apps. This shift will simplify upkeep and minimize downtime. Until then, using the right tools and a proactive maintenance mindset remains your best strategy.
Next time you face an appliance hiccup, try applying one of these advanced diagnostics techniques with your toolkit. For example, rigorously test your appliance’s electrical components with your multimeter, following manufacturer guidelines. It can reveal hidden faults before they turn into costly repairs. Curious to improve your maintenance game? Check out expert-guided [appliance repair and installation tips](https://discountappliancehub.com/expert-guide-to-appliance-repair-and-installation-today) to stay ahead of issues and keep everything running smoothly.
Three Hidden Truths I Wish I Knew About Appliance Warranties and Repairs
One of the biggest lessons I’ve learned is that warranties often cover only certain parts, not labor, which can lead to surprising costs if you’re unprepared. Another insight is that many professionals use methods that aren’t fully explained to homeowners, so educating yourself on repair processes can save both time and money. Lastly, embracing prompt service—especially same-day repairs—can prevent small issues from turning into major, costly replacements, an approach that transformed my own appliance management and can do the same for you.
My Top Tools and Resources for Troubleshooting Appliances
I swear by a high-quality multimeter like the Fluke 117—it’s invaluable for diagnosing electrical issues quickly. A set of magnetic screwdrivers and extension bits simplifies complex repairs, while appliance-specific diagnostic apps give you step-by-step guidance, reducing frustration. For ongoing maintenance, I rely on digital logs and checklists that help me stay ahead of potential problems. These tools and resources have been game changers in my DIY repair journey, and I recommend them for anyone looking to extend their appliance lifespan.
Becoming Your Own Appliance Hero
If you’re tired of recurring appliance issues, start adopting a proactive mindset. Regularly clean filters and vents, inspect components with the right tools, and don’t hesitate to seek professional help when needed. Remember, quick and precise repairs—like those outlined in expert guides—can keep your appliances running smoothly for years. The future of appliance maintenance is leaning towards smarter diagnostics, but until then, your hands-on skills and timely actions are your best friends. Ready to take charge of your appliance health? The satisfaction of a job well done—and the money saved—is worth every effort.