
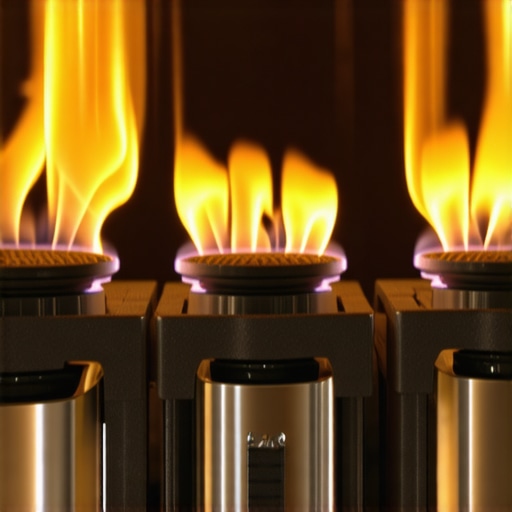
There was this one evening when I was trying to cook dinner, and suddenly, I noticed my gas stove’s flame was a weak, dull yellow instead of the bright blue I recall from the day I bought it. Frustrated, I fiddled with the knobs, hoping it was just a minor adjustment. But the flame stayed stubbornly weak, and I started to wonder: could this small issue be hiding a bigger problem? That moment made me realize how easy it is to overlook the significance of a healthy flame, and I knew I had to dig deeper.
Why a Yellow Flame Isn’t Just Aesthetic—It’s a Sign of Trouble
To most folks, a yellow flame might seem innocuous, but from experience, I learned it indicates incomplete combustion, which can lead to safety hazards and inefficient cooking. A proper, healthy flame should be a clear, blue cone, signaling that your stove’s gas-to-air mixture is in balance. When it turns yellow, it’s often a sign that something’s blocking or dirty, affecting your appliance’s performance and even your household safety. Like I did, many people assume it’s just a minor issue that can wait, but ignoring it could result in carbon monoxide buildup or faster appliance deterioration. Today, I want to share how I finally pinpointed the cause and fixed it—so you don’t have to go through the same frustration.
Skeptical About DIY Fixes? You’re Not Alone
I admit, when I first noticed the problem, I thought, “Is this really something I can fix myself?” Early on, I made the common mistake of only cleaning the burner surface without addressing the underlying issue—clogged or dirty gas outlets. That mistake delayed my solution and could have been dangerous. Trust me, it’s more common than you think, but with a bit of guidance, you can troubleshoot effectively. If you’re worried about safety or unsure where to start, reaching out to professionals like those at expert repair guides can help ensure you get it right the first time. Now, let’s uncover what causes that stubborn yellow flame and how you can restore your stove to optimal health.
Start with Basic Cleaning and Inspection
When I first noticed my stove’s dull yellow flame, I decided to remove the burner caps and clean them thoroughly with warm soapy water. I used a toothpick to clear out any debris blocking the tiny holes where gas flows. Remember, debris like pasta or soap residue can cause uneven gas flow, leading to a yellow flame. After cleaning, I inspected the burner head for rust or corrosion, which can also obstruct gas. Ensuring the holes are clear allows proper mixing of gas and air, restoring a healthy blue flame. If your cleaning doesn’t fix the issue, move to the next step, but always prioritize safety during these inspections. You can learn more about troubleshooting common appliance issues at expert guide to appliance repair.
Check and Adjust the Gas Air Mix
Identify the Air Mixer or Venturi
Most gas stoves have an air mixer or venturi, a small adjustable component near the gas inlet. Using a screwdriver, you can slightly turn the air shutter to increase or decrease airflow. A proper adjustment will produce a sharp, blue flame. Remember, turning the air shutter is delicate; small tweaks can have a big impact. I once adjusted mine too far, causing sputtering, but a quick readjustment restored the flame. This step is akin to tuning a musical instrument—precision matters. If you’re unsure, consulting the stove’s manual or a professional can prevent damage or safety hazards.
Ensure Proper Ventilation and Gas Supply
Sometimes, external factors like poor ventilation or inconsistent gas pressure cause incomplete combustion. Confirm your gas supply is steady and that vents or filters are clean and unobstructed. I experienced this issue when my gas line was slightly clogged, reducing pressure and causing a yellow flame. Clearing the line or arranging a professional inspection can resolve these issues and ensure safety. For persistent problems, consider scheduling an expert visit. Quick action here can prevent carbon monoxide buildup and improve efficiency, which you can explore more at same-day appliance repair.
Replace or Reinstall Components if Necessary
If cleaning and adjustments don’t fix the flame, worn or damaged parts may be the culprit. Rubber gaskets or seals can degrade over time, affecting gas flow, so replacing them might be necessary. I’ve replaced burner valves and observed immediate improvement in the flame quality. Think of this process as upgrading parts to restore peak performance—like tuning up a car engine. Always turn off the gas supply before attempting replacements, and consider consulting a professional for complex repairs. Many repair services offer same-day service with warranty benefits, ensuring safety and peace of mind.
Verify Safety and Prevent Future Issues
Once you’ve restored the flame’s health, it’s wise to test for leaks using a soap-and-water solution around connections—bubbles indicate leaks. Additionally, regularly cleaning your burners and inspecting components can prevent recurrence. Remember, safety is paramount; if at any point you’re unsure, reach out at contact us for expert assistance. Proper maintenance and timely repairs keep your appliances running safely and efficiently, preserving their value. For a deeper understanding, you might find warranty-backed appliance services helpful for peace of mind.Many homeowners assume that choosing the lowest-cost repair service or blindly trusting a generic warranty will always save money and hassle. However, in my extensive experience, I’ve seen that this approach often leads to hidden costs, delayed fixes, and even safety risks. One common myth is that all warranties are created equal, but in reality, some providers exclude essential coverage or impose hefty deductibles, trapping consumers in ongoing expenses. For example, a study by Consumer Reports highlights that many extended warranties exclude routine maintenance, which is often the root cause of appliance failures.
A critical mistake people make is trusting third-party or third-rate technicians without verifying their credentials. Not all repairs are equal, and improperly performed fixes can void warranties or cause new issues. That’s why working with certified professionals through reputable companies is essential; they understand the nuances of original parts and manufacturer specifications, which I’ve seen make a significant difference in long-term appliance health.
Have you ever fallen into this trap? Let me know in the comments.
Another overlooked point is the importance of proper installation. Many assume that a professional installation guarantees flawless operation, but neglect to verify if the installer followed the latest standards or manufacturer guidelines. Improper installation can lead to early breakdowns, water leaks, or safety hazards, which may not be covered under warranty. For instance, incorrect gas line setups or misaligned water connections often cause issues that aren’t immediately obvious but surface months later.
Additionally, the hype around same-day service can be misleading. While quick response times are appealing, rushing repairs or appointments without adequate diagnostics may result in temporary fixes that relapse. Always ask detailed questions about the technician’s process—reliable services ensure thorough inspections and diagnostics before making repairs. Remember, a quick fix isn’t always a permanent one.
Don’t forget that warranties often exclude routine maintenance, so neglecting simple tasks like cleaning filters, regular inspections, or timely part replacements can void coverage when failures occur. Maximize your warranty benefits by understanding what’s covered, scheduling preventative maintenance, and choosing trusted providers—look for companies that offer warranty-backed services like those at reliable appliance support.
In the end, the key is awareness: knowing the nuances of warranties, installation, and repair quality can save you money and frustration. Stay informed and cautious—your appliances and safety depend on it. For more insights, visit this comprehensive repair guide to make smarter decisions in your home maintenance.
Keeping It Working: Tools and Tips for Long-Term Appliance Reliability
When it comes to maintaining your home appliances, having the right tools and a solid routine can make all the difference in ensuring long-term performance and safety. I’ve found that investing in quality equipment and adopting a systematic approach not only extends the lifespan of my appliances but also saves money by preventing costly repairs. One of my go-to tools is a digital multimeter; I use it to routinely check electrical connections and troubleshoot issues with appliances like refrigerators and ovens. For example, verifying the continuity and voltage levels helps me identify potential electrical faults early, avoiding complete breakdowns.
Another essential item is a set of precision screwdrivers, which I use for delicate adjustments and replacing worn-out parts such as door seals or thermostats. I personally prefer insulated screwdrivers because they add an extra layer of safety when working on energized units. Additionally, I utilize a specialized vacuum attachment for cleaning vents and internal components—keeping filters and drainage paths clear enhances efficiency and prevents overheating or leaks. Regular internal cleaning, combined with these tools, forms the backbone of effective maintenance routines.
Beyond manual tools, I’ve integrated software solutions into my maintenance process. For instance, keeping a digital log of repairs, dates of filter replacements, and calibration checks helps me track what’s been done and when. Many modern appliances offer compatibility with monitoring apps—reviewing diagnostic data remotely or scheduling maintenance alerts simplifies upkeep. As technology continues to evolve, the integration of smart diagnostics is predicted to become standard, enabling owners to address issues proactively rather than reactively.
How do I maintain appliances over time?
The secret to longevity involves a combination of scheduled inspections, prompt repairs, and leveraging reliable service experts. I recommend performing a monthly visual check for leaks, worn belts, or damaged wiring. Additionally, I schedule professional tune-ups annually—this often includes cleaning, calibration, and replacing consumables like filters or seals. When selecting a repair service, look for those offering warranty-backed services—they tend to provide more thorough and trustworthy support. Remember, using specialized tools correctly and adhering to maintenance schedules not only enhances appliance lifespan but also keeps safety at the forefront.
Looking ahead, the trend points toward greater automation in appliance maintenance. Smart sensors and IoT integrations will alert homeowners to potential issues before they escalate, making DIY repairs more accessible and less risky. Embracing these technological advances can dramatically improve your appliance care routine. Why not start by testing your appliance’s diagnostic capabilities with a simple multimeter check this weekend? It’s a quick, effective way to get familiar with your equipment and catch problems early before they become expensive repairs.
Lessons That Took Me By Surprise About Appliance Repair and Maintenance
- Don’t Assume A Dull Flame Is Nothing: I used to ignore the yellow flame, thinking it was just a superficial issue. Realizing it was a sign of incomplete combustion saved my household from potential dangers like carbon monoxide poisoning.
- Cleaning Is Just the Start: I learned that removing debris from burners is vital, but ensuring proper gas-air mix requires fine adjustments—sometimes, the smallest tweak makes the biggest difference.
- Professional Help Isn’t a Sign of Weakness: Trying to DIY every problem can sometimes lead to safety hazards. Knowing when to call an expert, especially for complex issues or component replacements, is a game-changer.
- Routine Maintenance is an Investment, Not a Cost: Regular inspections and cleanings extend appliance longevity and prevent unexpected breakdowns, saving money and stress in the long run.
Tools and Resources That Changed My Approach to Appliance Care
- Digital Multimeter: Essential for diagnosing electrical faults. I trust mine for quick, accurate checks before calling a repair service.
- Precision Screwdriver Set: Necessary for safe, delicate adjustments and replacements, especially for burner components.
- Expert Guides and Knowledge Bases: Websites like this repair guide have been invaluable for understanding my appliances better and avoiding unnecessary costs.
- Regular Maintenance Schedules: Keeping a log of inspections and cleanings ensures nothing falls through the cracks, boosting appliance health and safety.
Your Next Step Toward Peace of Mind in Appliance Care
Taking proactive steps and leveraging reliable resources empowers you to master your household appliances, ensuring efficiency and safety every day. Embrace the learning process; with patience and the right tools, you can prevent many issues before they arise. Remember, no problem is too small when it comes to safety and performance—your dedication now pays off with smoother operations and fewer surprises. Ready to get started? Dive into this comprehensive guide and see how much you can improve your appliance maintenance routine. What challenges have you faced with your stove or other appliances, and how did you overcome them? Share your story below!