
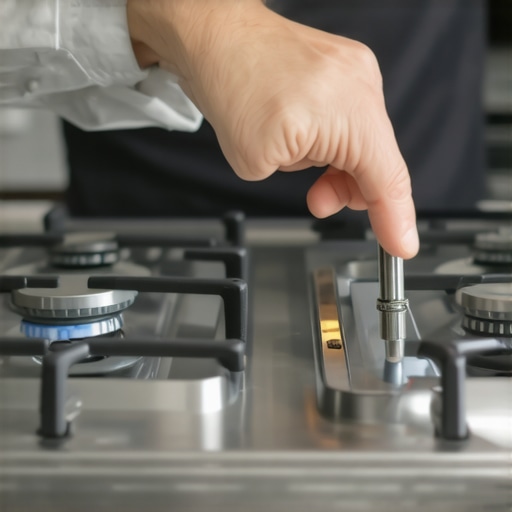
I remember the moment vividly. I was all set for a family dinner, eagerly baking that homemade lasagna, when I noticed my oven wasn’t baking evenly. Instead of a perfect golden crust, one side was overdone while the other was undercooked. Turns out, my gas range was slightly tilted, causing uneven heat distribution and risking potential safety hazards. That lightbulb moment made me realize how crucial proper leveling is—not just for culinary success but for safety too.
Why Properly Leveling Your Gas Range Matters More Than You Think
As someone who loves to cook and tackle DIY projects, I’ve learned that a level gas range is more than just about aesthetics; it’s about safety, efficiency, and outcomes. An uneven stove can lead to uneven cooking, which affects meal quality. More concerning, it can cause gas leaks or even fire hazards if your appliance isn’t stable. The good news is, leveling a gas range isn’t a complicated task—once you know the right steps. Today, I’ll walk you through exactly how to get your range perfectly balanced, ensuring your safety and culinary masterpieces.
Are You Wasting Time and Money on a Faulty Installation?
One mistake I made early on was assuming the installer would do it perfectly. Spoiler alert: they often don’t unless you specify! Proper leveling is something you can do yourself with a few simple tools. But here’s a crucial tip—skipping this step or doing it wrong could mean costly damages down the road, or worse, safety risks. Want to avoid repeated repairs and ensure your appliance functions as it should? Check out our guide on how to ensure reliable appliance installation to start on the right foot.
Now, let’s get into the practical steps to level your gas range. If you’ve ever faced uneven bakes or worried about safety, stick around. The process is easier than you think, and it’s worth every minute to get your kitchen safe and running smoothly.
Start with a Clear Workspace and Gather Tools
Before diving into the leveling process, clear the area around your gas range. Make sure the floor is free of obstructions and debris. Gather essential tools such as a bubble level, adjustable wrench, and possibly shims if your floor is uneven. I vividly remember the time I tried leveling mine without a proper level — the entire process took twice as long because I had to redo it after realizing my measurements were off. Using a quality bubble level ensures accuracy and saves time.
Check the Existing Level and Identify Imbalances
Place the bubble level on the stove’s top surface, ideally in the front-to-back and side-to-side directions. If the bubble isn’t centered, you know your range is tilted. During my first attempt, I ignored this step and only adjusted until it looked straight by eye, which led to uneven cooking for weeks. Always verify with a level for precise adjustments.
Adjust the Legs or Base of the Range
Most gas ranges have adjustable legs. Carefully locate the leveling feet beneath the stove. Use an adjustable wrench to turn the legs clockwise or counterclockwise to raise or lower each corner. When I did this, I slowly tightened the front-left leg, checked the level again, then adjusted the other corners, repeating the process until the bubble was perfectly centered. Be patient—small turns yield better control.
Use Shims for Persistent Unevenness
If leveling with the legs isn’t enough due to uneven flooring, shims can provide additional support. Place thin, sturdy shims under the legs to fine-tune the balance. I once used cardboard shims temporarily, but for a long-term fix, dedicated shim wedges are better. Ensuring the stove is stable reduces the risk of gas leaks and accidents.
Ensure the Range is Secure and Stable
Once leveled, double-check that all legs are tightened and that the stove doesn’t wobble. A wobbling appliance can cause gas fittings to loosen over time, creating safety hazards. During my own repair, I secured the legs more tightly, checked the stability by gently nudging, and then cleaned the area around the base from dust and residue to prevent slips later on.
Test for Safety and Functionality
After leveling, turn on your range and observe if the flame is steady and evenly distributed. Uneven flames can indicate improper positioning or residual imbalance. I did this after each adjustment, making small tweaks until the flames looked uniform and burning consistently. Remember, proper leveling isn’t just for even cooking — it’s essential for safety and longevity.
Schedule a Professional if Needed
If, after multiple attempts, your range still wobbles or your flames are uneven, it might be time to consult experts. Professionals can inspect the installation, check for gas leaks, or verify if your floor’s unevenness requires structural adjustments. You can find reliable local installers through resources like this guide to trustworthy installation. Moreover, proper installation and leveling are crucial to ensure your appliance functions optimally and safely in the long run.
Many homeowners believe that once an appliance is installed, their job is done—warranty takes over, and repairs are handled swiftly. However, this misconception can lead to costly mistakes. First, a common myth is that same-day service guarantees a quick fix; in reality, many providers promise quick appointments but face delays due to technician availability or parts shortages, especially during peak times. According to a recent industry survey, nearly 30% of emergency repairs are delayed because of underestimated scheduling complexities. It’s also a widespread belief that warranties cover all repair costs—yet, many warranties exclude accidental damage or routine maintenance, which are often the root causes of appliance failures. Neglecting to read the fine print can mean unexpected expenses; for example, some warranties require annual servicing or specific installation procedures to remain valid.
When it comes to installation, folks frequently overlook the importance of proper calibration and checkups afterward. For instance, improper leveling of a refrigerator can lead to coolant leaks or inefficient operation, which might void parts of the warranty. My own experience taught me that assuming a professional installer will handle everything flawlessly is risky—always verify the installation meets the manufacturer’s specifications. To ensure you are covered, consider reviewing comprehensive guides such as our expert guide to appliance installation.
Another nuance often missed is the significance of scheduling repairs promptly. Waiting too long can exacerbate issues or cause secondary damage, reducing the effectiveness of warranty repairs or making service more expensive. Additionally, many underestimate the importance of using authorized technicians; unlicensed repairs may void warranties or lead to improper fixes. As a rule of thumb, always request proof of certification and check reviews before scheduling service.
A critical insight is that prevention can save you money—regular maintenance can extend your appliance’s lifespan and ensure warranty terms stay intact. For example, cleaning filters and vents prevents overheating and component wear, which in turn avoids costly emergency repairs. If you’re uncertain about warranty terms or repair procedures, don’t hesitate to consult official resources. Our warranty-backed services are designed to cover such nuances.
Understanding these hidden details and challenging common myths allows you to make smarter decisions, saving time and money. Have you ever fallen into this trap? Let me know in the comments.
Essential Tools for Reliable Repairs
Investing in the right tools can dramatically improve your ability to maintain appliances over time. I personally rely on a high-quality digital multimeter from Fluke because it provides accurate voltage and continuity readings, which are crucial before attempting any repairs or troubleshooting. Having a digital infrared thermometer is also a game-changer; it allows me to check appliance temperatures and identify overheating components without dismantling the entire unit, saving time and preventing unnecessary parts replacement. For precise leveling of appliances like washing machines or dryers, I use a trusted magnetic bubble level attached directly to the surface, ensuring even weight distribution and optimal operation.
Software and Diagnostics That Make Life Easier
When it comes to modern appliances, having the right diagnostic tools can prevent costly service visits. I recommend apps like Appliance Helper, which contain extensive troubleshooting guides, or manufacturer-specific diagnostic apps that communicate directly with smart appliances. These tools often include error code databases—so rather than guessing, you can interpret issues accurately. Using these, I’ve successfully diagnosed problems and completed repairs with a clear understanding of the root cause, often avoiding the need for a technician.
Routine Maintenance Habits to Extend Appliance Life
Beyond tools, establishing a maintenance routine can save you hundreds in repairs. Regularly cleaning filters, condenser coils, and vent pathways keeps appliances running efficiently. For example, I schedule quarterly checks on my refrigerator’s drain and door seals. Additionally, implementing monthly visual inspections of electrical cords and connections helps spot wear and tear early. This proactive approach aligns with expert advice found in the expert guide to appliance repair and installation.
Long-Term Results and Scaling Up
Consistent use of these tools and practices leads to long-term reliability. As your familiarity grows, you can diagnose and fix minor issues yourself, delaying or even avoiding professional service calls. This scalable approach means smaller appliances, like microwave ovens or small dishwashers, can be maintained with minimal expenses. In the future, automation and IoT integration will likely offer even smarter diagnostic and maintenance options, reducing downtime further. For now, mastering basic diagnostic tools and routine checks ensures your appliances stay functional and safe for years to come.
How do I maintain appliance performance over time?
To keep appliances performing optimally, I recommend setting regular maintenance schedules, investing in diagnostic tools like infrared thermometers, and staying updated with manufacturer firmware updates. For example, periodically updating smart appliance software can patch bugs and improve efficiency. Also, familiarizing yourself with error codes can help you respond swiftly to issues, sometimes even before they cause failures. Don’t forget to review warranty coverage—sometimes, routine maintenance can be a requirement to keep your warranty valid, especially if you plan on scaling your home’s appliance ecosystem in the future. For the most comprehensive support, consider consulting our warranty-backed services. Try using a thermal imaging camera to identify hot spots in your appliances; it’s an advanced step that I personally find invaluable for diagnosing early signs of component failure and can be a worthwhile investment for any DIY enthusiast.
The Hardest Lesson I Learned About installation,same-day service,warranty,appliance repair
One of my biggest realizations was that even professional installers can overlook critical details like proper leveling or secure fittings. I once ignored subtle signs during installation, only to face costly repairs later. Now, I understand that asking the right questions and insisting on thorough checks can save a lot of headaches. Never assume the job’s done until you’ve verified every aspect, especially for safety and optimal performance.
Key Tools That Changed My Maintenance Routine
Equipping myself with a reliable digital multimeter and infrared thermometer transformed my ability to diagnose issues early. These tools, which I trust deeply, help me identify problems before they escalate. They make routine checks quick, accurate, and, most importantly, empowering — giving me confidence to handle minor repairs myself and defer expensive service calls.
The Emotional Spark to Keep Going in Appliance Care
Engaging with appliance maintenance became less of a chore and more of a personal challenge once I realized I could extend the lifespan of my equipment with small, consistent actions. Every successful fix fuels my passion to learn more, knowing I’m decreasing waste and saving money. The journey of mastering these skills is ongoing but incredibly rewarding, inspiring me to stay proactive and informed.
Where to Go from Here
My top recommendations include reviewing our guide to reliable appliance installation to ensure your setup is right from the start. Invest in quality diagnostic tools like the ones I swear by, and dedicate time regularly to simple maintenance tasks. Remember, the more you learn now, the fewer surprises you’ll face later. So, why wait? Dive into these resources and take control of your appliance health today!