
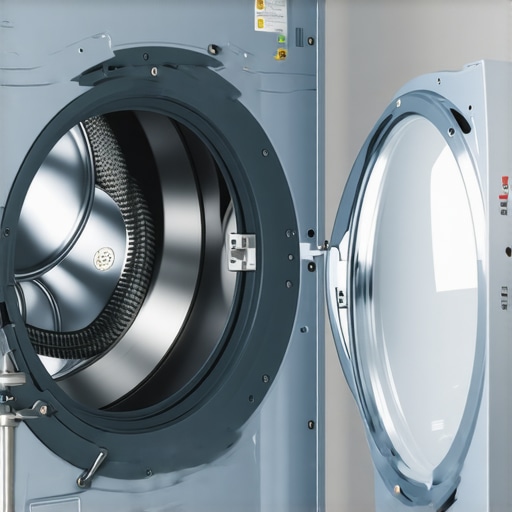
Ever had that moment when your dryer starts squealing like a banshee in the middle of laundry day? I’ve been there—frantically searching for the cause, helplessly wishing I could silence that maddening high-pitched noise before it drives me insane. It’s a familiar scenario for many homeowners, and let me tell you, that shrill sound isn’t just annoying; it signals that something’s amiss inside your trusty appliance.
Cracking the Code: What Causes the Squeal?
The first step in solving the mystery is understanding what might be creating that relentless high-pitched squeering. Often, it’s a worn-out drum bearing or a failing blower wheel that’s causing the noise. These components are essential for the smooth operation of your dryer, and when they begin to wear down, they can produce that unbearable squeal. Trust me, ignoring it won’t make it go away—and it can lead to more costly repairs down the line.
Is It Worth Calling in a Pro or Can I Fix It Myself?
This question haunts many of us. I made the mistake early on of ignoring that squealing, thinking a simple tightening would do the trick, only to find out later that I’d worsened the problem. It’s why I always recommend knowing what you’re dealing with before diving in blindly. Luckily, resolving common causes of dryer squeals can often be a manageable DIY project, especially if you’re comfortable with basic appliance repairs. For more detailed guidance, you might check out this expert guide.
But, of course, if you’re hesitant or the noise persists despite your best efforts, professional repair services are reliable and save you from potential mishaps. Not sure if your warranty covers repairs or want to explore quick solutions? You can always find affordable options with warranty-backed services.
To avoid costly damage, it’s better to act sooner rather than later. Now, let’s look at some practical steps you can take to diagnose and potentially fix that annoying squealing sound yourself, or at least know when it’s time to call in the experts.
Start with a Visual Inspection
Wear gloves and unplug your dryer. Remove the lint trap and check the blower wheel for debris or damage. Use a flashlight to examine the drum bearings and rollers for wear or cracks. I once found a tiny piece of plastic lodged in the blower wheel, which caused a squealing noise—I removed it and the noise stopped immediately. Clear obstructions and look for signs of wear.
Test the Components
Check the Drive Belt for Wear
Rotate the drum manually to see if the belt slips or feels loose. If frayed or cracked, replace it. The belt is like a bicycle chain—if it’s damaged, it won’t run smoothly, causing noise. I replaced mine following a tutorial I found on this guide, which made the job straightforward.
Assess the Drum Bearings and Rollers
Inspect these for excessive play or smoothness. Worn bearings can be a silent killer, leading to squeals over time. To check, slightly lift the drum—if it wobbles, bearings might be the culprit. Replacing bearings is more complex but doable with proper tools and instructions.
Lubricate Moving Parts
Apply high-temperature appliance lubricant to the drum rollers and idler pulley. Avoid over-lubricating—just enough to reduce metal-on-metal friction. I once lubricated my rollers, which silenced a persistent squeal without needing replacements. Remember, lubrication is a quick fix; if noise persists, deeper inspection is necessary.
Ensure Proper Tension and Alignment
Loose or misaligned belts cause squealing. Tighten the belt so it snugly fits the drum without slack. Check the belt’s alignment with the motor pulley; misalignment can cause uneven wear. This step is like tuning a guitar—precise tension makes all the difference.
Replace Damaged Components
If inspections reveal damaged bearings, rollers, or blower wheels, consider replacement. Use quality parts from trusted suppliers. For instance, I ordered a replacement blower wheel from this service and installed it following step-by-step instructions. It restored quiet operation and extended my dryer’s life.
Test After Repairs
Reassemble all components, plug in the dryer, and run a short cycle. Listen for any squealing. If noise persists, revisit your inspection for overlooked damage. Sometimes, the issue is a combination of minor problems that add up.
When to Call a Professional
If these steps don’t resolve the squeal or if the repair seems daunting, don’t hesitate to seek expert help. Professionals have specialized tools and experience to diagnose hidden issues quickly—saving you time and preventing further damage. For affordable, reliable repairs with warranty, explore this option for prompt service.
Understanding these core steps empowers you to troubleshoot small problems before they escalate. Proper maintenance may even extend your appliance’s lifespan and reduce repair costs, keeping your laundry routine smooth and quiet.
When it comes to same-day appliance repair and installation, many homeowners operate under a set of assumptions that can lead to costly misunderstandings. While quick service sounds ideal, the nuances behind warranty coverage and service reliability often get overlooked, creating traps for the unwary. As an seasoned professional in appliance maintenance, I’ve seen these misconceptions trip up even the most savvy consumers.
Myth: All Same-Day Services Are Equally Reliable
Everyone assumes that a same-day appointment guarantees quality and lasting results. But in reality, some providers cut corners to meet tight schedules, sacrificing thorough diagnostics and proper part replacements. What’s often missed is the importance of choosing a service with a robust warranty-backed service—this ensures accountability, even if initial fixes don’t hold. Sometimes, opting for the cheapest fast option results in repeated repairs, costing you more in the long run.
Are Shortcuts in Repairs a Common Pitfall That Gets Overlooked?
Absolutely. Cutting corners—such as reusing old parts or skipping calibration—might seem to save time and money initially, but they often lead to recurring problems. A study by the National Appliance Repair Association highlights that improper repairs contribute to 60% of appliance failures within the first year. Therefore, it’s crucial to verify that your chosen technician adheres to industry standards, ensuring longer-lasting repairs.
Another trap centers around the misconception that a warranty coverage guarantees free repairs forever. This isn’t always the case—many warranties exclude accidental damage, improper installation, or regular wear and tear. To maximize your warranty benefits, check out how to maximize your warranty and understand its limitations.
Don’t Fall for the Immediate Fix Trap
One sneaky nuance that many miss is assuming that the quickest fix is the best. The reality is, some issues are symptoms of deeper problems requiring detailed diagnostics. For instance, a noisy refrigerator might seem like a simple fan issue, but it could stem from a failing compressor or refrigerant leak—problems that necessitate specialist intervention. Rushing into superficial repairs can obscure these underlying issues and result in more expensive breakdowns later.
Always ask your service provider about their diagnostic process and guarantee policies. Reliable companies often provide a clear diagnostic overview and warranties on repairs, giving you peace of mind that they’re addressing root causes, not just surface alarms.
Advanced Insight: Will Your Warranty Cover All Repair Situations?
Many homeowners believe that warranty coverage is black and white, but the truth involves more shades. For example, some warranties exclude damages caused by improper installation or neglect. Moreover, the type of damage—internal vs. external—can determine whether repairs are covered. Experts advise reviewing the fine print and consulting with your provider beforehand, as outlined in detailed guides like this article on reliable installation. Doing so prevents surprises and ensures your investments are protected.
Let’s face it—assuming that quick service and warranty coverage are straightforward simplifies a complex reality. Navigating these nuances requires a discerning eye and awareness of common pitfalls. So, before you schedule that next service, consider these insights and ask yourself: Are you truly protected against hidden costs and ineffective fixes? Have you ever fallen into this trap? Let me know in the comments.
,
Maintaining your appliances effectively is crucial for long-term performance and peace of mind. Having the right tools and adopting proactive maintenance routines can significantly reduce unexpected breakdowns and extend the lifespan of your units. In this article, I’ll share some specific tools I personally rely on and the strategies I’ve found most effective to keep appliances running smoothly over time.
How do I maintain appliances over time?
One of my go-to tools for ongoing maintenance is a high-quality digital multimeter. I use it to regularly check electrical connections and ensure that components like thermostats and motors are functioning within proper parameters. Trust me, catching electrical issues early with a multimeter can prevent costly repairs later. Additionally, a set of precision screwdrivers is indispensable for safely removing panels and accessing internal parts without damaging delicate components.
For more thorough inspections, I swear by a reliable infrared thermometer. It helps me monitor temperatures of motors and heat exchangers during operation, alerting me to overheating issues before they escalate. Combining these tools with a maintenance schedule—such as cleaning lint filters, checking venting, and lubricating moving parts—is how I ensure consistent appliance health.
Looking ahead, I predict that smart diagnostic tools will become standard in appliance maintenance, providing real-time data and even remote alerts. This evolution will make preventive care even more accessible and efficient.
Essential tools I recommend for effective appliance upkeep
First, invest in a quality multimeter with clamp capabilities. I personally prefer models that can measure current without disconnects; it saves time and reduces risks. Second, keep a digital torque wrench on hand. Many appliance parts require precise tightening; over-torquing can damage components, while under-torquing risks loosening or malfunctioning. My choice is a compact, battery-powered torque wrench that delivers accurate readings quickly.
Third, an ultrasonic cleaner has become a game-changer for cleaning small parts like valves and sensors without harsh chemicals. It ensures components are thoroughly cleaned, improving overall performance and longevity. These tools, combined with routine inspections, form the backbone of my maintenance approach and help me troubleshoot issues early.
Additionally, maintaining detailed logs of repairs and inspections allows me to spot patterns and predict when parts might need replacement. This proactive stance minimizes downtime and keeps appliances operating at their best. For example, regularly checking the condition of seals and gaskets helps prevent leaks that could cause significant water damage or electrical faults.
Remember, proper maintenance isn’t a one-time task but an ongoing process. Consistently using these tools and following a schedule will save you money and frustration in the long run. If you’re unsure about specific procedures, consult expert guides—like this comprehensive maintenance guide—to ensure you’re on the right track.
Try adopting these tools and routine checks today, and you’ll notice a marked difference in your appliances’ reliability. Proper preventive care is the key to long-term success, saving you from emergency repairs and costly replacements in the future.
The Sneaky Truth About Rushing Repairs
One of the biggest lessons I’ve uncovered is that quick fixes often hide larger problems. I once hurried into a repair, thinking a simple belt replacement would solve my dryer squeal. It turned out the manufacturer’s quick service missed a worn-out bearing that caused recurring issues. This taught me that patience and thorough diagnostics save money and prevent future headaches.
Vet Your Service Provider Like a Pro
Not all same-day service providers deliver the same quality. I learned to ask about their warranty policies and past client reviews. A trustworthy company like this reliable service can make all the difference. Thoughtful vetting ensures your appliance gets the proper care without unnecessary returns.
Listen to Your Appliance’s Signals
Persistent squeals or odors aren’t just nuisances—they’re alerts. I began paying attention to early symptoms instead of ignoring them. Regular inspections and proactive repairs can extend your appliance’s lifespan. Remember, your appliance communicates; it’s up to you to listen and act appropriately.
Tools: The Best Allies for DIY Fixes
Investing in quality tools transformed how I handle small repairs. A trusted multimeter and a durable torque wrench help me diagnose issues confidently. I also rely on online tutorials and expert guides, like this comprehensive resource, which makes DIY repairs both safe and effective.
When to Call in Reinforcements
Despite my DIY spirit, I learned to recognize my limits. If a repair involves internal electrical components or if uncertainty clouds my judgment, I contact professionals. A credible technician with warranty-backed services like this trusted provider ensures long-term peace of mind.