
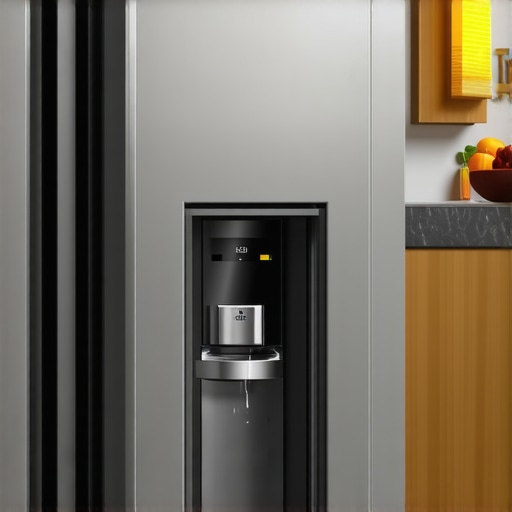
Imagine this: You’re standing in your kitchen, fresh coffee in hand, when suddenly you notice a small puddle forming on the floor near your refrigerator. Your heart sinks. You open the fridge, and sure enough, there’s no leak from the ice maker, which is humming along happily. It’s a common frustration I’ve faced myself—water dripping on the floor without any obvious reason behind it. That lightbulb moment when I finally understood the culprit made me realize how many of us are troubleshooting the same issue without knowing where to start.
Getting to the Heart of the Leak
So, why does this happen? The truth is, a leaking fridge with a functioning ice maker can be caused by a variety of issues, from simple drainage clogs to faulty door seals. What’s reassuring is that this problem is often solvable without calling a technician every time. Today, I promise to walk you through the practical steps I’ve used to diagnose and fix this pesky leak, saving you time and money while keeping your kitchen dry.
Is Water Leaking Even When the Ice Maker Is Fine?
One of the biggest fears I had early on was that a leak meant a major, expensive repair. Honestly, I used to think that if the ice maker could produce ice, then the leak had to be something catastrophic. But I learned that’s not always the case. Small issues like a clogged defrost drain or a misaligned door seal often cause water to pool on the floor. Plus, I made the mistake of ignoring regular maintenance, which only worsened the problem over time. Trust me, addressing these smaller issues quickly makes all the difference. For a deeper understanding of how appliance parts work together, check out this guide.
With that in mind, let’s get into the practical steps I took to identify the cause and fix my fridge leak—so you can do the same and keep your floors dry.
Identify the Drainage Blockage
The first step I took was to locate and clear the defrost drain, often the culprit for leaks despite a functioning ice maker. I unplugged the fridge, then removed the back panel inside the freezer to access the drain’s entry point. Using a thin, flexible pipe cleaner, I gently pushed through the clog, ensuring water could flow freely. This straightforward action often resolves minor blockages that cause water to back up and spill onto the floor.
Use Hot Water and Baking Soda
To further clear stubborn residues, I mixed hot water with a little baking soda. I poured this mixture into the defrost drain opening to flush out any remaining debris. This process helps dissolve mineral buildup or organic matter blocking the flow. After flushing, I used a turkey baster or syringe to inject additional hot water, ensuring the drain was clear. Regular maintenance of this kind prevents future leaks and keeps the drainage system functioning smoothly.
Inspect Door Seals and Alignment
I then examined the door gaskets for cracks or gaps. A loose or damaged seal can allow warm air in, causing excess condensation that drips down onto the floor. I closed the door on a dollar bill, pulling it out to test the tightness along the entire perimeter. If I noticed any slack or damage, I replaced the gasket, which is a simple fix available at most hardware stores. Properly aligned door seals ensure that the fridge maintains the correct temperature and prevents moisture buildup.
Realign the Door if Necessary
Sometimes, the door doesn’t sit flush, making the seal ineffective. I used a level and adjusted the door hinges, tightening or loosening screws as needed. Proper alignment ensures the door seal is tight, preventing warm air intrusion. This step is akin to tuning a musical instrument: small adjustments can significantly improve performance and eliminate issues like leaks.
Check for External Sources of Water
Water pooling can also originate from external sources, such as a leaking water line or ice maker supply hose. I traced the fridge’s water connections, inspecting hoses for cracks or loose fittings. Using a bucket and towels, I caught any drips during the inspection. If I detected a leak, I replaced or tightened the fittings. Ensuring these hoses are in good condition prevents water from seeping onto the floor over time.
Evaluate Professional Assistance Options
If after these steps the leak persists, calling in a professional might be the best move. Reputable appliance repair services, like those offering same-day repair with warranty coverage, can diagnose more complex issues swiftly. Investing in qualified technicians can save you from extended damage or the expense of replacing the entire fridge.
Addressing a leaking fridge involves a methodical approach: clear the drainage, inspect seals, and verify connections. By systematically eliminating common causes, you often resolve the issue without significant costs or downtime, ensuring your kitchen stays dry and your appliance runs optimally.
Many homeowners assume that choosing same-day appliance repair or installation guarantees a flawless experience, but this isn’t always the case. The truth is, there’s a hidden nuance that often trips up even the most informed consumers: misunderstanding what these services truly include and their limitations. For example, a common myth is that a warranty covers all types of damage; however, many warranties exclude accidental damages or improper usage, which can lead to unexpected costs. According to industry experts, such misconceptions can result in delays and additional expenses, as customers may believe repairs are covered when they’re not. **A critical tip is to thoroughly review warranty terms beforehand** and clarify what is included during installation or repair to avoid surprises. Additionally, many get misled by the promise of “quick” service, neglecting the importance of scheduling and technician expertise, which directly impacts the quality and durability of the repair or installation. Choosing a provider with proven experience—like those highlighted in top tips for same-day service and warranty coverage—can save you time and prevent rework.
Are there risks in opting for the cheapest or fastest service without thorough vetting?
In fact, rushing into a repair or installation process without verifying the technician’s credentials or understanding the scope can lead to subpar results or future breakdowns. Programs that promise “instant” fixes may omit vital safety checks or proper calibration, which experts warn against. The American Appliance Repair Association emphasizes that a reputable service considers both speed and quality, ensuring that the work aligns with safety standards and manufacturer specs. Remember, a rushed job might save you money upfront, but often costs more in the long run. To ensure your appliances function optimally, consider also learning about warranty exclusions and how they impact your coverage. Don’t fall into the trap of assuming all repairs are created equal; investing in trained professionals brings peace of mind and longevity to your appliances. Have you ever fallen into this trap? Let me know in the comments.
Tools That Make a Difference in Appliance Maintenance
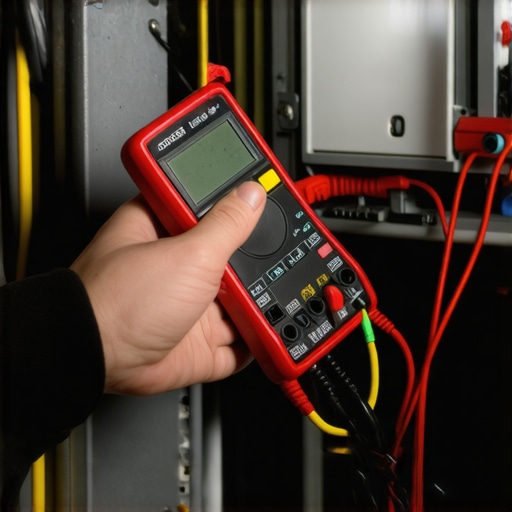
Staying ahead of appliance issues requires more than just intuition; it demands the right equipment. Personally, I rely on a few trusted tools that have proven their worth time and time again. For example, a quality multimeter is indispensable for diagnosing electrical issues in your appliances. I prefer the Fluke 117 because of its accuracy and durability, helping me quickly identify faulty wiring or blown fuses without guesswork.
Another essential is a digital infrared thermometer. This tool allows me to monitor temperatures of components like heating elements or compressor coils, preventing costly damage before it happens. The Fluke 62 MAX+ is my go-to because it provides reliable readings even in challenging environments. Additionally, a set of precision screwdrivers, like the Wiha 32092, helps me disassemble any appliance without damaging screws or panels, maintaining the integrity of the units during repairs.
The Power of Software for Diagnostics and Scheduling
Beyond physical tools, I leverage diagnostic software that connects via USB or Wi-Fi to get deeper insights. Many modern appliances have embedded diagnostic modes accessible through manufacturer apps—these can streamline troubleshooting. For instance, when dealing with smart washers or refrigerators, I use manufacturer-specific apps that provide error codes and firmware updates, saving me time and money.
In terms of scheduling, a reliable appointment management system is crucial. I recommend using dedicated scheduling platforms that sync with your calendar and send reminders. This helps ensure you don’t miss service windows, especially for same-day appointments. For example, scheduling tools designed for same-day service optimize both your time and service efficiency.
Long-Term Results and How to Scale Your Service
Consistent maintenance with these tools leads to longer appliance lifespan and fewer emergency repairs. I suggest creating a regular checklist—monthly inspections with the infrared thermometer, quarterly electrical tests with the multimeter, and annual calibration of testing devices. As your experience grows, you can even assemble a portable repair kit for roadside diagnostics or on-the-fly fixes during installations.
Looking ahead, the trend leans toward smarter tools integrated with IoT technology. Future devices will seamlessly connect with diagnostic apps, alerting you to issues before symptoms appear. Industry experts predict that home maintenance will become more automated, with predictive analytics guiding proactive repairs—officially documented by sources like our expert guide.
How do I maintain my appliance tools over time?
Proper storage, regular calibration, and cleaning are key. Keep your multimeter batteries fresh; store all tools in a dedicated toolbox to prevent damage or loss. Periodic calibration ensures accuracy, especially for high-precision devices. Refer to each tool’s manual for maintenance tips, and consider professional calibration services once a year. This routine protects your investment and ensures your diagnostics remain reliable, making appliance repair a smoother experience.
As you implement these strategies and use tools wisely, you’ll notice more consistent appliance performance and fewer surprises. Start by challenging yourself to calibrate your digital thermometer or update your diagnostic software today—small steps like these can make a big difference in keeping your appliances reliably working for the long haul.
Secrets Ruined My Assumptions About Quick Fixes
- One of the biggest lessons I learned was that not every water leak indicates a catastrophic failure. Sometimes, a simple clogged drain or a misaligned door seal causes more stress than a broken compressor. That realization saved me hundreds, knowing that patience and systematic troubleshooting are often enough.
- Another insight is that warranties rarely cover mistakes made from neglect or improper maintenance. I used to think warranties protected me from any repair cost, but I learned to read the fine print, especially about accidental damages and misuse—something critical to avoid surprises when service is needed.
- Finally, I discovered the importance of trusting trained professionals for complex issues. Rushing into the cheapest or fastest repair service can lead to future headaches. Investing in reputable technicians guarantees longer-lasting fixes and peace of mind—so don’t cut corners when it matters most.
My Go-To Arsenal for Appliance Care
- For diagnosing electrical issues, I swear by the Fluke 117 multimeter. Its reliability helps me avoid guesswork, making repairs safer and more precise. I recommend it because it’s sturdy and easy to use, even for beginners.
- The Fluke 62 MAX+ infrared thermometer is my secret weapon for detecting temperature inconsistencies in components like coils or heating elements. Spotting problems early prevents costly damage, and it’s surprisingly affordable for such utility.
- Precision screwdrivers from Wiha keep my disassembly smooth and damage-free. They’re essential when I need to access tight spots or delicate panels, helping me avoid additional damage and save time.
- Additionally, I consult the expert repair guide for troubleshooting tips and maintenance routines that extend my appliances’ lifespan.
Take Action and Keep the Momentum Alive
Your journey to mastering appliance maintenance and repair is just beginning. Whether it’s fixing a stubborn fridge leak or understanding warranty nuances, it’s rewarding to develop these skills. Embrace each challenge, stay curious, and remember that consistent care beats reactive fixes. The future is bright for those willing to learn and act—your appliances will thank you.
What’s the first step you’re planning to take today to improve your appliance troubleshooting skills? Let me know below!