
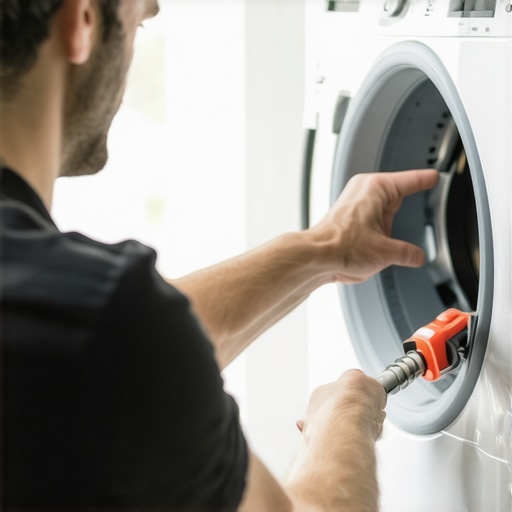
It was another exhausting laundry day when I finally heard that dreaded squeal from my dryer. You know the sound—loud, grating, like nails on a chalkboard. I opened the door, expecting a simple jam, but instead, I found lint buildup blocking the vent system. That moment hit me—if I didn’t do something, my dryer might overheat or even pose a fire risk. I realized I couldn’t just call a professional every time; that would get expensive, fast.
That’s when I discovered the one tool I needed to tackle this problem safely myself: a dryer vent cleaning kit. With a little bit of know-how and the right equipment, I managed to clear the blockage, saving money and preventing potential hazards. Today, I want to share my experience and show you how you can do the same.
Why Your Dryer Vent Is A Hidden Fire Hazard and How You Can Tackle It
Clogged dryer vents are often overlooked until it’s too late. According to the National Fire Protection Association, failure to clean dryer vents is a leading cause of home laundry room fires, accounting for hundreds of incidents annually. These fires not only threaten your safety but also cause costly damage and downtime. I learned this lesson the hard way, and that’s why I’m passionate about sharing practical solutions.
Early in my attempts, I made a critical mistake: I believed just brushing off the lint trap was enough. That’s a common misconception, but the real danger lies deep within the vent, where lint and debris accumulate. The first step I took was inspecting my vent system—and I was shocked by how much lint had built up beyond what I saw inside the lint trap.
The good news? Clearing a clogged dryer vent doesn’t have to be complicated or costly. With some basic equipment and a bit of patience, you can do it yourself safely. Plus, regular maintenance keeps your dryer running efficiently and extends its lifespan. Ready to get your hands dirty and eliminate this fire risk? Let’s dive into how you can do it effectively and securely.
If you’ve ever faced stubborn drying times or been worried about safety, you’re not alone. Many homeowners overlook this critical maintenance step — but I’m here to tell you it’s easier than you think. Keep reading, and I’ll walk you through the process, helping you avoid common pitfalls and ensuring your family stays safe.
Want to learn more about professional options or better warranties? Check out some of our trusted guides, like the [expert guide to appliance repair and installation today](https://discountappliancehub.com/expert-guide-to-appliance-repair-and-installation-today), to broaden your knowledge base and protect your home investments.
Start with Safety Precautions before You Begin
Pull the dryer away from the wall to access the vent and unplug the appliance to avoid electrical hazards. Wear a dust mask and goggles to protect yourself from lint debris. I remember my first attempt where I didn’t protect my eyes, leading to discomfort but no serious injury. Taking safety measures is crucial to prevent accidents and keep your cleaning effective.
Gather Necessary Tools and Materials
Use a dryer vent cleaning kit, which typically includes a flexible brush, extension pole, and vacuum adapter. Additionally, have a screwdriver, gloves, and a shop vac ready. I once tried using a wire hanger, but it was too inflexible and damaged the vent. Using specialized tools ensures thorough cleaning and avoids damage to your vent system.
Locate and Access the Vent
Identify the vent outlet outside your home and the vent hood inside your laundry area. Remove the vent cover and disconnect the duct from the back of the dryer. When I did this, I found a buildup of lint inside the vent cap, which was blocking airflow. Proper access is vital for cleaning both ends effectively.
Clean the Exterior Vent First
Insert the brush into the opening and twist to loosen lint clumps. Attach the brush to your extension pole and push it through the duct, rotating to scrub walls. Use the vacuum to suck out loosened lint and debris. I once overlooked cleaning the exterior vent, leading to poor drying performance; cleaning both ends makes a big difference.
Work Through the Entire Length of the Duct
Extend the brush as needed and gently push it through the entire duct, cleaning as you go. Always work from the dryer toward the outside vent. If the duct is long or curved, take your time to ensure no lint remains. I’ve seen lint buildup extend several feet inside, which can cause overheating and fire risk if left uncleaned. Regular cleaning prevents this hazard.
Reassemble and Test the Dryer
Reconnect all parts securely, replace the vent cover, and push the dryer back into position. Plug the appliance in and run a short cycle to verify proper airflow. You’ll notice reduced drying times and a quieter operation. I did this when my dryer started drying clothes faster, confirming the vent was clean and unobstructed.
Schedule Routine Maintenance to Prevent Emergencies
Set a reminder to inspect and clean your dryer vent every 12–18 months. Don’t wait until you notice longer drying times or a burning smell, which are signs of clogging. For complex setups or if you encounter stubborn debris, consider consulting professionals with expert repair services. Regular upkeep not only enhances safety but also prolongs your appliance’s lifespan.

How to Maintain Your Appliances Over Time for Long-Term Reliability
Maintaining your appliances isn’t just about fixing issues as they arise; it’s about proactive care that ensures smooth operation and extended lifespan. I recommend investing in a high-quality digital multimeter from Fluke, such as the Fluke 117, which I personally use to troubleshoot electrical issues safely and accurately. This tool allows me to verify wiring connections, test continuity, and confirm proper voltage levels, helping prevent small problems from escalating. Regularly cleaning lint filters, checking for obstructions, and lubricating moving parts are simple steps that go a long way. For instance, I make it a habit to inspect my dryer vent annually, using a specialized vent cleaning brush to prevent fire hazards and improve efficiency. Predicting where appliance technology is headed, I see smart features becoming standard, enabling remote diagnostics and maintenance alerts. This shift makes it even more crucial to keep software updated and conduct routine checks to capitalize on these innovations.
What’s the best way to keep your appliances running smoothly without costly repairs?
Establish a maintenance schedule tailored to each appliance. For example, regularly cleaning refrigerator coils with a coil brush can prevent overheating and save energy. Using a microfiber cloth, I wipe down machine surfaces weekly to prevent dust accumulation that can impede functioning. Implementing these habits reduces unexpected breakdowns, saves money, and maintains your warranty coverage, especially if you opt for services backed by extensive guarantees, like those found at warranty-backed appliance services. Additionally, scheduling annual professional inspections can identify issues early—professionals like those at expert guide to appliance repair and installation recommend this for peace of mind. Altogether, these proactive approaches preserve the longevity of your appliances and boost their efficiency.
Tools I recommend for maintaining appliances effectively
Besides a multimeter, I keep a silicon-based spray lubricant handy to lubricate door hinges and moving parts, reducing wear and squeaks. For clogged drains or filters, a flexible drain cleaning snake helps clear blockages without damaging internal components. When it comes to software, I utilize diagnostic apps provided by brands like Bosch or Whirlpool, which offer firmware updates and remote troubleshooting options. These tools allow me to assess real-time data and catch potential issues early, especially as appliances become more technologically integrated. As the trend leans toward connected devices, maintaining firmware and security updates will be essential to prevent vulnerabilities and ensure continued functionality. Exploring these tools and habits is vital for any homeowner committed to keeping appliances reliable over years of use. For tips on installation best practices that complement maintenance routines, check our detailed guide on reliable appliance installation. Don’t forget: integrating proper maintenance tools with routine checks optimizes performance and minimizes unexpected repairs—try starting with your dryer vent cleaning using a dedicated vent brush and see the difference it makes. Do you have a favorite maintenance tool or routine that has saved you time and money? Share your experience—you might help others keep it working longer and stronger.
Throughout my journey of maintaining my appliances, I learned that many of the most critical lessons are often hidden behind small mistakes or overlooked details. These insights have saved me money, prevented hazards, and given me confidence to tackle issues head-on, especially when it comes to dryer and appliance safety.
What I Wish I Knew About Warranties and Quick Repairs
- Don’t Rely Solely on Promotions: Many believe that warranties cover every repair, but the fine print often excludes accidental damage or misuse. Reading the details has helped me avoid costly surprises later on.
- Fast Service Can Be Deceiving: Same-day repairs are tempting, but sometimes rushed job lead to rework. Verifying technician credentials from sources like expert guides ensures quality over speed.
- Quality Installation Matters: A skilled installer can prevent future problems that warranties won’t cover if overlooked. I’ve learned that investing in qualified professionals pays off in longevity for my appliances.
My Top Tools for Appliance Confidence
- Multimeter from Fluke: Trustworthy for electrical diagnostics, I use it to ensure my appliances are wired correctly and safe to operate.
- Vent Cleaning Brush: Essential for my dryer maintenance routine, it helps me remove lint buildup beyond what a vacuum can reach.
- Diagnostic Apps: With smart appliances, regularly updating firmware and checking for software issues via manufacturer apps keeps everything running smoothly.
Take Action and Keep Appliances Safe
Your appliances are more than just convenience—they’re investments in your home and safety. Learning from my experiences, I urge you to inspect, clean, and maintain regularly, especially vents and filters. Don’t wait for a breakdown or emergency—be proactive by scheduling routine checks and trusting certified professionals when needed. For trusted, affordable service backed by warranty benefits, visit warranty-backed appliance services and stay ahead of costly repairs. Remember, a little knowledge and routine maintenance can make all the difference in extending your appliances’ lifespan and keeping your home safe.