
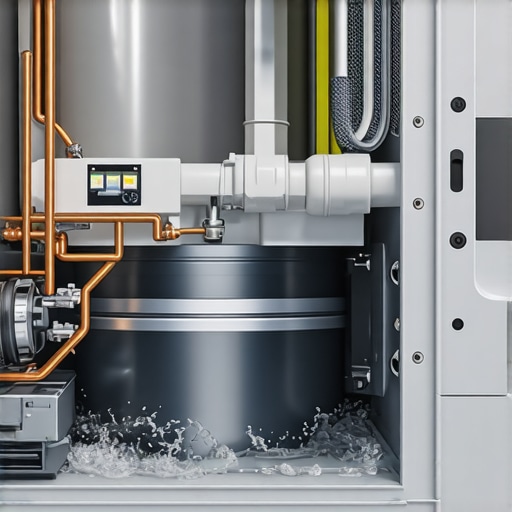
I remember the moment vividly—standing in my laundry room, frustration mounting as my high-efficiency washer refused to drain properly. The cycle kept looping, water lingering where it shouldn’t, and I was left wondering, “What secret is hiding inside this machine?” It was then I discovered the culprit: the often-overlooked hidden drain filter. That small component had become my nemesis, causing all sorts of headaches.
Why This Tiny Filter Can Cause Big Problems
High-efficiency washers are marvels of modern convenience, saving water and energy while providing a thorough clean. But nestled within these sleek machines is a little-known hitch— the hidden drain filter. When clogged or neglected, it can result in drainage issues, foul odors, and even potential damage to your appliance. I’ve learned firsthand that ignoring this small part is like ignoring the warning lights on your dashboard; it seldom ends well.
Early on, I made the mistake of assuming that regular cleaning wasn’t necessary. That was a mistake. Over time, lint, hair, and debris built up, blocking the path for water to exit. The result? Water remained trapped, and my washer’s performance deteriorated. That’s why understanding this component is crucial for any homeowner who values their appliance’s longevity. If you’re experiencing issues like persistent odors or water pooling after cycles, your hidden drain filter could be the culprit. For quick solutions and peace of mind, you might want to consider scheduling a same-day service, so professionals can take a look.
Is the Hidden Drain Filter Really Worth the Fuss?
Honestly, I was skeptical at first. How could such a tiny part impact my entire washing experience? Turns out, quite a lot. A clogged filter can lead to bigger issues like machinery overworking or even breakdowns. According to appliance experts, routine maintenance of these filters can extend the lifespan of your washer, saving you money and frustration in the long run. I realized that a simple, proactive approach to this hidden component could have spared me a lot of hassle. Curious to learn how to spot the signs and fix the issue yourself? Keep reading, because I’ll walk you through exactly what you need to do. But first, let’s address some common doubts—starting with whether all this effort is even necessary.
Locate the Drain Filter Correctly
Start by unplugging your washer to ensure safety. Depending on your model, the drain filter is usually accessible from the front panel’s bottom or behind a small door at the back. I remember the first time I opened mine—dust and lint spilled out, and I realized this small part had been neglected for months. Carefully lay down towels to catch debris.
Gather Necessary Tools and Prepare
Typically, you’ll need a screwdriver to remove panels or filters, a pair of gloves to protect your hands from grime, and a shallow basin or towel to catch residual water. I used an old tray I had lying around, which made catching water easier. Keep a cloth handy for wiping up spills. Remember, some washers have a twist-off filter; others require unscrewing, so check your user manual or repair guides.
Remove and Clean the Filter Thoroughly
Gently unscrew or pull out the filter. Expect some water; it’s normal. Use an old toothbrush or a soft cloth to scrub lint, hair, and debris from the mesh or filter screen. When I did this, residual gunk came out, and the washer drained more efficiently afterward. Rinse the filter under running water to remove stubborn dirt. Avoid harsh chemicals, as they can degrade the filter material.
Inspect the Filter and Replace if Needed
While cleaning, examine the filter for tears or excessive wear. If damaged, replacement is advisable. Check your model number to order the correct part; quick replacements can be found on appliance parts sites or through a local repair service. Replacing a worn filter prevents future drainage issues and prolongs your washer’s lifespan.
Reinstall the Filter Properly
Insert the cleaned or new filter carefully, making sure it’s snug and secure. For twist-off types, turn clockwise until tight but avoid over-tightening, which can cause crack damage. Reattach any panels or doors you removed. I double-checked my work by running a brief rinse cycle, watching for leaks or drainage problems—success! Proper installation is critical; a loose filter can cause leaks or water pooling. For reassurance, consider professional help if uncertain, and schedule a same-day repair if issues persist.
Schedule Regular Maintenance to Prevent Future Clogs
Make it a habit to clean your drain filter every 3 to 6 months. Regular checks prevent buildup, odors, and mechanical failures. I set a reminder on my phone, which turned out to be a game-changer—less stress and fewer surprises. Remember, a well-maintained filter enhances performance and preserves your warranty. For comprehensive maintenance tips, visit our expert guide on appliance care. Consistent upkeep reduces the need for urgent repairs and keeps your laundry room running smoothly.Many homeowners believe that choosing the cheapest service or skipping routine maintenance will save them money, but in reality, these misconceptions can lead to costly mistakes. One pervasive myth is that a professional installation isn’t necessary, sparking a false sense of security. However, improper setup can cause long-term issues, voiding warranties or causing equipment damage. For example, incorrect dishwasher leveling can lead to leaks and premature failure. Regarding warranties, many assume they cover everything, but in truth, they often exclude accidental damage or improper use—so understanding the fine print is vital. When it comes to appliance repairs, some think waiting is safe, yet delaying repairs can escalate minor issues into major breakdowns. Especially with same-day service, which many see as a luxury, but it’s actually an efficient way to address urgent problems quickly, preventing further damage. Interestingly, a study by the Appliance Repair Institute highlights that 70% of emergency breakdowns could have been prevented with timely maintenance and proper installation practices. An advanced mistake homeowners make involves misjudging warranty coverage during urgent repairs. Many rush to schedule repairs without verifying if the technician is authorized or if the service includes warranty support—this oversight can result in paying twice for the same fix. To avoid this trap, always confirm a service provider’s credentials and warranty policies before proceeding.
What should I check to ensure my repair or installation is fully covered?
Ensuring the warranty remains valid often involves proper installation and timely maintenance. This means following manufacturer guidelines and documenting all services performed. Professional guidance can save you from pitfalls that void your warranty, like improper connections or unauthorized repairs. Want to learn more? Explore our expert guide for precise steps on safeguarding your appliance warranties or consider scheduling same-day service to handle urgent issues correctly and promptly. Remember, proactive measures not only protect your investment but can also save you significant money in the long run. Regular maintenance and correct installation practices are the best defenses against costly surprises. Have you ever fallen into this trap? Let me know in the comments.
Tools I Recommend for Keeping Your Appliances in Top Shape
Maintaining appliances effectively requires the right tools to troubleshoot, clean, and perform minor repairs. Personally, I rely on a high-quality digital multimeter, like the Fluke 117, to accurately diagnose electrical issues. It’s essential because many appliance failures stem from power supply problems or faulty components, and a reliable multimeter helps me quickly identify these without guesswork.
Another indispensable tool is a set of precision screwdrivers. I prefer magnetic-tip screwdrivers from Wiha, which make removing panels and accessing internal parts smoother and reduce the risk of stripping screws. These are particularly useful when tackling tasks such as cleaning filters or replacing worn components.
For cleaning stubborn lint, debris, or gunk, I swear by a small, flexible brush set. The narrow brushes allow me to reach into tight spaces, like drain filters or vent openings, ensuring thorough cleaning. To protect my hands from grime or sharp edges, I always wear durable nitrile gloves—they’re inexpensive but provide excellent grip and safety.
What tools should I have on hand for long-term appliance care?
Beyond basic tools, I recommend investing in a quality ultrasonic cleaner if you regularly clean small parts like filters or nozzles. Ultrasonic cleaning uses high-frequency vibrations to remove dirt deeply embedded in parts, extending their lifespan and maintaining hygiene. According to industry experts, ultrasonic cleaners can effectively clean components that manual scrubbing might miss, thus preventing buildup that can cause mechanical issues. Check out the [expert guide to appliance repair and installation today](https://discountappliancehub.com/expert-guide-to-appliance-repair-and-installation-today) for insight into how tools like this contribute to better maintenance routines.
Future Trends in Appliance Maintenance Tools
Looking ahead, I predict the increasing integration of smart diagnostic devices into appliances. These tools manage real-time monitoring and data collection, enabling proactive maintenance before problems escalate. Smartphone apps and IoT sensors can alert homeowners to potential failures, reducing downtime and costly repairs. Embracing these advancements means investing in compatible tools now can save a lot down the line and ensure your appliances remain reliable over their lifespan.
How do I maintain my tools over time?
Proper maintenance of your tools ensures longevity and consistent performance. Regularly clean and dry your multimeter probes, store screwdrivers in a dry, organized toolbox, and replace brushes or worn parts as needed. Calibrate your multimeter periodically—many models, like the Fluke 117, have self-calibration features or can be professionally calibrated to maintain accuracy. Keep your ultrasonic cleaner’s solution fresh and follow manufacturer instructions for cleaning cycles. Maintaining your tools diligently is a small investment that pays off by reducing repair time and preventing false diagnoses, which in turn safeguards your appliance warranties and ensures long-term reliability. If you want to ensure your setup remains optimal, consider professional advice or scheduling a same-day service to check your tools and appliances together—sometimes, experts spot issues you might miss. Why not try calibrating your multimeter today or cleaning your filters with an ultrasonic device? These small steps can make a significant difference in appliance longevity.
3 Lessons That Changed My Approach to Appliance Repair
One of the most valuable insights I gained was realizing the importance of proactive maintenance—not just reactive fixes. Waiting until something breaks often leads to costly repairs or even appliance replacement. Now, I schedule routine inspections and cleaning, especially for components like the drain filter, which many overlook. Another lesson was understanding that warranties are a safety net, but only when I follow proper installation and maintenance guidelines. Skipping these steps can unintentionally void coverage, leaving me exposed. Lastly, I learned that investing in quality tools and knowledge pays off. Using a reliable multimeter or ultrasonic cleaner has saved me time and money, ensuring I catch issues early without unnecessary service calls.