
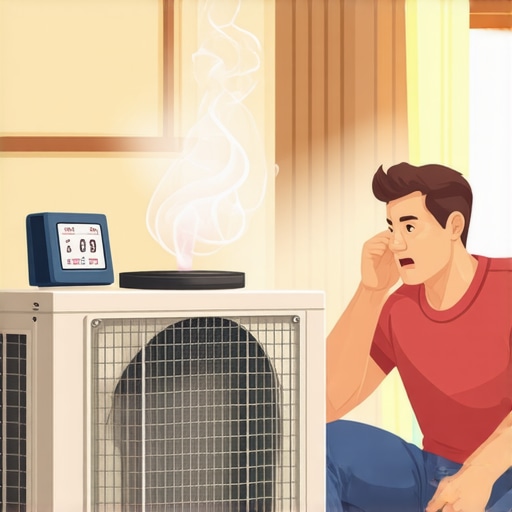
I remember the summer evening when I first faced this frustrating dilemma: my air conditioner was working fine all day, and then suddenly, warm air started billowing out of the vents. That sinking feeling of helplessness was immediate. I couldn’t understand how a unit that was cooling perfectly one minute could turn into a heat-blower the next. It was a lightbulb moment for me—realizing that AC problems aren’t always due to a broken compressor or low refrigerant, but often simpler issues that even a DIY enthusiast can tackle.
The Heartbreaking Surprise of Warm Air During a Heatwave
If you’re here, chances are you’ve experienced that moment of panic when your cool oasis suddenly turns into a hotbox. Believe me, I’ve been there, and I know how unsettling it feels. The good news? Most of the time, this isn’t a sign of a catastrophic failure. It’s often something that can be diagnosed and fixed quickly, saving you from costly repairs or waiting days for a technician to arrive.
Today, we’re going to explore why your AC might be blowing warm air suddenly, and more importantly, how you can troubleshoot and resolve the issue yourself. I’ll guide you through common causes like thermostat mishaps, dirty filters, and electrical issues—things I’ve learned from personal experience and verified with expert advice. Plus, I’ll share some insider tips on avoiding these pitfalls in the future, including what to check before calling in a professional.
Is It Worth Trying to Fix This Yourself or Should You Call a Pro?
Honestly, early on, I made the mistake of attempting complex repairs without proper knowledge, which only made things worse. That’s why I always recommend knowing your limits. But many small issues, like replacing a filter or resetting a breaker, are perfectly manageable if you follow the right guidance. For more advanced repairs, consider trusted experts, especially when dealing with refrigerant or electrical components. You can find reliable local service providers at this link.
Before you dive into troubleshooting, it’s beneficial to understand the common reasons behind warm air. This knowledge helps you avoid unnecessary expenses and ensures your AC runs efficiently when you need it most—especially during those scorching days. Ready to take control of your cooling system? Let’s start with the most common culprit: thermostats.
Start with Your Thermostat Settings
The first thing I check is the thermostat. Once, on a humid Saturday, I found the thermostat set to ‘Econ’ mode instead of ‘Cool,’ which caused warm air. To fix this, I turn the thermostat to cooling mode, set the temperature below room temperature, and wait a few minutes. If your thermostat is battery-operated, replace the batteries to ensure accurate readings. An incorrectly set or faulty thermostat can make your AC blow warm air even when other components are okay.
Verify Power and Circuit Breakers
Next, I examine the power supply. A tripped breaker in my basement caused the outdoor condenser to turn off, resulting in warm air from the vents. Locate your main breaker panel and look for any switches in the ‘off’ position or showing a neutral position. Reset any tripped breaker by flipping it fully off and then back on. Also, check for blown fuses if applicable. These simple steps restore power, which is essential for proper AC operation.
Inspect and Replace Air Filters
Clogged filters are common culprits. I once neglected this and noticed my system struggled to cool, emitting warm air. Turn off the AC, remove the filter, and hold it up to the light—if you see little to no light passing through, it’s time for a change. Replace with a filter rated appropriately for your system’s usage. Clean filters improve airflow and efficiency, preventing the system from overheating or shutting down.
Clean the Condenser Unit
The outdoor unit can gather dirt, leaves, and debris. I remember a hot day when my system’s performance dropped because the condenser was coated with dust. Turn off the power at the disconnect box or circuit breaker. Carefully remove debris and gently hose the condenser fins with water. Use a fin comb for bent fins. Clear airflow here is crucial for heat dissipation. Note that if you notice persistent issues after cleaning, professional servicing may be necessary.
Check Electrical Components and Connections
In my experience, loose wires can cause inconsistent cooling. Turn off power to the unit, open the access panel, and visually inspect for loose or corroded wires. Tighten any loose connections with insulated tools. Also, examine contactors and relays for signs of damage or pitting. If you’re unsure, refer to this comprehensive guide for detailed electrical testing procedures. Proper electrical connections ensure your system runs smoothly and safely.
Assess the Refrigerant Level
This step is where things get tricky. Low refrigerant can cause the system to blow warm air, but handling refrigerant requires certification and specialized equipment. I once attempted to recharge my system with a DIY kit, which was messy and ineffective. Instead, it’s best to schedule same-day professional service through trusted technicians. They can accurately diagnose leaks and recharge refrigerant, restoring cold air efficiently.
Final Tips for Reliable Cooling
Prevent future issues by scheduling regular maintenance, including coil cleaning and system inspections. Keep the area around outdoor units clear and ensure filters are replaced periodically. Remember, attempting complex repairs without proper knowledge can void warranties—review your warranty details at this resource before proceeding. With these steps, you can troubleshoot most common causes of warm air, extending the lifespan of your AC and ensuring comfort during the hottest days.
When it comes to appliance repair and installation, many homeowners operate under misconceptions that can cost them time and money. One common myth is that all warranties cover every repair issue; in reality, warranty exclusions often trip up even the most diligent consumers. For instance, many believe that a warranty is a catch-all safety net, but manufacturers frequently exclude damages caused by improper installation or misuse, emphasizing the importance of professional setup from trusted experts like those listed at this trusted service provider. Meanwhile, too many rely on the assumption that same-day service guarantees immediate resolution, but many fail to realize that scheduling an appointment in advance significantly increases the chance of quick, reliable repairs—details discussed in this guide.
A critical nuance often overlooked involves the fine print in service agreements. For example, some technicians might advertise ‘same-day’ repairs, yet their availability can be limited by parts delays or technician scheduling conflicts, undermining expectations. This traps many homeowners into believing their problem will be fixed instantly, but in reality, the actual turnaround depends on several factors, including the complexity of the repair and supply chain issues. Experts suggest always clarifying what ‘same-day’ entails before scheduling, as explained in this resource.
Another misunderstood aspect is the difference between manufacturer warranties and third-party maintenance plans. The latter might offer coverage for routine repair, but they often come with limitations that users don’t realize until a claim is denied. This can lead to unexpected out-of-pocket costs, especially if the plan excludes high-wear components. Read the fine print carefully at this page to understand what is truly covered.
From an expert perspective, a frequent mistake involves assuming that initial installation is perfect without inspection; however, improper alignment or electrical connections can silently degrade appliance performance. Professionals advocate for thorough post-installation assessments to prevent future issues, which is detailed in this comprehensive guide.
Make no mistake: understanding these nuances about installation, warranties, and service expectations can profoundly impact your appliance’s lifespan and your peace of mind. Always question what you’re being told, examine the fine print, and select reputable providers. Do you think you’ve fallen into any of these common traps? Let me know in the comments and share your experiences.
The Value of Specialized Tools for Appliance Maintenance
Over the years, I’ve discovered that having the right tools is essential for keeping appliances running smoothly. For instance, a high-quality multimeter, like the Klein Tools MM6000, allows precise electrical testing, which I use to quickly identify wiring issues or faulty components without guesswork. Similarly, a reliable coil cleaner, such as the Slim PC Coil Cleaner, makes cleaning condenser coils safer and more effective, preventing overheating and ensuring optimal cooling efficiency.
Investing in these tools has saved me countless service calls and extended the lifespan of my appliances. I recommend maintaining a dedicated toolkit that includes an insulated screwdriver set, a digital thermometer, and a refrigerant leak detector—specifically, the Fieldpiece LEAKTITE, which I trust for detecting leaks in refrigeration systems. These tools collectively empower you to perform routine checks and minor repairs safely and confidently.
Where Do I Keep My Maintenance Tools?
Designate a specific storage space—like a sturdy, weatherproof toolbox or a dedicated drawer in your garage—to keep all your maintenance equipment organized. This way, whenever a small issue arises, you’re ready to tackle it immediately without hunting through clutter. Regularly reviewing and replacing worn-out tools will maintain their effectiveness over time, ensuring you’re always prepared for basic troubleshooting tasks.
How Do I Sustain Long-Term Benefits from My Maintenance Routine?
Consistency is key. I schedule quarterly inspections of critical components—filter replacements, coil cleanings, and electrical checks—to prevent minor problems from becoming major failures. Using thermal imaging cameras, such as the FLIR TG165, has enabled me to spot hot spots indicating potential issues beforehand, especially with electrical connections and motors. These proactive measures not only prolong appliance life but also reduce energy consumption, saving money in the long run.
Looking ahead, I believe that automation and smart diagnostic tools will revolutionize appliance maintenance. Devices capable of transmitting real-time data to an app will alert homeowners instantly to issues, allowing for faster interventions and minimizing downtime. This trend will make maintenance more accessible for non-experts, emphasizing the importance of investing in compatible, future-proof tools now.
How do I maintain my appliance systems over time?
Beyond tools, developing a routine that combines visual inspections with using diagnostic equipment is best practice. Regularly checking for unusual noises, vibrations, or temperature changes can alert you to underlying problems. For example, if your AC’s compressor begins to overheat, a quick reading with an infrared thermometer can confirm the issue before it escalates. Refer to expert guides such as this comprehensive resource to refine your maintenance approach and maximize appliance longevity.
Try integrating a simple but effective step—like using a refrigerant leak detector—to your routine. This proactive approach allows early detection of leaks, potentially saving hundreds of dollars in repair costs. Remember, the investment in diagnostic tools pays off by enabling timely interventions and avoiding complete system failures.
What I Wish I Knew When I Started Fixing My Appliances
One of the biggest realizations I’ve had is that most appliance issues aren’t as complex as they seem. I once assumed that blowing warm air meant a costly refrigerant leak, but more often than not, it was just a simple thermostat setting or a clogged filter. Recognizing these small, solvable problems early saved me money and frustration. Additionally, understanding the importance of proper electrical connections taught me that many malfunctions stem from loose wires or faulty switches—something easily checked with the right tools and a careful eye. These lessons have transformed my approach from reactive to proactive, empowering me to take control of my appliance maintenance instead of relying solely on professionals.
My Top Tools for DIY Appliance Success
Over the years, I’ve curated a toolkit that makes troubleshooting straightforward. A high-quality multimeter, like the Klein Tools MM6000, helps me quickly diagnose electrical issues without guesswork. A reliable condenser coil cleaner, such as the Slim PC Coil Cleaner, keeps outdoor units running efficiently by preventing dirt buildup. For detecting refrigerant leaks, I trust the Fieldpiece LEAKTITE, which allows me to pinpoint issues safely. Investing in these tools has reduced my dependence on costly repair calls and extended the lifespan of my appliances. They are essential for anyone eager to embrace DIY fixes and keep their systems operating smoothly.
Let’s Embrace the Future of Appliance Care
Taking charge of appliance and HVAC maintenance is more accessible than ever. With smart diagnostic tools becoming more affordable, early problem detection and routine checkups are within reach for even non-experts. As these technologies evolve, I believe we will see more user-friendly interfaces that guide us through repairs step-by-step, reducing anxiety and increasing confidence. My advice? Start small—regularly replace filters, clean condenser coils, and keep an eye on electrical connections—and gradually incorporate smart tools into your routine. The future holds exciting possibilities for maintaining comfort and efficiency, and you can be part of it by staying curious and proactive.
What’s a small fix you’ve learned to do yourself that made a big difference? Share your experience below and inspire others to become their own troubleshooters!