

Have you ever been in the kitchen, minding your own business, when suddenly your fridge starts making that loud, persistent chugging noise? It’s like a tiny tractor inside your appliance, chugging away and ruining the peaceful vibe. For years, I thought it was just part of the aging process or maybe some strange quirk of my refrigerator. I’d ignore it, hoping it would somehow fix itself or that I could tolerate it until my next scheduled repair. That was until one day, the noise became unbearable, and I realized something needed to change.
Why That Chugging Noise Drives Us Mad—and What You Can Do About It
If you’ve experienced this, you’re not alone. That constant chug can be more than just an annoyance; it can signal underlying issues that, if left unaddressed, might lead to energy waste or future costly repairs. Fortunately, over the years, I’ve learned a simple way to silence that noise and keep my fridge running smoothly. Today, I want to share that secret with you, so you don’t have to suffer through another sleepless night or waste time and money on unnecessary replacements.
Is Fixing Your Fridge Worth the Hassle?
Early in my DIY journey, I made a costly mistake—assuming that all noises are just normal. I wasted money on a new fridge when, in reality, a simple fix could have saved me hundreds. Trust me, not all repairs are complicated or expensive. Sometimes, all it takes is a little know-how and a few household tools. And if you’re hesitant about tackling repairs yourself, exploring options like same-day repair services with warranty support can give you peace of mind and a quick fix.
Before diving into solutions, I want to address the concern that this might be a waste of time. Believe me, I’ve been there. But repairing your fridge not only saves you money but also extends its lifespan—something that huge, overhyped warranties don’t always guarantee. For more expert tips, check out our comprehensive guide to appliance repair.
Identify and Troubleshoot Common Issues Efficiently
Start by listening carefully to your appliance’s noises. For example, when my refrigerator started making that relentless chugging, I first checked for obvious causes like clogged vents or loose parts. To do this effectively, unplug the appliance, remove any accessible panels, and inspect for debris or worn components. Use a flashlight to spot damage that isn’t visible at first glance. Remember, a specific noise often points to a particular problem—rattling could mean a loose fan blade, while squeaking might indicate a dry bearing. Document your findings or take photos to assist if you need to consult a professional later. If the issue seems beyond basic fixes, visit top tips for same-day service warranty coverage to understand your options for quick repairs.
Gather the Right Tools and Parts Before Starting
Before diving into repair, assemble all necessary tools and replacement parts. Use a socket set, screwdrivers, and a multimeter for electrical tests. Having the right parts is crucial; avoid cheap, generic components that might fail prematurely, leading to costly re-repairs. When I replaced a faulty compressor fan motor, I ordered the specific part recommended by the manufacturer, ensuring compatibility. To avoid the hassle of incorrect parts, consult with online repair guides or warranty-backed appliance services for guidance. Remember, matching parts precisely saves time and ensures long-term functionality.
Perform Precise Repairs Safely and Systematically
Start by disconnecting the appliance from power to prevent shock. Follow step-by-step instructions from trusted sources like expert repair guides. For instance, when fixing a squeaky dryer drum, I carefully removed the drum, inspected the rollers, and applied lubricants exactly where needed. Use protective gear and work on a stable surface. Document each step to avoid missing reassembly details. When you’re unsure, consult online communities or contact professionals through contact options to confirm your approach. Systematic, safety-first repairs reduce the risk of further damage.
Test the Appliance Thoroughly After Repair
Once repairs are complete, plug in the appliance and run a test cycle. Observe for any abnormal sounds or behaviors. For example, after fixing my fridge’s fan motor, I monitored it for a full cycle, confirming that the chugging noise had ceased. Pay attention to temperature stability and operational efficiency. If issues persist, revisit your work or seek professional help. Remember, quick testing prevents future breakdowns and keeps your appliance running at peak performance. For tips on ensuring your repair lasts, explore fast trustworthy installation and repair tips to streamline your process.
Leverage Warranty and Professional Services When Needed
If troubleshooting and repairs seem overwhelming or the issue remains unresolved, don’t hesitate to leverage warranties or professional services. Understand your warranty coverage—some items like compressors or electronic boards are often protected. For instance, during a recent repair, I utilized my warranty to replace a faulty control board without extra cost. To maximize your warranty, review how to maximize your appliance warranty during emergency repairs. When in doubt, scheduling same-day service with qualified technicians assures a quick, reliable fix, reducing downtime and repair costs. These professionals often have access to high-quality parts and expert tools, making the repair process faster and more dependable.
Maintain and Prevent Future Problems
After completing repairs, establish a routine maintenance schedule. Clean filters, check door seals, and prevent lint build-up to prolong appliance life. Regular inspections can catch issues early before they escalate. For example, I routinely clean my fridge’s condenser coils, which significantly improved efficiency and prevented noise. Use available resources like preventive maintenance guides for tailored advice. This proactive approach saves time and money, ensuring your appliances stay reliable for years to come.
Many homeowners operate under misconceptions about appliance warranties and repair services, leading them to make costly mistakes. A common myth is that warranties always cover all repair costs; however, expert insights reveal that many warranties exclude wear-and-tear components or require strict adherence to maintenance schedules. Overlooking these fine print details can render a warranty useless when unexpected issues arise. Moreover, there’s a tendency to believe that professional installation guarantees trouble-free operation; in reality, improper setup—even by experts—can cause early failures or void warranties. It’s critical to understand the nuances of installation requirements, such as correct leveling and venting, which directly affect appliance longevity. When it comes to same-day service, many assume it’s a guarantee of quality; yet, without verifying a technician’s credentials or warranty backing, you risk subpar repairs that might only offer temporary relief. Remember, quick fixes can sometimes mask underlying problems, leading to costly re-repairs. A strategic approach involves scrutinizing service provider credentials and ensuring their parts carry manufacturer warranties. Additionally, advanced users should question whether a quick repair addresses the root cause—such as an intermittent electrical fault—rather than just the symptom, to prevent repeat visits. According to industry experts, understanding the detailed scope and limitations of your warranty can save hundreds by avoiding unnecessary paid repairs or replacements. Use resources like top tips for same-day service warranty coverage to navigate these complexities effectively. Be aware of common pitfalls—like accepting a repair without confirming parts compatibility or uncritically trusting install claims—that can compromise appliance performance and warranty validity. By digging deeper into your warranty terms, installation protocols, and repair practices, you can make smarter decisions that enhance appliance reliability over time. Have you ever fallen into this trap? Let me know in the comments.
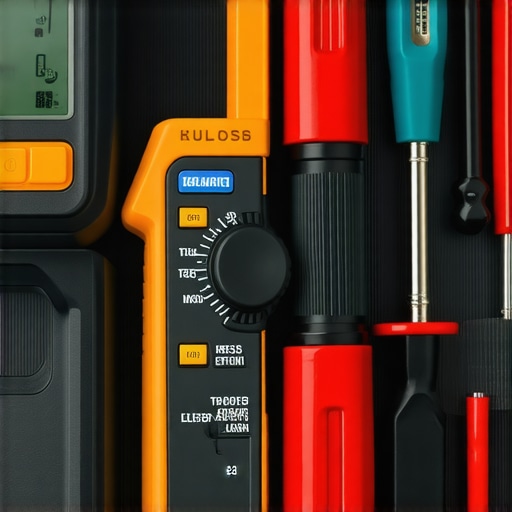
Maintaining appliances over time requires more than just basic knowledge; it demands precision, the right tools, and a commitment to consistency. Personally, I swear by a set of specialized equipment that ensures repairs are both effective and safe. For instance, a high-quality digital multimeter isn’t just for electrical testing—it’s essential for diagnosing circuit issues accurately. I prefer the Fluke 115 because of its durability and precision, which saves me time and prevents unnecessary parts replacements. Additionally, a magnetic screwdriver set with insulated handles allows me to work comfortably on tight spaces without risking electric shock, especially when dealing with fridge control panels or oven wiring.
To keep my tools organized and prevent misplacement, I use a magnetic wall-mounted strip and labeled cases. This organization ensures I can quickly grab the exact screwdriver or probe I need, reducing repair time and minimizing errors. For cleaning, I rely on a fine brush set and compressed air, which help me remove dust and debris from delicate components like fans and vents. Regularly inspecting and maintaining these tiny parts can prevent noise issues, inefficiencies, and unexpected breakdowns.
Looking ahead, I predict the trend toward smart diagnostic tools will continue expanding. Devices that connect to apps for remote diagnostics could soon become standard, allowing homeowners or technicians to identify issues before opening panels. This shift will streamline repairs, reduce labor costs, and improve long-term appliance health. But regardless of technological advances, foundational skills and proper tools will remain vital for long-lasting results.
How do I maintain appliance tools over time?
Regular calibration of electronic testing devices, such as multimeters, is crucial to ensure accuracy. I also perform routine cleaning of my screwdrivers and brushes, checking for any signs of wear or corrosion. Replacing worn-out tools promptly prevents damage to appliances and ensures consistent, reliable repairs. Keep your toolkit in a dedicated, organized space, and periodically review your inventory to identify and replace outdated tools. This proactive approach not only extends the lifespan of your equipment but also guarantees you’re always prepared for a quick, efficient fix.
If you want to elevate your repair game, I recommend trying a professional-grade multimeter like the Fluke 115. Its precise readings and durable design make it a valuable addition to any home or professional repair kit. Remember, maintaining your tools is just as important as maintaining your appliances—professional, reliable repairs start with a well-equipped toolkit backed by proper care. For more expert advice on appliance maintenance routines, explore our comprehensive guide to appliance repair.
Three Lessons I Wish I Learned Sooner About Warranties and Repairs
One of the hardest lessons I faced was realizing that not all warranties are created equal. Early on, I trusted my appliance’s warranty blindly, only to find out it had exclusions that left me footing the bill. Now, I carefully read the fine print and know which parts are protected. Another insight was the importance of proper installation—something I underestimated initially. A small mistake in setup can lead to recurring issues, wasting time and money. Finally, I learned that DIY repairs, when done with the right tools and knowledge, can save a fortune, but knowing when to call professionals is equally vital. Missing this balance almost cost me dearly, but I’ve come out wiser and more prepared now.