Ever pulled a load of laundry out of the dryer only to find your clothes still damp or feeling kind of sticky? Trust me, I’ve been there more times than I’d like to admit. One day, I was about to toss in another load, only to see that frustrating error message blinking on my dryer—”Moisture Sensor Fault.” Frustration bubbled up as I wondered, why is this happening? And more importantly, how can I fix it to get my clothes dry without wasting more time and energy?
Why Your Dryer’s Moisture Sensor Can Be a Hidden Villain
If your dryer isn’t drying clothes properly, the culprit is often the moisture sensor. This tiny component detects when your laundry is dry, telling the machine to stop. When it gets dirty or clogged, it can think your clothes are wet even when they’re dry, leading to longer drying cycles or incomplete drying. This may not seem like a big deal at first, but over time it can increase your utility bills and wear out your appliance faster. According to a study by the Department of Energy, inefficient dryer operation can raise energy costs by up to 25%, which adds up quickly. The good news? It’s usually a straightforward fix.
But before diving into cleaning, I’ll share a mistake I made early on that probably made things worse. I used abrasive cleaners on my moisture sensor, thinking it would make it shine. Instead, I scratched it, making the problem worse. Trust me, gentle is the way to go. Now, let’s get into how you can clean your moisture sensor effectively to restore your dryer’s performance and save money on energy bills.
Locate Your Dryer’s Moisture Sensor
First, unplug your dryer to ensure safety. Open the dryer door and locate the moisture sensors, typically small metal or thermistor strips positioned inside the door opening or on the lint screen housing. Take a flashlight if needed, as these components can be subtle. During my own repair, I found mine nestled behind the lint trap, hidden but accessible.
Gather Your Cleaning Supplies
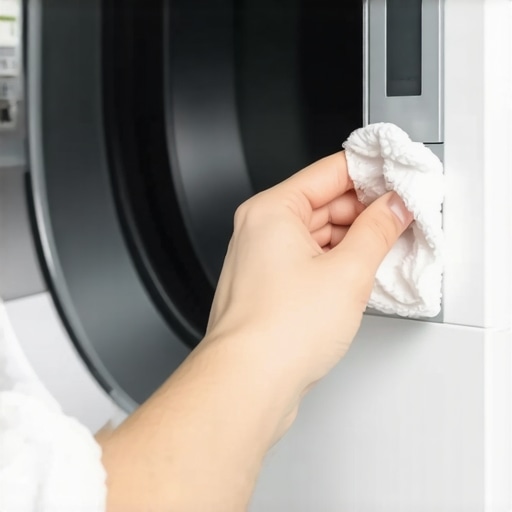
Use a soft cloth or cotton swab dipped in a mixture of warm water and a gentle, non-abrasive detergent or a vinegar solution. Avoid harsh chemicals or abrasive pads—they can scratch or damage the sensor, making things worse. I once tried using steel wool—which looked shiny—and ended up scratching the sensor, causing more errors. Remember, gentle cleaning is key.
Clean the Sensor Carefully
Moisten your cloth or cotton swab with the cleaning solution. Gently wipe the metal strips or thermistor, removing any lint, detergent residue, or fabric softener buildup. Pay close attention to edges and corners. During my experience, I used an old toothbrush with soft bristles to get into tight spaces, which effectively removed stubborn grime without scratching. This process restores the sensor’s ability to detect moisture accurately.
Check for Visible Damage
While cleaning, inspect the sensor for any signs of damage, corrosion, or disconnection. If you notice corrosion or broken wires, replacement may be necessary. In my case, a loose connector was causing false readings; reattaching it improved performance.
Reassemble and Test
Once cleaned and inspected, reconnect any disconnected parts, close the dryer door, and plug the machine back in. Run a drying cycle with a small load of towels to observe if the drying time has normalized. If the error persists, consider consulting the manufacturer’s guide or professional service. Proper sensor maintenance can prolong your dryer’s lifespan and improve energy efficiency, saving you money over time. For further tips on dryer maintenance, see this guide.
When it comes to appliance warranties and repairs, many homeowners operate under misconceptions that can cost them both time and money. Contrary to popular belief, the devil is often in the details, and understanding these nuances can make a significant difference in your maintenance approach. For instance, many think that a standard warranty covers all types of damage, but actually, most warranties exclude accidental damages or neglect-related issues. This misbelief can lead to unexpected out-of-pocket expenses when problems arise. Moreover, common myths suggest that same-day service is always a guarantee, yet scheduling depends on technician availability and parts in stock. My personal experience has shown that aggressively insisting on immediate repairs without verifying the technician’s expertise can lead to subpar outcomes. An advanced mistake homeowners frequently make is assuming that DIY fixes are cost-effective when, in reality, improper repairs can void warranties or cause further damage. According to the Consumer Reports’ research, nearly 40% of appliance breakdowns are worsened by amateur repairs. Also, many overlook the fine print in warranty agreements, which often specify specific maintenance routines or limit coverage to certain components. For example, neglecting regular cleaning and inspections can void your warranty, leading to costly repairs later. The subtlety lies in understanding that warranties typically require proof of professional maintenance, so documenting services is crucial. Additionally, thinking that installation is a simple plug-and-play task is often mistaken; improper setup can impair appliance performance and void warranties. To prevent these pitfalls, always confirm installer credentials and follow manufacturer guidelines meticulously. For advanced users, questions like ‘What are the specific conditions that void my warranty?’ are essential. These details are often buried in the fine print but can save you from costly mistakes. For example, improper electrical wiring or insufficient ventilation can lead to warranty denial. To stay ahead, read and understand your warranty policy thoroughly—many reputable sources, including manufacturer websites, provide detailed documents. Focused maintenance and clear communication with certified technicians can extend your appliance’s lifespan and ensure warranty compliance. Have you ever fallen into this trap? Let me know in the comments. For more insights on keeping your appliances in top shape, check out this guide.Maintaining your appliances efficiently requires the right tools and methods. As an experienced homeowner and DIY enthusiast, I emphasize precision and longevity when choosing equipment. One of my top recommendations is a digital multimeter, such as the Fluke 117. This device helps me quickly diagnose electrical issues—crucial for fixing everything from malfunctioning microwaves to faulty refrigerator thermostats. Its accurate readings prevent unnecessary replacements, saving time and money. Additionally, a cordless inspection camera, like the Bosch Inspections Camera, allows me to visualize hard-to-reach areas inside appliances without disassembly, reducing risk of damage. For cleaning moisture sensors or delicate components, I rely on soft-bristle brushes and microfiber cloths. I also use an ultrasonic cleaner for stubborn parts like immersion cooling components, ensuring thorough cleaning without abrasives that could cause damage. Looking ahead, I believe the integration of IoT-enabled diagnostic tools will revolutionize appliance maintenance, enabling remote troubleshooting and predictive repairs. How do I maintain appliances over time? Regularly scheduled inspections using these tools and keeping detailed logs of repairs help catch issues early, extending appliance lifespan. For example, documenting the performance of your dryer moisture sensor with a multimeter can alert you to impending failures before they cause emergency breakdowns. Remember, investing in quality tools pays off by reducing long-term repair costs and downtime. If you’re interested in elevating your repair game, try calibrating your digital multimeter after purchase—it’s more accurate and critical for precise diagnostics. For more in-depth guidance on tools and maintenance routines, check out the comprehensive article on appliance troubleshooting.
What I Wish I Knew When Starting Out
One of the most underestimated lessons I encountered was the significance of proper documentation. Keeping detailed records of maintenance and repairs is like having a roadmap; it saves time and reinforces warranty claims. I once lost a repair receipt, and when a warranty claim came up, I regret not having documented the service properly. Now, I document every service meticulously, which has proved invaluable.
Another insight was about the importance of understanding the fine print. Warranties often come with subtle limitations—exclusions that can catch you off guard. Reading these details carefully has helped me avoid unexpected costs and plan preventive maintenance accordingly.
Third, I realized that DIY fixes are tempting but can backfire if you’re not cautious. A rushed repair or using improper parts might void warranties or cause further damage. Consulting professionals when unsure has protected me from costly mistakes. Remember, knowing when to call in a pro is just as important as the repair itself.
Tools and Resources That Changed My Approach
My essential toolkit includes a high-quality digital multimeter like the Fluke 117. It provides quick, accurate readings, saving me from unnecessary replacements and pinpointing issues early. Pairing it with an ultrasonic inspection camera has transformed the way I diagnose hard-to-reach parts without disassembly, making inspections safer and more efficient.
For reading up on best practices, I rely on trusted sources like the articles available at this resource. They guide me through common challenges and preventive tips, helping extend my appliances’ lifespan. Additionally, reputable brands for tools, such as Bosch and Fluke, give me confidence that my diagnostics are reliable, leading to fewer guesswork moments and more effective repairs.
Remember, You’re Never Alone in This
Applying these insights has empowered me to take better care of my appliances and approach repairs with confidence. It’s easy to feel overwhelmed, but small, consistent efforts pay off—saving money, extending equipment life, and reducing stress. Your appliances are investments; treat them with patience and knowledge, and they’ll serve you well for years to come. Whether you’re just starting or deep into repairs, keep learning, and don’t hesitate to reach out for expert advice when needed.
Don’t you think understanding these behind-the-scenes lessons can transform your appliance maintenance routine? Share your experiences below—I love hearing how others navigate these challenges.