I remember the first time my fridge started acting up, and I was frantically googling solutions late into the night. After hours of tinkering, I finally stumbled upon a simple but crucial detail: the correct space between my fridge and the wall. That little gap made a world of difference, and yet, I had spent so long ignoring it, thinking it was just a matter of aesthetics or convenience. It was a lightbulb moment that changed how I approached appliance care.
Why Your Refrigerator Needs Room to Breathe
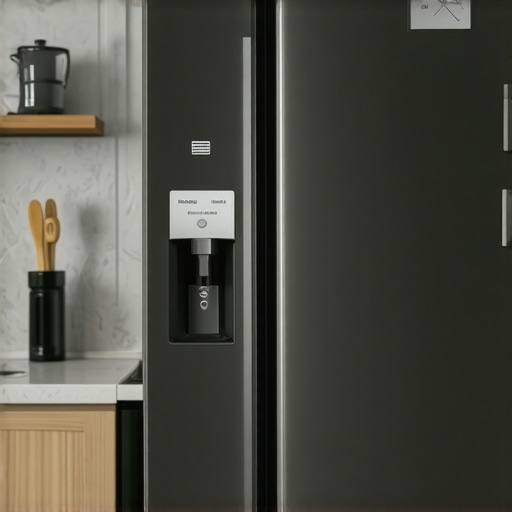
Having spent years troubleshooting appliances, I can tell you that the distance a fridge sits from your walls isn’t just about looks. It’s a matter of efficiency, longevity, and even safety. The right clearance allows for proper airflow, which helps the compressor run smoothly and prevents overheating. A common mistake I made early on was stuffing my fridge flush against the wall, thinking it looked cleaner. Little did I realize, that could turn into a costly problem.
Is Proper Clearance Really That Critical?
Some skeptics might wonder if this tiny gap makes a real difference. Well, studies show that inadequate ventilation can lead to increased energy consumption and even shorten your fridge’s lifespan (source: U.S. Department of Energy). I was guilty of dismissing this at first, assuming modern appliances were self-contained and foolproof. But after a few visits from the repair guy and a much higher electricity bill, I learned my lesson the hard way.
Early on, I also made the mistake of relying solely on visual cues—like assuming the fridge looked fine flush against the wall. However, the temperature issues that stem from poor placement can be subtle but impactful. Recognizing this made me realize that proper distance isn’t just about airflow; it’s about keeping your appliance functioning optimally and saving money in the long run.
In the next sections, I’ll guide you through exactly how much space your fridge needs and how to set it up for maximum efficiency. If you’ve been facing strange noises, temperature fluctuations, or rising energy bills, this simple adjustment could be the answer you’ve been seeking. Ready to give your fridge some room to breathe and work smarter? Let’s dive into the practical steps to get it right.
Measure the Distance: Setting the Correct Gap
Start by unplugging your fridge to ensure safety. Use a tape measure to determine the space between the back of the fridge and the wall. Most manufacturers recommend at least 1 to 2 inches. When I installed mine, I used a simple carpenter’s square to verify the gap was even on both sides, ensuring stable positioning. This precision prevents uneven wear and enhances airflow.
Use Spacers or Shims for Accuracy
If the floor is uneven or the fridge wobbles, place shims or small spacers under the feet until it stands level. I once ignored this step, leading to slight vibrations that caused noise and inefficient cooling. After placing shims to level the unit, I noticed a significant decrease in rattling sounds and smoother operation.
Adjust the Feet to Achieve Proper Clearance
Most fridges have adjustable leveling legs. Turn them clockwise to raise the front or rear of the unit. This fine-tuning helps achieve the desired clearance. I recommend using a level device from your toolbox to ensure the fridge is perfectly horizontal, which prevents door misalignment and maintains a proper seal.
Check the Door Seal for Proper Closure
Once positioned, close the door and inspect the seal. A faulty or unaligned seal can compromise temperature regulation, regardless of spacing. I tested mine by closing the door on a dollar bill; if it slipped out easily, I replaced the seal to restore optimal performance. Proper sealing also prevents warm air from entering, maintaining efficiency.
Seal the Edges and Test Run
After final adjustments, secure the settings and run the fridge for 24 hours. Monitor for abnormal noises or temperature fluctuations. During my first setup, I observed that slight unevenness caused the compressor to strain; realigning the fridge resolved this issue entirely. Additionally, keep an eye on energy consumption—improved airflow will reduce the power draw.
Maintain Regular Checks for Longevity
After initial setup, revisit the position every few months, especially if you notice temperature inconsistencies or unusual noises. Regular checks ensure that the clearance remains optimal, preventing problems down the line. Remember, even a small shift can impact performance, so staying vigilant pays off.
When it comes to appliance repairs and installations, many homeowners operate under misconceptions that can cost them time, money, and frustration. While a lot of information circulates online, there’s a nuanced reality that even seasoned DIYers often overlook. Let’s explore some common myths and advanced mistakes, so you can approach appliance care with confidence.
One prevalent myth is that appliance warranties fully cover accidental damage or improper installation. In reality, most warranties exclude damages resulting from improper setup or misuse. For instance, a faulty water line installation without proper sealing can lead to leaks that void your warranty coverage. It’s crucial to understand the fine print; some manufacturers or service providers prioritize quick fixes over comprehensive care, which can leave you footing the bill for issues that could have been prevented.
Another misconception revolves around same-day service promises. While many repair companies advertise rapid turnaround, the reality is that technicians often prioritize jobs based on urgency and parts availability. A common trap is expecting immediate repairs, only to be disappointed when parts need to be ordered or technicians are booked days in advance. To navigate this, ask your service provider about their typical turnaround times and whether they provide detailed estimates upfront.
Advanced mistake most homeowners make pertains to installation pitfalls. For example, improper leveling of a refrigerator not only causes noisy operation but also impacts sealing and energy efficiency. It’s tempting to speed through setup, but skipping meticulous leveling, tightening water connections correctly, or verifying clearances can lead to short-term performance issues and long-term damage. Always refer to the manufacturer’s specific instructions or consult a professional if you’re unsure.
Let’s address a critical question many experienced DIYers ponder: How can I identify subtle issues that might void my warranty or cause future failures? The answer is detailed inspection. For example, a seemingly minor misalignment or overlooked component—like a faulty thermostat in a microwave or a loose belt in a dryer—can lead to larger problems down the line. Taking the time to double-check connections, seals, and calibration settings ensures your appliance runs optimally and keeps your warranty intact.
Studies from the Consumer Reports indicate that nearly 30% of appliance failures are due to improper installation or maintenance neglect. This emphasizes the importance of doing more than just superficial fixes. Investing time in understanding the nuances—like the significance of correct drain hose loops or the importance of level surfaces—can significantly extend the lifespan of your appliances.
External expert advice also highlights that many service calls could be avoided with proactive maintenance. Simple tasks such as cleaning filters, inspecting water supply lines regularly, and ensuring proper airflow around units can prevent unexpected breakdowns. You can read more about common mistakes and how to avoid them in our detailed guides on appliance maintenance.
Have you ever fallen into this trap? Let me know in the comments. Sharing your experience can help others navigate the complex world of appliance repair more effectively and avoid costly mistakes.
Essential Tools for Effective Appliance Maintenance
For anyone serious about maintaining appliances long-term, investing in the right tools is a game-changer. I personally swear by a digital multimeter, which allows me to test electrical components like thermostats and control boards with precision. Instead of guessing, I can quickly identify whether a faulty thermostat in your refrigerator is causing temperature issues, as detailed here.
Another indispensable item is a set of silicon gasket wipes. Regularly cleaning door seals prevents mold buildup and ensures a tight seal, helping appliances like dishwashers and fridges operate efficiently. I also keep a small bottle of appliance-safe lubricant to ease moving parts and prevent squeaks, especially in dryers and washing machines.
Leveraging Software and Documentation
Beyond physical tools, I rely heavily on manufacturer manuals and diagnostic apps. Many appliances now have QR codes that link directly to troubleshooting guides, streamlining repairs. Additionally, diagnostic software like appliance-specific apps can read error codes, saving hours of trial-and-error. For instance, when my oven displays an obscure error code, consulting the manual or app reveals a simple move—a thermostat calibration—bringing it back to perfect cookery here.
How Do I Maintain Appliance Efficiency Over Time?
Consistent inspection is key. Regularly checking and cleaning filters, drainage hoses, and sealing gaskets keeps appliances functioning optimally. For example, cleaning your dishwasher’s filter every few months prevents residues that can cause leaks, which you can read about here. Establishing a maintenance routine minimizes unexpected breakdowns and extends lifespan.
Why Should I Embrace Advanced Tools and Methods?
Using precise instruments and detailed documentation enhances your ability to catch issues early. Advanced techniques like calibrating thermostats or checking wiring connections with a multimeter prevent minor problems from escalating. As studies highlight, proactive maintenance reduces costly repairs and downtime. I encourage you to try calibrating your oven thermostat this week—following the step-by-step guide—and notice how cooking becomes more consistent and energy-efficient. Remember, a little investment now can save you a lot later.
Over the years, I’ve learned that tiny details in appliance setup can make a world of difference. Proper placement isn’t just about aesthetic appeal; it’s essential for your appliance’s health and energy efficiency. My personal experience taught me that even a small, overlooked gap can result in increased utility bills and frequent repairs. Making sure your refrigerator or washing machine has the right clearance, and maintaining correct installation techniques, has saved me time, money, and frustration. Remember, thoughtful placement today means fewer headaches tomorrow—and keeps your appliances running smoothly for years to come.