I remember the day I nearly lost my mind trying to dry a mountain of laundry. The dryer started up just fine—the motor hummed, the drum rotated slightly, and I figured, “No big deal.” But then, nothing. The drum refused to spin fully, leaving me with damp clothes and a growing sense of frustration. Turns out, that common problem was a head-scratcher I had to troubleshoot myself, and I want to share what I learned because, honestly, it’s something many homeowners face without even realizing the fix is within reach.
The Sneaky Culprit Behind a Silent Dryer Drum
If your dryer’s motor kicks on but the drum stays still, you’re not alone. It’s a surprisingly frequent issue, and it’s often caused by a broken drive belt, a seized idler pulley, or a faulty motor pulley. When I first experienced this, I assumed the motor was dead, especially since I’d heard some odd noises before. But diagnostics revealed that the motor was functional—the belt simply wasn’t doing its job. That was a lightbulb moment for me—sometimes, the problem isn’t the engine, but what connects everything together.
Is This Problem Actually Worth Fixing?
At first, I debated whether replacing a belt or pulley was worth it, especially after hearing about more complicated repairs. But considering the cost of a new dryer versus a belt or pulley replacement, it’s often a no-brainer. Plus, it’s a manageable DIY project if you follow the right steps. Remember, many issues stem from simple wear and tear, which is totally normal and easily fixable. Just like how even a small problem in a washing machine can cause major headaches, neglecting such issues can lead to bigger, more expensive repairs down the line. And here’s something I wish I’d known when I started: periodic maintenance, like inspecting belts and pulleys, can prevent these surprises altogether. If you’re curious about other appliance hiccups, check out our guide on how to fix a wobbly washing machine.
So, if you’ve faced that unsettling moment where the motor roars but the drum stays put, don’t panic. We’re going to walk through the common causes and simple fixes that will get your dryer spinning like new. Because honestly, there’s no need to replace the entire unit when a few parts might just be the culprits.
Disconnect and Prepare Your Dryer
Before starting, unplug the dryer and move it to a well-lit workspace. Remove the lint trap and disconnect the vent hose to prevent dust and debris from entering the motor area. Carefully shift the appliance to access the back panel, and unscrew the mounting screws securing it. Use a plastic pry tool to gently detach the panel, revealing the internal components.
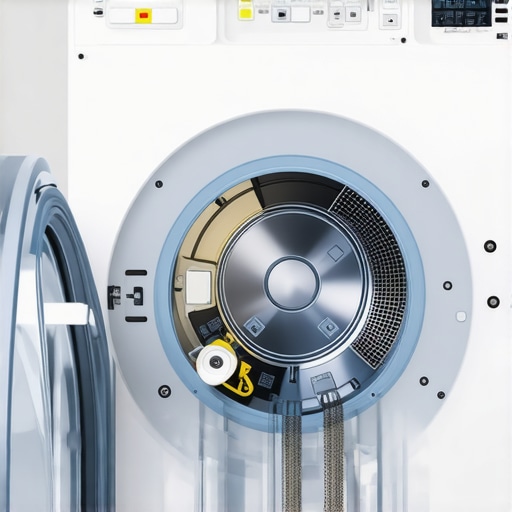
Locate the Drum and Clutch Assembly
Identify the drum, which is the large cylindrical component. The clutch assembly is mounted near the motor and pulley system, often held in place with clips or screws. In my experience, the clutch is a small component connected to the belt system; if worn out, it causes the drum to slip or not spin altogether. Visual inspection may show cracks or broken parts, confirming the need for replacement.
Remove and Replace the Clutch
Carefully disconnect any wires attached to the clutch. If a belt is involved, note its routing; take a picture if necessary. Loosen and remove the mounting screws holding the clutch. Take out the faulty part and compare it with the new replacement to ensure correct fit. Install the new clutch by reversing the removal steps, tightening screws firmly, and reconnecting any wiring.
Reassemble and Test
Reattach the back panel, secure with screws, and slide the dryer back into its position. Reconnect the power cord and vent hose. Turn on the dryer and run a short cycle to verify that the drum spins smoothly. An example from my own experience: after replacing the clutch, the dryer’s drum spun perfectly, and I avoided costly professional repairs. For more complex issues like persistent leaks, check out our guide on ice maker leaks.
Tips for Long-term Maintenance
Regularly inspect the drive belt and pulley system to catch wear early. Keep the lint filter clean and ensure the vent duct is unobstructed to prevent overheating, which can prematurely damage internal parts. If the drum continues to not spin after clutch replacement, it might indicate a faulty motor or wiring issue, requiring further diagnostics.
Many homeowners operate under misconceptions about warranty coverage, installation promises, same-day service, and appliance repair processes, often leading to disappointment and unnecessary expenses. Let’s dig deeper into what most people get wrong, dispelling myths and highlighting advanced pitfalls.
Contrary to popular belief, warranties seldom cover accidental damages or improper usage; they focus primarily on manufacturing defects. For instance, consumers frequently assume that a broken fridge compressor will be covered indefinitely, but most warranties exclude issues caused by user mishandling or neglect. To understand the fine print, consult the manufacturer’s detailed warranty policies and document your maintenance efforts to ensure coverage validity.
When it comes to installation, many assume that appliance companies guarantee perfect setup without extra costs, but installation often involves additional fees, especially for complex setups like built-in ovens or integrated dishwashers. Failing to clarify these charges upfront can lead to unexpected bills. Moreover, improper installation is a common cause of premature appliance failure, emphasizing the importance of hiring certified installers and verifying their work. For example, incorrect leveling or unsealed connections can lead to leaks or vibrations, undermining your appliance’s lifespan.
Regarding same-day service, the myth persists that repair technicians can always arrive promptly and complete repairs within hours. However, high demand, diagnostic complexity, and parts availability often cause delays. A savvy approach involves scheduling inspections ahead of peak seasons and maintaining a list of trusted, experienced service providers who prioritize quality over speed. Rushing the repair process can result in incomplete fixes or further damage, costing more in the long run.
Advanced mistakes include neglecting to recognize the nuances of warranty claim processes. Many overlook that voiding warranties can happen due to minor DIY repairs or unauthorized parts replacement. For example, installing incompatible components may void your coverage if later repairs reveal non-standard modifications. Additionally, some consumers assume that warranties automatically extend after service, but most require registration or adherence to maintenance requirements. Staying informed about these details preserves your warranty rights.
From an expert standpoint, understanding the complexities of appliance service involves recognizing that each brand and model may have unique policies. A comprehensive knowledge base, such as consulting official manuals and reputable repair guides, can prevent common pitfalls. Moreover, learning to differentiate between simple troubleshooting — like resetting a smart fridge by power cycling — and complex diagnostics can save time and money.
Have you ever fallen into this trap? Let me know in the comments. Mastering these advanced nuances ensures you make informed decisions, avoid unnecessary costs, and extend the life of your appliances.
Tools I Recommend for Reliable Appliance Maintenance
Having the right tools makes all the difference when it comes to maintaining and troubleshooting your appliances effectively. Personally, I rely on a core set of equipment that combines precision, durability, and ease of use, ensuring I can tackle most issues without calling in a repair technician. One indispensable item is a quality digital multimeter. I use a Fluke 117 because of its high accuracy and reliability, which helps me diagnose electrical faults accurately and quickly. For instance, when checking if a faulty dryer motor is receiving power or verifying continuity in a damaged wire, a dependable multimeter is essential.
Next, I recommend investing in a set of precision screwdrivers, specifically the Wiha Precision Screwdriver Set. Its ergonomic design and magnetic tips allow me to access tiny screws in tight appliance compartments effortlessly. This is particularly useful for delicate tasks like replacing a faulty thermostat or resetting internal switches. Pair this with a magnetic inspection mirror and a LED flashlight to see into obscure areas and ensure comprehensive inspection.
For more comprehensive diagnostics, I use a thermal imaging camera like the
Establishing a Maintenance Routine to Prevent Surprises
Consistent maintenance is key to extending your appliance lifespan. I suggest creating a schedule that includes checking and replacing worn belts, inspecting electrical connections, and cleaning filters. For example, regularly inspecting the ice maker gasket can prevent leaks and costly repairs. Using a gasket check tool or just a careful visual inspection periodically can catch potential failures early, saving you money and inconvenience.
Additionally, keeping detailed records of maintenance work and repairs helps you identify patterns or recurring issues, making it easier to address problems proactively. Document every replacement part used and dates of service. Over time, this habit simplifies future troubleshooting and can even support warranty claims, especially if you follow the guidelines outlined in the warranty preservation article.
The Future of Appliance Maintenance and Diagnostics
The trend points towards smarter, self-diagnosing appliances that can notify homeowners of issues before they become serious. Technology like IoT sensors and predictive analytics will soon make manual inspections less critical. However, until then, equipping yourself with solid tools and a routine maintenance plan remains your best defense against unexpected breakdowns.
Try implementing a visual inspection routine combined with a digital multimeter check this week. It’s a straightforward yet powerful way to keep your appliances humming smoothly and prevent costly failures. Remember, proactive care today ensures reliable performance tomorrow.

Secrets Only the Pros Learn About Appliance Guarantees and Repairs
One of the most eye-opening lessons I learned was that warranties often hold unexpected pitfalls. For example, I once assumed that all repairs by authorized technicians wouldn’t void my warranty, but digging deeper revealed that unauthorized DIY fixes could cancel coverage without notice. It taught me to carefully read the fine print and document every maintenance step, especially if I hoped to leverage warranty benefits later. Additionally, timing is everything: scheduling service during off-peak seasons often results in faster, more thorough repairs that save money and stress. Lastly, I discovered that many professionals are willing to share insider tips if asked—they’re not just there to fix; they’re eager to help you understand your appliance’s nuances, leading to smarter care and longer-lasting performance.
Tools I Swear By to Keep Appliances Running Smoothly
My essential toolkit includes a high-quality digital multimeter like the Fluke 117, which provides precise electrical readings—crucial when diagnosing wiring issues or motor troubles. A sturdy set of precision screwdrivers, such as the Wiha Precision Screwdriver Set, makes delicate tasks like replacing thermostats or resetting circuit boards much easier. For more detailed diagnostics, I rely on a FLIR C3 thermal imaging camera; spotting hotspots preemptively helps prevent major breakdowns. Lastly, a reliable gasket check tool or simply a visual inspection routine helps me prevent leaks before they damage the appliance or the surrounding area. These tools are investments that save me money by catching problems early and making repairs straightforward.
Take Action to Protect Your Appliance Investment
The future of appliance maintenance is becoming smarter, but until then, your proactive approach can make all the difference. Scheduling regular inspections, like keeping an eye on those ice maker gaskets, or cleaning filters can prevent costly failures. Implement a simple routine—check belts, inspect wiring, and keep vents clear—to extend your appliances’ life and avoid emergency repairs. Remember, maintaining your appliances isn’t just about fixing problems but preventing them altogether. With the right knowledge, tools, and habits, you can enjoy reliable, efficient performance for years to come. Start today, and turn appliance care into a routine that pays off in peace of mind and savings.