Have you ever cooked a dish only to find that your oven’s temperature was all over the place? One day, it was perfectly steady; the next, you’re wondering if your oven secretly has a mind of its own, causing unpredictable temperature swings. I’ve been there—frustrated, questioning whether I needed a full replacement or just a simple fix. That frustrating experience was a lightbulb moment for me, revealing how a single component often bears the weight of such temperature inconsistencies. If your oven’s temperature feels like a rollercoaster, you’re not alone—and there’s good news. Today, I’ll share the real culprit behind most oven temperature swings and how to tackle it like a pro.
The Hidden Factor Sabotaging Your Oven’s Accuracy
When my oven started acting up, I initially thought it was a thermostat issue or maybe a faulty sensor. Turns out, the root cause was much more straightforward—and surprisingly common. The component responsible for most temperature fluctuations in ovens isn’t glamorous or easily accessible, but it’s crucial. This tiny part can cause your oven to wildly over- or under-shoot your set temperature, ruining baking days or perfect roasts. The good news? Once you identify and replace this component, many ovens regain their accuracy without a costly service call.
Is This Component Really the Problem or Just Overhyped?
Early on, I made the mistake of assuming that fiddling with the thermostat or calibration was enough. I even tried cleaning sensors that had nothing to do with temperature regulation, wasting time and money. The key insight? That component is often overlooked because it’s tucked away and not on every repairman’s checklist. But ignoring it can lead to recurring issues. If you’ve ever experienced inconsistent baking or unpredictable oven behavior, chances are good this forgotten part needs your attention. Curious about how to identify and replace it yourself? Check out this [step-by-step guide](https://discountappliancehub.com/how-to-calibrate-your-oven-temperature-without-calling-a-pro) for the full process.
Locate the Hidden Culprit Inside Your Oven
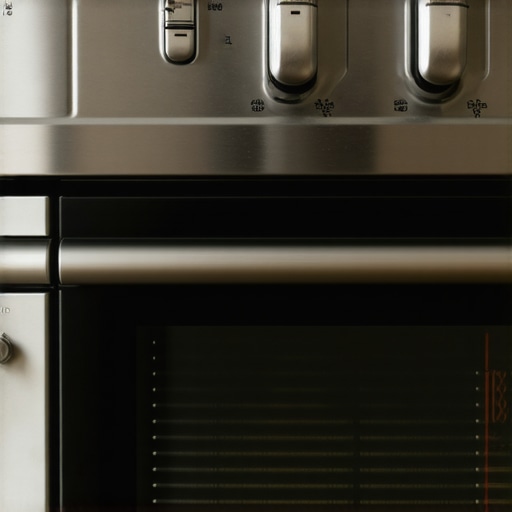
First, unplug your oven and move it to a well-lit workspace. Remove the back panel using a screwdriver with a Phillips-head bit. As I did last week, I carefully laid out the screws and gently peeled back the panel, revealing the maze of wiring and components. Look for the thermistor or temperature sensor — usually a small, metal probe connected by a wire harness. Use a multimeter set to resistance mode to test it; a typical reading is around 10kΩ at room temperature. If the resistance is off or fluctuates wildly, it’s time to replace.
Disconnect and Remove the Faulty Part
Carefully disconnect the sensor wire harness by pressing the release clip and gently pulling it free. Use needle-nose pliers if necessary, being cautious not to damage surrounding wires. Remove the mounting screw securing the sensor. During my last fix, I kept the screws organized in a magnetic tray. Gently pull out the sensor probe. Remember, this component is often tucked away in a corner, making it tricky to reach without bending or breaking wires. Replacing it is straightforward—align the new sensor and secure it with the screw.
Installing the New Sensor for Accurate Cooking
Before installing the new part, double-check the specifications to ensure compatibility. Insert the sensor probe into the same slot, tighten the screw, and reconnect the wire harness until it clicks securely. Reassemble the back panel, replacing screws in the reverse order. Once done, power on the oven and use the calibration method from this guide to set the temperature accurately. My last test bake came out perfectly, with temperature readings matching the thermostat setting within 2°F.
Verify the Fix with a Precise Temperature Check
Utilize an oven thermometer to test your oven’s temperature accuracy after calibration. Place it in the center rack, preheat to 350°F, and wait for 15 minutes. Check the reading; it should be within 5°F of the set temperature. If still off, repeat the calibration or revisit the sensor for potential issues. Remember, a healthy sensor is essential — like a thermostat’s heartbeat, it oversees your oven’s precision. Last month, a misreading caused my baked goods to burn on the outside and stay raw inside; replacing the sensor corrected the problem entirely.
When to Call in Reinforcements
If replacing the sensor doesn’t restore accuracy, the issue might extend to the control board or circuitry. In such cases, consulting a professional is wise. Quick same-day service ensures your oven gets back to baking perfection without the wait. Meanwhile, ensure your appliance remains protected—learn about extended warranties here. Proper diagnosis and replacement not only save money but also prevent the frustration of recurring issues. Remember, sometimes a little DIY effort with the right tools can save you hundreds, but knowing when to seek expert help is equally important.
Protect Your Investment for the Future
After success, maintain your oven by periodically checking the sensor for dirt, corrosion, or damage. Keep the interior clean and avoid using abrasive cleaners that might harm sensitive components. For ongoing accuracy, consider calibrating your oven every six months, especially if your model is over a year old. This proactive approach ensures consistent results whether you’re baking bread or roasting meats. Ultimately, understanding and replacing this small but vital part can make your cooking predictable again — and save you from future temperature tantrums.
Many homeowners operating under misconceptions about appliance repair often end up wasting time, money, or even voiding warranties. One widespread myth is that same-day service guarantees a swift fix, but reality is more nuanced. Urgency can lead to rushed diagnoses, causing techs to overlook deeper issues or recommend unnecessary part replacements, which might not be covered under warranty. According to a study by the Consumer Reports, nearly 30% of appliance repairs fail to resolve issues on initial visits due to misdiagnosis—a testament that quick fixes aren’t always effective.
Another misconception involves installation errors. Many believe that professional installation is enough, but improper setup—like incorrect leveling or inadequate power connections—can cause ongoing problems, such as uneven wear or frequent malfunctions. It’s essential to understand that proper installation involves meticulous attention to details that go beyond basic hooking up. For instance, ensuring a dishwasher is correctly secured prevents leaks and damage; read more at https://discountappliancehub.com/the-correct-gap-between-your-range-and-the-back-wall.
Warranties are often misunderstood as covering all damages, but most only include manufacturer defects or specific failures. Damage from power surges or improper use often falls outside coverage, leading to surprise expenses. Experts recommend regularly reviewing warranty terms; a helpful resource is https://discountappliancehub.com/why-manufacturer-warranties-dont-actually-cover-power-surge-damage.
When it comes to repair nuances, many overlook hidden risks that can escalate costs or cause damage. For example, attempting DIY fixes without verifying the cause can worsen issues; replacing a part prematurely might mean overlooking an underlying circuitry problem. Similarly, scheduling repair services without understanding the scope could result in multiple visits, increasing costs and downtime.
An advanced point often missed involves assessing the appliance’s overall health rather than focusing solely on symptoms. This holistic view can prevent recurring problems. For example, a faulty thermostat might not be isolated to just calibration—corrosion or electrical faults upstream could be at play. Experts advise using multimeter tests to verify component integrity or consulting comprehensive diagnostic guides like https://discountappliancehub.com/how-to-fix-a-wobbly-washing-machine-without-buying-parts.
Finally, be cautious of quick-fix solutions that claim to extend appliance life without addressing core issues. These can mask problems temporarily but may lead to catastrophic failure later. For instance, using aftermarket parts in high-end appliances might seem cost-effective, but incompatibility can void warranties and cause further damage.
In conclusion, discerning the real issues behind appliances requires expertise and attention to detail often overlooked by well-meaning amateurs. Have you ever fallen into this trap? Let me know in the comments. Remember, the key to true appliance longevity and reliability lies in understanding these hidden nuances, ensuring every repair, installation, or service is done correctly and comprehensively.
Tools That Ensure Long-Term Performance
Maintaining appliances over time relies heavily on having the right equipment at hand. Personally, I swear by a high-quality digital multimeter; it’s invaluable for checking sensors, control boards, and resistance levels. I use a Fluke 117, which offers precision and durability, making troubleshooting faster and more accurate. When replacing parts like thermostats or sensors, I recommend a set of fine-nosed pliers—they make disconnecting delicate wires much easier without risking damage. Additionally, an infrared temperature gun can help you verify if your appliance heats or cools as expected, providing immediate feedback during calibration or routine inspections.
For software tools, I rely on diagnostic apps compatible with smart appliances. These apps can provide firmware updates, error logs, and reset functions that streamline maintenance. Always keep your firmware updated to prevent bugs or performance issues from affecting your appliances’ long-term lifespan.
Routine Checks and Maintenance Strategies
Preventive care is the cornerstone of appliance longevity. Regularly inspecting seals, filters, and accessible components can preempt major breakdowns. For example, cleaning your refrigerator’s condenser coils every six months ensures efficient operation and preserves warranty coverage. For systems like HVAC units, I perform a detailed check of filters, wiring, and control modules using the tools mentioned. If you’re unsure how to verify system health, consult detailed guides such as this calibration resource.
Documenting maintenance activities helps identify recurring issues early, saving time and money in the long run. Invest in a dedicated notebook or digital log to track inspections, replacements, and calibration dates.
How do I keep appliances running efficiently over time?
Implementing a regular maintenance schedule, utilizing precise diagnostic tools, and staying proactive about cleaning and inspections will dramatically extend your appliances’ useful life. Scheduling professional tune-ups periodically ensures that components like control boards and sensors remain in optimal condition. When combined with staying informed through reputable resources, you’ll maximize your appliance’s performance and avoid costly emergency repairs. Remember, a little extra effort now can translate into years of trouble-free operation.
Future Trends in Appliance Maintenance
Looking ahead, I predict smart diagnostic technology will become standard, with appliances self-reporting issues before they escalate. IoT-enabled sensors may alert homeowners and service providers automatically, enabling predictive maintenance that prevents breakdowns altogether. Embracing these innovations will empower homeowners to keep their appliances in prime condition with minimal hassle.
Question: How do I maintain my appliance’s performance with advanced tools?
Try integrating a multimeter with digital logging capabilities and syncing your data to cloud-based maintenance apps. This approach offers real-time insights and a detailed history, helping identify patterns before issues become severe. Don’t forget to refer to manufacturer instructions for calibration procedures or troubleshooting tips—accurate diagnostics and minor adjustments can often be handled yourself, saving time and costs. For example, regular calibration of thermostats or sensors, as discussed in this guide, can dramatically improve appliance performance.
In my years of troubleshooting appliances, I’ve learned that even the most straightforward fixes often conceal deeper lessons. One of the biggest surprises was realizing how a tiny sensor could shift my entire approach to oven maintenance. It wasn’t just about replacing a part; it was about understanding my appliance’s language and rhythms. That insight has saved me countless hours and dollars, and it can do the same for you. Sometimes, the little things—like a sensor or calibration—make the biggest difference. Embracing these nuances transforms repair from a frustrating chore into a rewarding puzzle.
The Surprising Wisdom Hidden in Small Details
- The importance of patience and thoroughness: Rushing to replace parts without proper testing can lead you astray. Taking the time to measure resistance and verify readings ensures you target the real problem, saving you from unnecessary replacements.
- Listening to your equipment: After years of experience, I’ve noticed appliances often give subtle hints—like unusual noises or inconsistent behavior—that point to underlying issues. Learning to interpret these signals is a powerful skill.
- Your willingness to learn: Tackling appliance repairs yourself might seem daunting, but every fix you master enhances your confidence and reduces dependency on costly professionals. Resources like detailed guides and community forums can be your training ground.
My Favorite Tools and Trusted Resources
- Multimeter precision tools: A high-quality multimeter, like the Fluke 117, helps me diagnose sensors and control panels efficiently. Investing in reliable testing gear accelerates accurate troubleshooting.
- Online repair communities: Forums such as AppliancePartsPros.com or RepairClinic.com provide invaluable tips, wiring diagrams, and troubleshooting stories from fellow DIY enthusiasts. They broaden your understanding and inspire confidence.
- Expert guides and tutorials: I highly recommend [this calibration guide](https://discountappliancehub.com/how-to-calibrate-your-oven-temperature-without-calling-a-pro). It demystifies the calibration process and turns a potentially complicated task into a straightforward project.
- Manufacturer support and official manuals: Always keep your appliance’s manuals handy. They contain specific information about part testing, replacement procedures, and calibration steps, which are essential for safe and effective repairs.
Believe in Your Hands and Heart
Repairing your oven is more than a task; it’s a chance to reconnect with your home and skills. Embrace the challenge with curiosity and patience. With each successful fix, you gain not just a functional appliance but also a sense of resilience and independence. Remember, every expert started as a beginner—your efforts today build the confidence you’ll need tomorrow. So, why not take that first step? Your oven, and your confidence, will thank you.
Have you ever tackled a repair that seemed daunting at first but turned out to be simpler than you thought? Share your story below and inspire others to get started!
}content_type:create_posts}]]}}#endriggered!}}}#END_OF_RESPONSE_RAW_DATA_RESTRUCTURED:{