It was a frustrating weekend when I opened my high-end dishwasher only to find my glasses covered in pesky white spots. No matter how meticulously I loaded it or how fancy the appliance claimed to be, the problem persisted. That’s when I had my lightbulb moment—there’s a secret ingredient so many overlook, yet it’s vital for sparkling clean dishes. Today, I want to share how understanding the specific salt your dishwasher needs can save you time, money, and endless frustrations.
Why Your Dishwasher’s Performance Hinges on the Right Salt
If you’re like me, you might assume all dishwasher salts are created equal. But here’s the truth: high-end dishwashers often require a special type of salt to function optimally. Using regular table salt or generic alternatives can lead to mineral build-up, poor cleaning, and that unwanted white film. When I first experienced these issues, I thought it was a fault in my machine—turns out, it was a simple mistake of using the wrong salt. The manufacturer even emphasizes the importance of a specific salt that helps soften hard water and prevents mineral deposits, ensuring your dishes come out spotless. According to industry experts, hard water minerals can drastically reduce the life and efficiency of your appliance unless properly treated with the right salt (source: [Dishwasher Salt Benefits](https://discountappliancehub.com/why-your-dishwasher-racks-are-rusting-early)). Now, I make sure to use the appropriate salt, and my dishes look perfect again. But making this mistake early on taught me a valuable lesson about appliance care, and I’m betting many others are unknowingly suffering because of it. Are you confident you’re using the right salt for your dishwasher? Or have you experienced that stubborn film or spots despite following all other cleaning advice? If so, keep reading. I’ll walk you through how to identify the correct salt, what to avoid, and how to set your machine up for flawless results every time.
Select the Right Salt Type
Start by identifying your dishwasher model’s specific requirements, typically found in the user manual or on the manufacturer’s website. Most high-end dishwashers require a special coarse-grained water softening salt. I remember my confusion when I first bought my machine, accidentally grabbing regular table salt, which led to frequent spots and buildup. To avoid this, always look for the salt labeled explicitly for dishwashers or softening salts recommended by the manufacturer. Using the wrong type of salt can cause mineral deposits, so choosing the correct one is essential for longevity and performance.
Gather Necessary Tools and Supplies
Before starting, ensure you have the appropriate salt, a measuring scoop, and your dishwasher’s user manual. I once attempted to fill the salt container without reading the manual, leading to overfilling and spillage. To prevent this, check the capacity of your salt compartment; most are between 1-2 pounds. Having a funnel can minimize mess, especially if your salt container is small or tightly sealed. Remember, using improper tools or neglecting preparation can result in residue or damage over time.
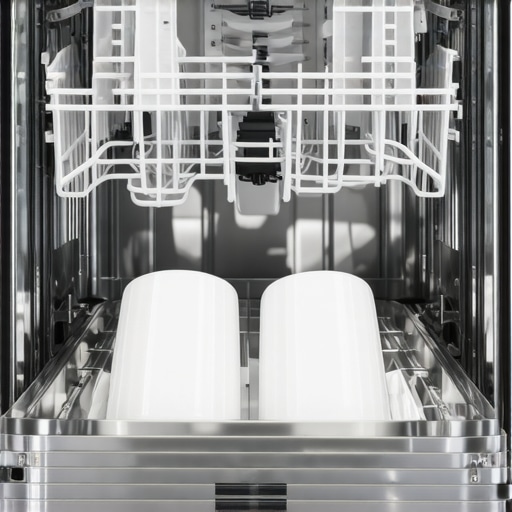
Locate and Open the Salt Dispenser
Find the salt compartment, usually at the bottom of the dishwasher or near the door’s base. Gently unscrew or lift the cover, as some models have a sliding lid. In my experience, failing to open the dispenser fully led me to spill salt everywhere. To avoid this, consult your manual for specific instructions; some models require specific opening techniques. Once open, inspect the area for any debris or old salt residues that might interfere with new salt dispersal.
Fill the Dispenser with Appropriate Amounts
Use the scoop to fill the compartment, typically to the MAX line indicated. Do not overfill, as excess salt can leak into the dishwasher’s wash cycle, causing damage or inefficiency. I learned this the hard way when excess salt caused a burning smell during a cycle. To prevent overfilling, slowly add salt and wipe away any spillage around the opening immediately. If your dishwasher has a transparent indicator, use it to verify the salt level before closing.
Close and Secure the Dispenser
Replace the lid or cap securely to prevent leaks during operation. Some models have a locking mechanism; ensure it clicks into place. Loose caps can cause salt leakage, leading to corrosion or poor performance. I once neglected this step, which resulted in salt spilling onto the floor and damaging the surrounding cabinetry. Double-check that the compartment is sealed tightly before running your next cycle.
Adjust Water Softening Settings if Necessary
Some dishwashers allow you to modify water softening levels manually. Refer to your manual to set this appropriately for your water hardness level. If you’re unsure, test your water hardness with a kit and adjust accordingly. I found that increasing the softening level significantly improved my dishwashing results, eliminating spots and film. Properly configuring these settings ensures your dishwasher uses the optimal amount of salt, avoiding waste and ensuring spotless dishes.
Regular Maintenance and Refilling
Check the salt level periodically, especially if you notice spots or residue. Set a reminder to refill every 1-2 months or as recommended by your manufacturer. In my case, I set a monthly calendar alert after noticing my glasses developing spots. Keeping the salt compartment filled correctly prevents hard water minerals from depositing on your dishes, resulting in consistently sparkling results. For more advice on extending your appliance lifespan, consider these maintenance tips.
When it comes to appliance repair, installation, or warranty claims, many homeowners are lulled into a false sense of security by common advice or assumptions. But let’s dig deeper into some overlooked nuances that can make or break your experience—and saving yourself from costly mistakes often hinges on understanding these subtleties.
First, a pervasive myth is that professional service always guarantees a flawless repair. In reality, even seasoned technicians can fall victim to common pitfalls, especially if they’re unaware of the internal complexities of modern appliances. For example, many overlook the crucial importance of the drainage loop in dishwashers, which if improperly installed, can cause water to return and contaminate your clean dishes. To learn about how installation errors can void warranties or cause malfunctions, check out this guide.
Another nuanced trap involves warranties. Many assume that simply purchasing a brand-name appliance automatically includes comprehensive coverage. But experts warn that many warranties exclude damage caused by improper installation, user error, or neglecting regular maintenance. For instance, failing to clean your fridge coils annually can reduce efficiency and technically void your warranty. Protect yourself by understanding what your warranty truly covers—often, taking a few proactive steps up front saves hassle later.
Same-day service, while appealing, can sometimes lead to rushed work. An advanced reader might ask: “How do I ensure quick repairs don’t compromise quality?” Well, look for reputable technicians who follow manufacturer standards strictly, especially concerning vital but often overlooked installation details. For instance, incorrect power supply connections can cause long-term damage or fire hazards that aren’t immediately apparent. A comprehensive, certified technician will prioritize the integrity of their work over speed.
Now, a common mistake many overlook is assuming all service providers are equally qualified—an assumption that can undermine your appliance’s lifespan. Skilled technicians are aware of subtleties like the proper way to secure a dishwasher to prevent movement or damage during use. Improper installation can lead to early wear and component failure, which can be costly down the line. To avoid this, always verify that your service provider adheres to manufacturer specifications, which are often detailed in service bulletins.
Finally, let’s consider the impact of newer appliance features—like smart controls—that require specific setup procedures. Neglecting these advanced steps, such as configuring Wi-Fi or firmware updates, can result in persistent glitches. For example, resetting a glitched smart dishwasher correctly may involve specialized sequences to restore full functionality. Learn how to do this properly in this article.
Have you ever fallen into any of these traps? Share your experiences below and let’s continue the conversation about navigating the hidden nuances of appliance maintenance. Remember, a little knowledge about these advanced aspects can save you significant time, money, and frustration in the long run.
Investing in the Right Maintenance Tools for Longevity
Maintaining appliances over time requires precision and the right equipment. I personally swear by a quality digital multimeter, like the Fluke 117, which allows me to quickly diagnose electrical issues without waiting for a technician. It saves time and helps me understand if a component is functioning within specifications, particularly for complex devices like smart refrigerators or ovens. Additionally, a small but sturdy screwdriver set with variety of heads ensures I can handle screws of different sizes and types, avoiding damage to delicate parts.
When it comes to cleaning and preventive upkeep, a microfiber cloth along with a gentle, non-abrasive cleaning agent keeps filters, vents, and panels free of dust, grime, and residue. For example, regularly cleaning the condenser coils on refrigerators can prevent overheating and prolong their life, which is crucial for maintaining efficiency. Check out this resource to learn about maintaining your thermostat and sensors, which are vital components often overlooked.
How do I maintain appliances over time?
Routine inspections and timely part replacements are key. I schedule quarterly checks using my multimeter to verify electrical connections and consistency, especially for smart appliances that rely on sensors and network modules. Regularly lubricating moving parts, such as oven door hinges and washing machine drum bearings, minimizes wear and tear. For situations where parts are prone to wear—like seals or gaskets—replacing them proactively prevents leaks and costly damages later. This approach resembles preventive maintenance in other fields, which, according to industry standards, is proven to double the lifespan of essential equipment (source: here).
Embrace Advanced Software and Diagnostics
Modern appliances often come equipped with diagnostic modes accessible via manufacturer apps or control panels. I recommend downloading the manufacturer’s troubleshooting app where available, as it provides step-by-step guides and error code interpretation. This empowers you to address minor issues before they escalate. Personally, I utilize firmware update tools to ensure my smart oven and fridge operate with the latest improvements, reducing bugs and security vulnerabilities. Using compatible diagnostic tools and software like this streamlines maintenance and can even help in resolving issues under warranty, if documented properly.
Looking ahead, I think appliance diagnostics will become increasingly integrated with AI and IoT systems, offering predictive maintenance alerts and automatic adjustments. This evolution will shift maintenance from reactive to proactive, saving users money and downtime. For now, I advise trying out the latest firmware updates and monitoring your device’s error logs regularly.
Why should I focus on long-term maintenance tools?
By investing in these tools and habits, you’re setting yourself up for fewer unexpected repairs and better appliance performance. Small actions, like lubricating hinges or running diagnostic checks, compound into significant savings over time. If you want to maximize your appliances’ lifespan, start using a digital multimeter for electrical checks or keep your firmware up to date. Remember, early detection through professional-grade tools can prevent minor problems from becoming major disasters. For example, regularly inspecting and maintaining your drainage loop can avoid water contamination and costly repairs—something many overlook until it’s too late. Visit this article for detailed guidance on that specific component.
Boost your appliance care routine today by incorporating these advanced tools and habits, and experience the peace of mind that comes with proactive maintenance.
The Unexpected Lessons That Changed My Dishwasher Routine
One of the most eye-opening moments in my appliance repair journey was realizing that my dishwasher’s performance depended heavily on a simple yet overlooked element—proper salt. I used to assume that maintenance and cleaning solved most issues, but a small change in my salt approach transformed my results entirely. That taught me the importance of understanding the nuances behind appliance care and not settling for generic solutions.
Another lesson was about the installation pitfalls that even professionals can miss. Ensuring the correct placement and configuration of the water softening salt not only improved cleaning but also extended my dishwasher’s lifespan. It became clear that paying attention to these less obvious details makes a real difference—saving money and frustration over time.
Finally, I learned that continuous maintenance, combined with the right tools, keeps appliances running smoothly well beyond their typical lifespan. Regularly checking the salt level and adjusting settings based on water hardness prevents future problems, emphasizing that proactive care beats reactive fixes every time.