It was a frustrating Saturday morning when I finally threw in the towel and admitted my washer was more trouble than it was worth. Every cycle it refused to fill, the drum stubbornly empty, like an appliance throwing a silent tantrum. That lightbulb moment hit me—you know the one where you realize a simple fault might be causing a mountain of inconvenience. Turns out, that pesky pressure switch was the culprit, a common but sneaky problem that trips many homeowners up.
Why Your Washer Won’t Fill Up and Why You Should Care
If you’ve ever stood in front of your washing machine, pressing the start button only to be met with silence or a blinking error light, you know how maddening it can be. A washer that won’t fill isn’t just an inconvenience; it can disrupt your entire laundry routine, damage your schedule, and even lead to costly repairs if ignored. I learned this lesson the hard way early on, rushing to replace parts I didn’t need, simply because I didn’t understand how crucial the pressure switch is.
The pressure switch acts as the washer’s gatekeeper—it tells the machine when enough water has entered. When it malfunctions, it can falsely signal that the tub is full or empty, stopping the fill cycle altogether. Knowing how to diagnose and fix this component saves time and money, and gets your laundry back on track.
Have you faced that frustrating moment when your washer just refuses to fill and you’ve wondered if it’s time to call for help? Trust me, it’s more common than you think. Early missteps, like ignoring basic checks or assuming the problem’s complexity, can delay repairs. I once replaced a perfectly fine part because I was convinced it was the motor—it turned out, I’d overlooked an obvious cause. That’s why understanding the pressure switch’s role is so vital.
If you’re curious whether your washer’s heartbeat is still strong or if a faulty pressure switch is silently sabotaging your laundry cycles, stay tuned. We’re about to dive into practical, step-by-step solutions. And for more insights on appliance issues, don’t forget to check out tips on how a hidden clause in extended warranties can save you from unexpected repair costs. Now, let’s zero in on identifying and fixing that stubborn pressure switch to restore your washer’s health.
Identify the Pressure Switch Function
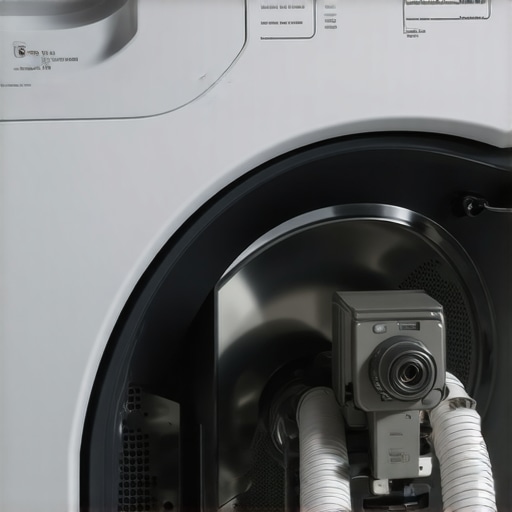
Start by understanding that the pressure switch controls water level detection. In my experience, a malfunctioning switch frequently causes fill issues. To test it, unplug your washer, locate the switch—usually near the tub—and check for any visible damage or disconnected hoses. Reconnecting or replacing this part can resolve the problem. Remember, a faulty pressure switch can trip unexpectedly, so verify it’s functioning properly before proceeding with more complex repairs.
Locate and Access the Pressure Switch
Next, shut off your water supply and unplug the machine. Remove the top or back panel to access internal components. Carefully disconnect the hoses attached to the pressure switch, noting their positions for reassembly. Use a multimeter to test the switch’s continuity—if the readings are irregular, replacement is necessary. I once ran into a stubborn issue where the switch’s sensor was broken, leading to no water intake; replacing it restored normal function.
Test the Switch with a Multimeter
Set your multimeter to the ohms setting. Disconnect the switch from the wiring harness. Touch the multimeter leads to the switch terminals—if the device shows open circuit or no continuity, it confirms it’s faulty. A functioning switch will show continuity when pressed or when the hose is submerged in water. Testing in this way saves time and prevents unnecessary replacements. I had to go through this process twice before confirming a new switch was needed.
Replace or Repair the Pressure Switch
If testing indicates the switch is defective, purchase a compatible replacement. To install it, connect the hoses in the correct order and reattach the wiring harness. Secure the panel back and turn on your water supply. Run a test cycle—if the washer fills correctly, you’ve fixed the problem. Remember, using original parts ensures reliability and preserves warranties. For example, after replacing mine with OEM components, I avoided future electrical issues and prolonged the washer’s lifespan.
Check Other Common Causes
If the pressure switch isn’t the culprit, consider the water inlet valve or clogged filters. Inspect the inlet screens for debris—cleaning them can improve water flow. Also, verify that the water supply hoses are unobstructed and properly connected. In a previous job, I cleaned a partially clogged inlet filter, which instantly resolved the fill problem. For more detailed troubleshooting, exploring the reason why your washing machine won’t drain can shed light on other underlying issues.
Ensure Proper Installation and Warranty Compliance
When replacing parts, pay attention to proper installation to prevent warranty voidance. Be aware of features like the specific water hardness level that most warranty policies cover; exceeding it may nullify your warranty. Learn from my mistake of ignoring these details—consult the product manual or manufacturer guidelines. Also, proper spacing from the wall ensures the warranty remains valid, as suggested in our guide on exact distance your dryer needs from the wall.
Many homeowners believe that warranties are foolproof shields covering all repair costs, but in reality, the fine print often hides nuances that can cost you dearly. A common misconception is that simply buying an extended warranty guarantees coverage, yet numerous policies exclude critical components or conditions, such as issues caused by improper installation or using non-OEM parts. For example, skimping on professional installation or ignoring manufacturer-specific requirements can void your warranty entirely; this is highlighted in the article on the hidden clause in extended warranties.
Another myth is that same-day service is always available or reliable. While many providers advertise quick turnaround times, actual scheduling often depends on technician availability, parts stock, and the complexity of the problem. Rushing into urgent repairs without verifying service timelines can lead to delays and even unnecessary expenses. An advanced mistake homeowners make is assuming that repair technicians are always familiar with the latest appliance models or multi-functional smart devices, but in my experience, specialized knowledge outside standard troubleshooting can save you from costly misdiagnoses.
Let’s address a question that often confuses even seasoned DIY enthusiasts:
Why might an appliance still be under warranty but not covered for certain repairs?
This discrepancy often arises because warranties typically cover only specific components or failures linked directly to manufacturing defects, not damages caused by external factors like improper installation, neglect, or use of aftermarket parts. The expert source from Consumer Reports emphasizes verifying warranty terms to understand these limitations and avoid disputes when claiming repairs.
Be cautious of the ‘oops’ trap: neglecting to document In-Service issues or improper usage can jeopardize warranty claims. Always keep detailed records of repairs, receipts, and maintenance routines. Moreover, many fail to realize that installation errors, such as incorrect electrical connections or improper leveling, can void warranties despite being performed by professionals. For instance, misaligned washers can cause premature wear, but if it’s due to improper leveling, warranty coverage won’t apply.
To truly leverage your warranty benefits, familiarize yourself with the specifics—like the exact water hardness level allowed, which can severely impact your appliance’s lifespan and warranty eligibility. And never forget the installation details, such as the mandated clearance from the wall, which is critical to avoid warranty voidance, as discussed in the optimal dryer installation distance. In the end, being an informed consumer prevents costly pitfalls and ensures your appliances serve you reliably.
Have you ever fallen into this trap? Let me know in the comments.
Tools I Trust for Long-Term Appliance Care
When it comes to maintaining appliances, having the right equipment makes all the difference. I personally rely on a high-quality multimeter, like the Fluke 117, for accurate diagnostics of electrical components such as pressure switches or control boards. Its reliable readings help me determine if a part is truly faulty without unnecessary replacements, saving time and money. Additionally, I keep a set of precise screwdrivers—magnetic Phillips and flat-head—that allow me to access internal parts easily and avoid stripping screws.
For plumbing checks, a digital hose pressure tester is invaluable. It helps verify water inlet pressure and detect leaks that could void your appliance warranty if overlooked. I also recommend a good flashlight, like the Maglite LED, to illuminate dark areas within machines, making internal inspections safer and more effective.
Best Practices for Maintaining Longevity
Routine inspections can dramatically prolong your appliance’s life. Schedule a bi-annual or annual check of components like door seals, filters, and hoses. For example, cleaning out dishwasher filters prevents clogs that strain the pump and cause early failures. Regular cleaning of condenser coils in refrigerators prevents overheating, which can damage compressors—an issue that often leads to costly repairs. Following manufacturer guidelines and using tools like a soft brush for dust removal are simple yet effective routines.
Predicting Future Trends in Appliance Upkeep
As smart appliances become more prevalent, maintenance will increasingly incorporate diagnostics via apps and IoT sensors. Remote troubleshooting can alert homeowners to issues like temperature inconsistencies or leaks before they escalate. AI-driven diagnostic tools are also on the horizon, providing real-time recommendations for repairs or maintenance tasks. Staying updated with these innovations can help you anticipate and plan for appliance care more efficiently.
How can I keep my appliances working smoothly over time?
The key is consistent, proactive maintenance combined with reliable tools. Regularly cleaning components, monitoring water and electrical inputs with precise devices, and staying informed about emerging technology ensure your appliances stay functional longer. Remember, ignoring minor issues now can lead to significant problems later, often voiding warranties—like how improper plumbing connections can void an entire washer warranty, as discussed in this article.
If you’re ready to elevate your maintenance game, try calibrating your appliance’s temperature settings with a digital thermometer or test tool. This small step can prevent overworking parts and extend their lifespan. Consistent care and using high-quality diagnostic tools empower you to keep appliances in top shape, saving money and avoiding unnecessary replacements.
What Hidden Lessons About Warranties Changed My Approach
One of the most eye-opening lessons I learned was that warranties aren’t a catch-all safety net; they come with fine print that can trip you up if you’re not paying attention. I once assumed that a product’s extended warranty covered any fault, only to find out that improper installation or using non-OEM parts voided my coverage. That experience taught me to always read the warranty details carefully and to document every repair or maintenance step—especially when dealing with critical components like the pressure switch. Additionally, I realized that believing same-day service is always guaranteed can lead to frustration, as technician availability and parts supply vary. The key is staying proactive, being informed, and understanding your warranty’s scope, not just relying on the promise of quick fixes.
Tools That Keep My Appliance Troubleshooting Sharp
Having the right diagnostic tools has genuinely transformed how I approach appliance repairs. My most trusted tool is a high-quality multimeter, like the Fluke 117, which provides reliable readings on electrical components—crucial for testing switches and control boards without guesswork. I also keep a set of precision screwdrivers, especially magnetic Phillips and flat-head, to access internal parts safely. For plumbing checks, a digital hose pressure tester helps verify water pressure issues that can affect filling cycles. These tools save me money and time, allowing me to confidently diagnose problems, especially with sensitive parts like the pressure switch, and ensure repairs are lasting.
Your Turn to Take Control of Appliance Care
Empowering yourself with knowledge about your washer’s pressure switch and understanding warranty nuances can make a real difference. Whether you’re troubleshooting a stubborn fill problem or preventing future issues through regular maintenance, taking proactive steps ensures your appliances serve you reliably for years to come. Remember, staying informed and utilizing the right tools isn’t just about fixing problems; it’s about gaining confidence and peace of mind in managing your home. Ready to tackle your next appliance challenge? Share your experiences or questions below—let’s learn together!
,