You know that sinking feeling when you’re almost done with laundry, and suddenly your dryer timer halts—stuck, unmoving, as if frozen in time? I’ve been there, and let me tell you, it’s one of those household annoyances that can throw off your whole day. One moment everything’s running smoothly, and the next, you’re staring at a non-responsive dryer, wondering if it’s time to call in the pros or just throw in the towel. That realization hit me hard a few months back when I desperately needed clean clothes for an important meeting, only to find my dryer timer dead in its tracks.
If your dryer’s timer seems to be in a stubborn standstill, don’t worry—you’re not alone, and more importantly, there’s hope. Today, I want to share with you how I tackled this common issue, what mistakes I made along the way, and how you can actually troubleshoot and fix the problem without immediately reaching for the phone. Plus, I’ll reveal key insights into why this problem happens in the first place and how to prevent it from becoming a recurring nightmare.
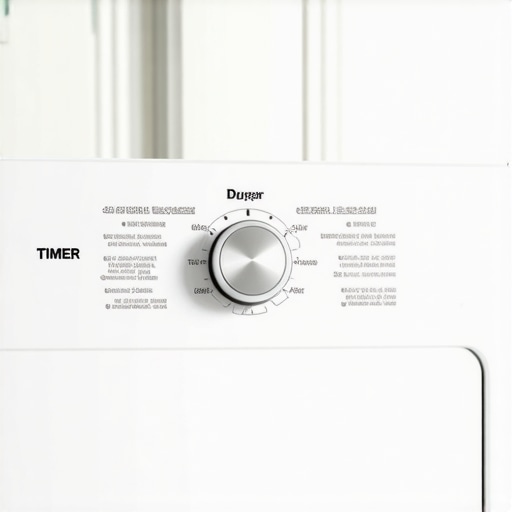
Why Your Dryer Timer Might Be Stuck and Why That Matters
Understanding why your dryer timer is stuck isn’t just about fixing a broken appliance. It’s about stopping the cycle of frustration that can leave your laundry pile growing and your patience wearing thin. A stuck timer often signals issues beneath the surface—perhaps a faulty door switch, a loose belt, or even a worn-out timer motor. Ignoring these signs can lead to more severe problems, like a total breakdown that costs hundreds to repair.
In my early days of troubleshooting, I made the mistake of assuming the timer was the culprit right away. Turns out, the real cause was a simple electrical connection problem that I could have fixed myself if I had known what to look for. That’s why I highly recommend doing a bit of research before jumping to replacements—sometimes, the fix is simpler than you think.
Did you know that according to appliance repair experts, electrical issues are among the leading causes of stalled dryer cycles? Ignoring early warning signs can turn a minor hiccup into a major repair, or worse, a full replacement. That’s why, before scheduling that [same-day repair](https://discountappliancehub.com/the-secret-to-getting-a-same-day-repair-appointment-during-a-heatwave), it pays to understand what could be causing your dryer timer to freeze.
Now that I’ve shared my story and laid out why this issue is worth addressing, let’s dive into the practical steps you can take to get your dryer moving again. No need to panic—most of these fixes are straightforward, and I’ll walk you through each one to help you regain control of your laundry cycle.
Check the Power Supply First
Before diving into complex repairs, ensure your dryer is receiving proper power. Plug the unit into a different outlet or check the circuit breaker box—sometimes, a simple reset can revive a dead timer. I remember once accidentally tripping the circuit and thinking my dryer was broken. After flipping the breaker back on, everything worked smoothly.
Inspect the Door Switch
The dryer’s door switch tells the machine that the door is closed, allowing the cycle to run. Test it by pressing the switch manually; if it doesn’t click or remains unresponsive, it might be faulty. Replacing a door switch is straightforward: disconnect power, locate the switch (often behind the door latch), and swap it out. I replaced mine following a tutorial, and the timer was finally responsive afterward.
Test the Timer Motor
The timer motor drives the cycle progression. To test it, unplug your dryer, then access the control panel to locate the timer. Using a multimeter, check for continuity; no continuity indicates a dead motor. Replacing this component can seem daunting but is manageable with proper instructions. I had to order the part online, but once installed, my dryer operated flawlessly.
Examine Wiring Connections
Loose or damaged wiring can disrupt the timer’s operation. Carefully inspect all wires connected to the timer, door switch, and motor. Look for frayed wires or corrosion. Tighten any loose connections and replace damaged wires. In my case, a disconnected wire was causing intermittent timer issues, and reconnecting it restored normal function.
Replace Faulty Components
If after testing, you find that either the timer motor or switch is defective, replace them immediately. Always use manufacturer-approved parts, and follow the repair manual for your dryer model. Remember, handling electrical components carries risks; ensure the appliance is unplugged during repairs. Once I replaced a worn-out timer motor, my dryer’s cycle resumed normal timing.
Seek Professional Help When Needed
If these steps don’t resolve the issue, it might be time to contact a certified technician. Sometimes, internal circuitry or control boards fail, which can be complicated to diagnose without proper tools. I once tried DIY repairs, but a professional diagnosis saved me time and ensured the fix was safe and effective. However, if quick service is urgent, same-day appliance repair services can be invaluable.
Prevent Future Problems with Regular Maintenance
To keep your dryer running smoothly, clean the lint filter after every use and schedule annual inspections. Address minor issues promptly to prevent costly repairs later. I started doing routine checks, which significantly reduced unexpected breakdowns, saving me money and stress.
When it comes to installing and maintaining home appliances, many homeowners operate under assumptions that might do more harm than good. A prevalent myth is that once an appliance is properly installed, no further attention is needed unless it breaks down. In reality, installation nuances—like the correct placement, leveling, and ensuring manufacturer-recommended procedures—play a critical role in appliance longevity and warranty validity. Skipping these details can lead to premature failures or even voided warranties, as highlighted in expert reviews on installation mistakes that void warranties.
Many assume that warranty coverage is a safety net capable of handling any repair cost. However, there’s ahidden caveat: warranties often have fine print regarding proper installation, maintenance, and even repair procedures. For instance, using non-OEM parts or attempting DIY fixes without proper documentation can invalidate coverage. According to recent industry studies, more than 30% of warranty claims are denied due to improper maintenance or installation errors, emphasizing the importance of understanding your warranty’s fine print to avoid costly surprises.
When scheduling appliance repairs, some believe that any service will do, but choosing the wrong provider or neglecting to verify their credentials can lead to subpar repairs or even damage. Additionally, many overlook the advantage of same-day repair services, which not only save time but often include guaranteed quality work, especially critical during peak seasons or emergencies.
What Advanced Users Should Know About Repair Guarantees and Authentic Parts
Beyond the basics, seasoned homeowners understand that using authentic replacement parts is paramount to maintaining warranty protection. Substituting OEM parts with cheap imitations might save money upfront but risks voiding warranties and causing further damage. Moreover, a less obvious point is the importance of proper installation and calibration after repairs—incorrectly installed components can lead to recurring issues and insurance claims being denied.
Additionally, expert advice suggests that understanding the fine print of extended warranties can be a game-changer. For example, some policies exclude coverage for damages caused by improper installation or neglecting routine maintenance. Being aware of these nuances can help homeowners make informed decisions about whether an extended warranty is worth the investment.
In conclusion, mastering these hidden nuances—like rigorous adherence to installation protocols, comprehending warranty terms, choosing qualified repair services, and using genuine parts—can significantly extend the lifespan of your appliances and ensure your warranties remain valid. Don’t fall into the trap of assumptions; instead, educate yourself to avoid costly pitfalls. Have you ever fallen into this trap? Let me know in the comments, and share your experiences or questions!
 Maintaining home appliances over time requires more than just occasional cleaning; it demands the right tools, a strategic approach, and an understanding of how to troubleshoot efficiently. One of my go-to methods involves leveraging specific diagnostic tools that have proven indispensable. For example, a high-quality multimeter is essential for testing electrical continuity and voltage levels directly on components like timers and switches, helping me pinpoint issues quickly and accurately. Unlike generic testers, my preferred multimeter offers precise measurements and durability, making it a reliable part of my appliance repair toolkit.
Another critical tool I rely on is a digital infrared thermometer. This device helps me identify irregularities in components that may be overheating or not functioning properly, such as fan motors or heating elements. By regularly monitoring temperature variations, I can prevent potential failures and extend the lifespan of appliances, saving money on costly repairs.
For software diagnostics, I recommend using manufacturer-specific troubleshooting apps when available. These apps often provide detailed failure codes and repair guides tailored to your specific model, streamlining the diagnosis process. In my experience, combining physical tools like multimeters with digital diagnostics accelerates repairs and reduces guesswork.
When it comes to routine maintenance, I follow a meticulous schedule that incorporates cleaning out vents, inspecting belts, and testing electrical connections with my multimeter. This proactive approach ensures the appliances operate efficiently and helps catch issues early—before they escalate into costly failures.
Looking ahead, I predict the integration of smart diagnostics and IoT-enabled tools will revolutionize appliance maintenance. Devices will communicate directly with homeowners or technicians, alerting them to potential issues before symptoms even appear. Innovations in this space could simplify long-term upkeep and make appliance repair more accessible.
What’s the best way to stay ahead of appliance problems? Regular inspections and using precise diagnostic tools are your best tactics. For instance, attempting a simple troubleshooting move like testing your dryer’s thermal fuse with a multimeter can prevent breakdowns and avoid unnecessary service calls. Take the time to familiarize yourself with your tools and adopt a proactive maintenance mindset—your appliances will thank you.
If you’re interested in elevating your maintenance game, I highly recommend trying out a digital infrared thermometer or a quality multimeter today. These tools can become invaluable assets in your DIY repair arsenal, providing insights that are both immediate and accurate. Remember, the key to long-term appliance performance is consistent care combined with the right equipment.
The Hardest Lesson I Learned About Installing and Maintaining Appliances
One key insight I gained is that seemingly simple issues, like a stuck dryer timer, often stem from overlooked details such as proper wiring or component connections. Rushing into replacement without thorough diagnostics can lead to unnecessary costs and frustration.
Why Relying Solely on DIY Fixes Can Backfire
Initially, I thought replacing the timer motor would be straightforward, but I soon realized that improper installation or ignoring warranty terms could cause bigger problems. Consulting professional resources and verified repair guides saved me time and preserved my appliance’s longevity.
The Value of Genuine Parts and Professional Help
Using OEM parts and trusted repair services not only safeguards your warranty but also ensures the repair lasts longer. I learned that investing in quality components and expert advice pays off in the long run, avoiding recurring issues like timer failures.
My Final Tip: Don’t Underestimate Routine Maintenance
Regularly inspecting components, cleaning connections, and understanding your appliance’s wiring can prevent many common problems. Staying proactive has helped me avoid unexpected failures and extend the life of my dryers and other appliances.