I vividly remember the sinking feeling when I went to do laundry last Saturday and found my washing machine stubbornly refusing to drain. The suds and water just sat there, mocking me as I scrambled for a solution. It’s one of those household moments that make you realize how much you rely on these appliances—until they break down.
Don’t Let a Little Penny Cause Big Laundry Hassles
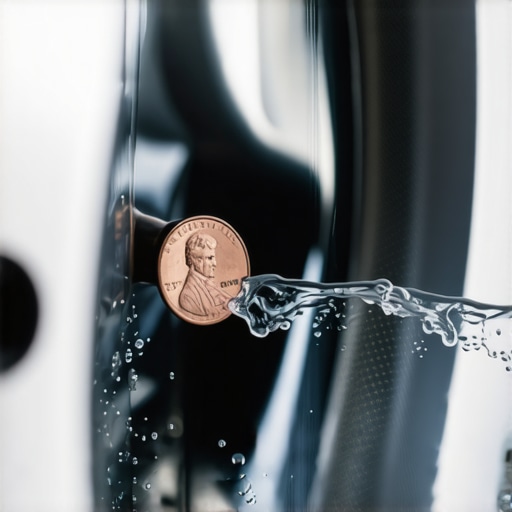
Sometimes, the culprit behind a washer that won’t drain isn’t a complex mechanical failure. It’s something tiny, almost comical—like a penny, or any small object, stuck right in the pump. That small coin, which I mistakenly thought was harmless, can clog the pump and block the water’s escape route. Before you call in the pros or start panicking about costly repairs, it’s worth knowing that a simple penny could be the sneaky villain.
Is a Penny-Sized Obstacle Really That Big of a Deal?
Early in my DIY adventure, I made the mistake of assuming that only major parts could cause drainage issues. It wasn’t until I opened up my machine andfished out that stubborn penny that I realized how something so tiny could cause such a big headache. According to appliance repair experts, debris or foreign objects like coins are among the most common causes of clogged pumps. And yes, this little piece of metal can be the villain behind your washing machine’s refusal to drain.
Have you experienced this frustrating drain problem with your washer? If so, I’m here to tell you that it’s often easier to fix than you think. In the sections ahead, I’ll guide you through identifying whether a penny or similar object is causing the blockage—and most importantly, how to safely clear it out without risking further damage.
But first, let’s discuss why addressing this issue promptly can save you time, money, and that sinking feeling of helplessness when your laundry pile continues to grow.
Disconnect Power and Prepare Your Workspace
Before diving into repair, unplug your washing machine to prevent electrical shock. Move the unit away from the wall to access the back panel easily. Gather necessary tools: a screwdriver, gloves, a container for water, and a cloth for spills. Remember, safety first—if you’re unsure, consult a professional.
Access the Pump Assembly
Remove the front or rear panel of your washer, depending on your model. Usually, screws hold the panel in place. Carefully unscrew and set aside. Tip: Keep track of all screws and parts to avoid confusion during reassembly. Locate the pump; it’s typically a small, round, or rectangular component connected to hoses. For detailed steps tailored to your model, visit our guide on how to identify pump failure signs.
Identify the Obstruction
Check the pump inlet and impeller for debris or foreign objects. If you’ve experienced flooded washes, there’s a high chance a small item like a penny is lodged inside. Use gloves and a flashlight to inspect thoroughly. Remember, coins can spin at high speeds, causing damage if not removed carefully.
Remove the Obstruction Safely
Loosen the clamp or screws securing the pump disassembly. Gently pull out the pump, watching for water drips. Extract any foreign objects, especially coins or lint build-up. If a penny is stuck, wiggle it cautiously to avoid damaging the impeller blades. For detailed instructions, consider reading about how small parts cause flooding.
Clean and Reassemble
Wipe the pump and surrounding area. Clear any residual debris in hoses and check for cracks or damage. Reattach the pump securely, ensuring clamps and screws are tight to prevent leaks. Replace the panel and screw everything back in place. Reconnect power and run a test cycle to confirm proper drainage.
Prevent Future Obstructions
After fixing the drain issue, inspect your pockets before laundry to avoid object ingestion. Use a lint trap or drain filter to catch coins or debris. Regular maintenance can prevent recurring blockages and extend the life of your appliance. If problems persist, consult a professional or visit our article on warranty coverage tips for repairs.
#IMAGE_PLACEHOLDER_B#}]}#imagePrompt=Close-up of a disassembled washing machine pump revealing debris and coins inside.&imageTitle=Disassembled washing machine pump with debris and coins&imageAlt=Close-up image showing the inside of a washing machine pump with debris and coins for obstruction removal.,While many homeowners assume that scheduling same-day appliance repair or installation guarantees swift and reliable service, the reality is far more complex. A common misconception is that all service providers offer uniform quality and transparency, but behind the scenes, nuanced factors significantly impact your experience and warranty protections.
One overlooked detail is how some companies prioritize quick scheduling over thorough diagnostics. Rushing to meet your urgent need can lead technicians to overlook subtle issues, which might void your warranty or cause future breakdowns. For example, insufficient attention to installation specifics—like proper drain hose positioning or secure electrical connections—can result in premature appliance failure. Make sure your installer follows the manufacturer’s recommended procedures; for instance, improper dishwasher drain hose loops could lead to leaks and warranty rejection.
Additionally, many consumers underestimate the importance of verifying whether your service provider uses genuine OEM parts. Utilizing generic or substandard replacement parts might void your warranty entirely, especially if the issue recurs. This is why experts strongly recommend confirming part authenticity and understanding the warranty’s fine print. For detailed insights on protecting your warranty during routine repairs, check out [how to protect your warranty during a kitchen remodel](https://discountappliancehub.com/how-to-protect-your-warranty-during-a-kitchen-remodel).
Another subtle trap involves the use of surge protectors during installation. Despite the common belief that surge protection is optional, most appliance warranties explicitly require the use of specialized surge protectors—particularly for smart devices or sensitive components. Ignoring this requirement can make your warranty null if power surges cause damage. Learn more about why most appliance warranties require surge protection at [does your installer use a surge protector?](https://discountappliancehub.com/does-your-installer-use-a-surge-protector-why-most-appliance-warranties-require-it).
From an advanced perspective, understanding how water pressure and electrical wiring influence warranty coverage can be game-changing. For example, inconsistent water pressure may cause defective dishwashers to fail prematurely, yet many overlook this detail, leading to warranty denial. Experts recommend testing your household water pressure regularly—ideally above 20 psi—and adjusting pressure regulators if necessary. For comprehensive tips, visit [the specific water pressure fault that kills your dishwasher warranty](https://discountappliancehub.com/the-specific-water-pressure-fault-that-kills-your-dishwasher-warranty).
Finally, being aware of the installation’s impact on the appliance’s smart features is crucial. Advanced smart appliances depend heavily on proper setup, including network configuration and app compatibility. If overlooked, this can cause issues that are falsely attributed to hardware failure, affecting warranty claims. For instance, improper Wi-Fi setup can make your appliance seem unresponsive and void warranty coverage if deemed user error.
In summary, while same-day service and warranties promise convenience, the nuance lies in due diligence, proper installation practices, genuine parts use, and understanding specific warranty conditions. Always question whether your service provider accounts for these critical details—they could determine whether your appliance is truly protected.
Have you ever fallen into this trap? Let me know in the comments. Understanding these nuances can save you time and money, ensuring your appliances run smoothly and your warranty remains intact.
How do I keep my appliances running smoothly over time?
Maintaining appliance performance requires more than just periodic cleaning; it involves adopting precise tools, routines, and routines tailored to each device’s needs. Personally, I recommend investing in a digital multimeter for electrical diagnostics. It allows me to quickly verify power supply issues or faulty components without unnecessary disassembly, saving both time and money. For example, a multimeter helps confirm if a suspect component like a heating element or motor is functioning properly before deciding on repairs or replacements. Additionally, a lithium grease applicator is invaluable for lubricating moving parts, reducing wear, and extending lifespan. I use a high-temperature, food-grade lubricant for dishwasher and oven hinges, which prevents squeaking and corrosion over time. For routine cleaning, I rely on microfiber cloths and gentle, appliance-specific cleaning solutions, avoiding harsh chemicals that can damage seals or electronic parts. To identify potential problems early, I follow a regular visual inspection routine—checking hoses for cracks, seals for leaks, and electrical connections for corrosion. Integrating these practices helps prevent small issues from escalating into costly repairs and minimizes downtime. In the future, I predict that smart diagnostics will become more integrated into home appliances, providing real-time alerts to homeowners and technicians, further simplifying maintenance. Leveraging these advancements alongside traditional tools can optimize long-term appliance health.
What’s the best way to stay on top of appliance upkeep?
One highly effective method is establishing a scheduled maintenance checklist tailored to each appliance’s usage cycles and manufacturer recommendations. For instance, I schedule quarterly descaling for my coffee maker and annual deep-cleaning for the refrigerator coils, which proactively prevents performance issues. Utilizing professional-grade diagnostic software, like the ones used by certified technicians, can identify minor irregularities early. While many of these tools are proprietary, some offers have consumer versions or compatible devices that interface with your smartphone, allowing for easy, ongoing monitoring. Remember, using genuine OEM parts during repairs aligns with the warranty requirements and ensures compatibility. I highly recommend checking out the article on appliance care for detailed maintenance routines. To keep your appliances operating at peak efficiency, consider scheduling visits from a qualified technician annually, especially for complex systems like HVAC units or water heaters. This preventative approach not only extends lifespan but also uncovers issues before they cause major disruptions. always verify that service providers use surge protectors during installations, as neglecting this step can void your warranty and lead to costly damage over time, as explained in this guide on surge protection. As appliance features become increasingly sophisticated, understanding and utilizing advanced diagnostic tools and routine checks will remain essential to preserving their long-term reliability. Take the time to develop a maintenance routine now—your appliances and your peace of mind will thank you.
The Hidden Lessons That Changed My Approach to Appliance Troubleshooting
One of the most eye-opening realizations I encountered was how small oversights, like neglecting to check if a service provider used genuine parts, could void a warranty and lead to costly repairs. It taught me the importance of digging deeper beyond surface assurances—trusting but verifying. Additionally, I learned that rushing into same-day service without understanding the technician’s process can sometimes do more harm than good; patience and asking the right questions often save time in the long run. Lastly, I discovered that simple preventive measures—such as routinely inspecting water pressure or ensuring proper appliance leveling—can prevent major breakdowns, saving both money and stress.
Your Essential Arsenal for Quick and Reliable Appliance Fixes
Over time, I’ve curated a toolkit that has become indispensable: a high-quality digital multimeter helps diagnose electrical issues precisely; a magnetic screwdriver ensures I don’t lose tiny screws during disassembly; microfiber cloths keep the components clean, preventing issues caused by dirt or lint; and, crucially, my trusted sources like detailed repair guides on how to protect your warranty during a kitchen remodel give me ongoing confidence. These tools and resources build a foundation for confident, safe repairs, ensuring I don’t void warranties or cause further damage.
Own Your Repair Journey: Empowerment Starts Now
Taking control over appliance repairs and understanding warranty nuances can seem daunting at first, but it’s incredibly empowering. By arming yourself with knowledge—like inspecting water pressure for dishwashers or confirming the correct installation of new appliances—you can prevent frustrations before they start. Remember, every minor effort today is an investment in your home’s reliability tomorrow. Don’t be afraid to ask questions, do a bit of homework, or even learn a new troubleshooting skill; these small acts can make a world of difference in ensuring your appliances serve you well for years to come. Your future self will thank you for taking that first step toward greater confidence in home maintenance.