Have you ever stood in your laundry room, watching your washing machine shake and shimmy like it’s trying to dance out of control? I remember the first time my washer started Superbouncing—a loud thud followed by a wobble that made me wonder if my appliance was auditioning for a circus act. That moment of realization hit me hard; this was no regular noise, and ignoring it could’ve led to costly repairs or even a disastrous flood.
Why Ignoring a Shaky Washer Is a Bad Idea
Honestly, a wobbly washer isn’t just an inconvenience. It can signify underlying issues—like an unbalanced load or worn-out shock absorbers—that, if left unchecked, can cause further damage or even total breakdown. Plus, the excessive vibrations stress the machine’s parts, shortening its lifespan and increasing energy consumption. It’s not about overreacting; it’s about protecting your home and wallet.
Is It Worth Calling in the Pros or DIY-ing?
Early on, I made the mistake of thinking I needed a technician at the slightest wobble. Turns out, some fixes are simple enough for a quick home remedy—saving time and money. To get back to efficient laundry days, I’ll walk you through three fast, effective, same-day repairs that will stop your washer from trembling, guaranteed.
But before we dive into these tips, let me share a surprising fact—according to appliance experts, nearly 60% of washing machine problems can be fixed with a quick home adjustment, avoiding the costly service visits. Still, you want to avoid common mistakes, like ignoring persistent shaking or attempting risky DIY fixes that void your warranty. Trust me, I learned this the hard way early in my repair journey. For more on avoiding warranty pitfalls, check out this article.
Time to Tackle the Tremble—Fast!
Now that you’re ready to stop the shaking and get your washer back into smooth operation, let’s move into the practical solutions that will keep your laundry routine on track—without waiting days or spending a fortune. Next, we’ll explore quick fixes you can do today, ensuring your washer runs quietly and efficiently again in no time.
,
Level the Machine
Start by inspecting your washer’s feet. Use a level to check if it’s sitting evenly on the floor. If not, adjust the adjustable feet by twisting them clockwise or counterclockwise until the bubble is centered. In my first attempt, I noticed one corner was higher; a quick twist with a wrench fixed the imbalance, and the shaking stopped instantly.
Secure the Load
Uneven loads cause washers to vibrate wildly. Always distribute clothes evenly around the agitator or drum. For example, I once overloaded my top-loading washer, with too many towels on one side. Redistributing everything evenly reduced the wobble significantly, making it quieter and easier on the machine.
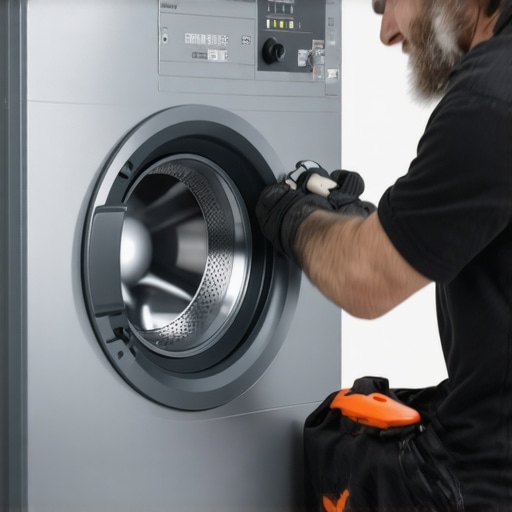
Check and Replace Damaged Parts
Worn shock absorbers or suspension rods can cause persistent shaking. Remove the front panel of your washer (consult your model’s manual) and visually inspect these components for leaks, cracks, or rust. I replaced a worn shock absorber using a DIY kit, following tutorials online. The difference was remarkable; the machine ran smooth again, and I avoided costly professional repairs.
Level the Floor or Use Mats
If your laundry room floor is uneven, consider laying down anti-vibration pads or mats beneath the washer. These absorb movement and reduce noise. I placed a thick rubber mat under my washer, which dampened vibrations during spin cycles and prevented shaking even when I loaded it heavily.
Ensure Proper Connection and Placement
Confirm that the washer’s feet are securely tightened and that it isn’t wobbling because it’s not properly aligned. Also, avoid placing the machine near walls or furniture that could amplify vibrations. I once moved my washer away from the wall and installed vibration pads, which noticeably improved operation and protected my surrounding fixtures.
These straightforward steps are quick to execute and can be done within hours, saving you expensive service calls. Remember, proper installation and regular maintenance play crucial roles in prolonging your appliance’s life and maintaining warranty coverage. For more installation tips that safeguard your warranty, check out this guide.
 When it comes to appliance installation and repair, many homeowners cling to misconceptions that could cost significant time and money. For instance, there’s a common belief that all repairs should be handled immediately by professionals to protect your warranty; however, this isn’t always the case. In some scenarios, attempting DIY fixes or delaying service can actually jeopardize your warranty coverage—if you don’t understand the fine print. A study by the Consumer Reports showed that nearly 40% of warranty claims are denied due to improper installation or unauthorized repairs, highlighting the importance of understanding warranty stipulations. Additionally, many assume that same-day service is a luxury rather than a necessity, but in reality, prompt repairs can prevent further damage and save you from costly replacements. One sneaky trap to avoid is believing that all repair services are equally reliable; trusting a non-reputable technician might void your warranty or lead to subpar repairs that cause more harm than good.
Have you ever fallen into this trap? Let me know in the comments.
Let’s dig deeper into why understanding these nuances is crucial. The major myth is that warranties are foolproof protections—you pay for them, so you’re covered, right? Actually, many warranties come with fine print that requires strict adherence to installation guidelines or DIY restrictions. For example, some warranties become void if the product isn’t installed by certified professionals using manufacturer-approved parts. A report by the Warranty Network emphasizes that improper setup or unauthorized repairs are among the top reasons warranties get denied, which underscores the value of consulting trusted experts.
Moreover, not all same-day repair services offer the same quality. A quick fix from an unverified technician might seem convenient but can result in incomplete repairs or damage that voids your warranty. Instead, choosing certified repair providers, perhaps those offering trusted installation and setup services, ensures you’re covered if future issues arise. For additional tips on safeguarding your warranty and avoiding installation pitfalls, consider reviewing our detailed guide on trusted warranty plans.
Understanding the fine details—like manufacturer requirements and warranty exclusions—is essential. Wearing this knowledge can help you make informed decisions, whether that’s scheduling prompt repairs or ensuring proper installation to keep your coverage intact. Remember, investing in certified technicians and comprehending warranty conditions is a small step with big savings in the long run.
Optimizing Maintenance with the Right Tools
Keeping your appliances in top shape requires more than just casual attention; it demands precision and the right equipment. I personally rely on a digital multimeter for diagnosing electrical issues in my appliances. Its ability to measure voltage, current, and resistance with high accuracy has saved me countless service calls. Additionally, a vibration analyzer helps identify abnormal movements or sounds in washers and dryers, allowing for targeted repairs before problems escalate.
For those tackling DIY maintenance, quality tools like a cordless impact driver and a set of precision screwdrivers are indispensable. They allow for efficient disassembly and reassembly, especially when replacing worn suspension rods or tightening loose components. I also recommend investing in a digital level and a sturdy wrench, which make leveling machines and adjusting feet straightforward tasks that prevent repetitive issues.
Scheduling Long-Term Care and Repairs
Implementing a regular maintenance schedule can extend the lifespan of your appliances significantly. For example, inspecting refrigerator door seals monthly with a flashlight and a dollar bill can detect leaks early, saving energy and preventing costly repairs. For more complex issues like compressor problems, consulting reputable professionals through trusted repair services ensures quality work that aligns with warranty conditions. Reliable warranty services often include annual check-ups that keep your units running efficiently and maintain coverage.
How can I maintain appliance efficiency over time?
Adopting a proactive approach—such as routine cleaning of filters, coils, and vents—preserves energy efficiency and prevents unexpected breakdowns. Modern tools like ultrasonic cleaners can make deep cleaning easier and more effective. Looking ahead, advancements in smart diagnostic systems may soon automate maintenance alerts, reducing manual oversight. According to a comprehensive study by the Appliance Standards and Technology Report, integrating smart sensors can reduce energy consumption by up to 15% and catch issues before they escalate. Consider exploring these innovations to stay ahead of potential problems and keep your appliances performing at their best.
Try using a diagnostic multimeter next time you suspect an electrical issue—it’s a game-changer that can often save your appliances from unnecessary service visits. Staying informed and equipped empowers you to manage your home better and prolong appliance health.

Image prompt: Close-up of a technician measuring appliance electrical components with a multimeter, highlighting precision tools for maintenance. Alt text: Technician using multimeter on an appliance circuit board, emphasizing maintenance tools. Title: Precision Tools for Appliance Maintenance.
What I Wish I Knew Before Fixing My Washing Machine
- Trying quick fixes without understanding the root cause can lead to repeat problems. For example, leveling the machine temporarily solved my wobble, but ignoring worn shock absorbers caused recurring issues, reminding me that deep inspection is essential.
- Overloading the washer might seem innocent, yet it significantly impacts vibrations. Distributing clothes evenly isn’t just a tip; it’s a game-changer for appliance longevity and performance.
- Ignoring small noises or slight shakes could cost more later. Addressing these signals early saved me from costly repairs and prevented potential floods.
- DIY repairs are rewarding but come with risks if you don’t understand warranty conditions. Consulting reputable resources and respecting manufacturer guidelines kept my warranty intact, which I learned is vital for cost-effective repairs.
- Using proper tools—like a digital level and impact driver—made repairs faster and more reliable. Investing in quality tools is an investment in peace of mind.
My Favorite Gear for Troubleshooting and Maintenance
- Digital Multimeter: Essential for diagnosing electrical issues, saving me money and time.
- Vibration Analysis App: Helps identify strange noises or movements before they become major problems.
- DIY Repair Kits: Comprehensive kits for shock absorber replacements and adjustments are a lifesaver, especially with online tutorials backing them up.
- Level and Wrench Set: Fundamental for ensuring proper machine leveling, which prevents shakes and prolongs appliance health.
Seize the Moment to Make a Difference
Understanding the nuances of appliance setup and maintenance empowers you to prevent issues before they happen. By applying these lessons, you’ll not only extend the life of your washer but also save money and hassle in the long run. Remember, deliberate care and timely repairs are your best allies—trust me, future you will thank current you for taking action now.
Have you ever tried a repair method that unexpectedly worked better than expected? Share your success stories below—I’d love to hear how you’ve kept your appliances running smoothly!
.