It was a hectic Tuesday afternoon when I suddenly hit a wall—my kitchen was flooding, and I realized my garbage disposal was completely jammed. That moment of panic was a lightbulb moment for me. I used to think these issues were minor nuisances, easily handled by calling a plumber or waiting for scheduled repairs. But after my own mishap, I learned that many problems like this can be resolved swiftly and affordably the very same day, often without the need for professional intervention.
Why a Jammed Garbage Disposal Can Ruin Your Day—and How to Fix It Fast
Have you ever faced that moment when your garbage disposal refuses to turn on, grinds to a halt, or emits that unsettling buzzing noise? It’s not just inconvenient; it disrupts your entire kitchen hustle. In 2026, more homeowners are discovering that quick, effective repair techniques can save them time, money, and prevent further damage. Whether it’s a stubborn jam or debris buildup, knowing a few simple fixes can make all the difference.
Is Repairing Your Garbage Disposal Really Worth the Effort?
When I first encountered my jammed disposal, I was tempted to call a professional straight away—until I realized many fixes are straightforward and can be done with tools I already had at home. Early on, I made the mistake of thinking I needed to replace the entire unit when a simple reset or removal of a clog could have solved it. According to industry experts, timely DIY repairs can extend the lifespan of your appliances and help maintain their warranties without voiding them—if done correctly. So, before you reach for your phone, let’s explore how you can fix your garbage disposal today, without waiting for a technician.
Ready to get your kitchen humming smoothly again? Let’s dive into the top three same-day repair techniques.
Unclog and Clear the Jam Quickly
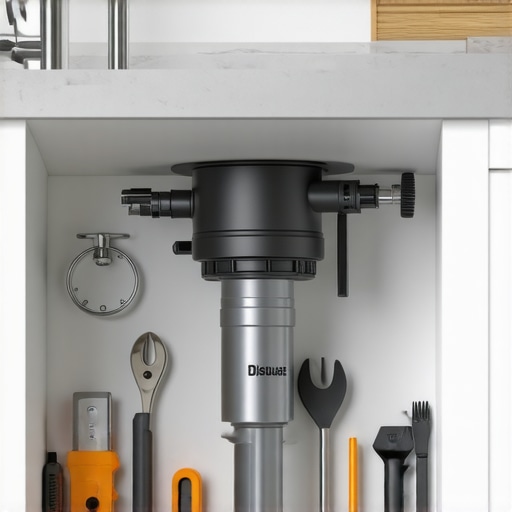
Remove any visible debris or objects lodged in the disposal using tongs or pliers—never your hands. Turn off the unit and disconnect the power. Use a flashlight to inspect inside the disposal chamber for blockages. For stubborn clogs, insert a specialty wrench into the underside of the disposal and rotate it clockwise and counterclockwise to loosen debris. Remember, a jammed disposal often triggers a reset button—press it to restore function.
Dealing with the Reset Button
Locate the reset button on the bottom or side of your unit—usually a red or black tab. After clearing obstructions, press this button firmly. Ensure the disposal is plugged in before resetting. If the button pops back out immediately, recheck for remaining obstructions or electrical issues. This simple step saved me from calling a repair technician during my first jam.
Remove and Inspect the Impellers
Sometimes, objects like utensils or bones get stuck, causing the blades to grind ineffectively. To access impellers, turn off the power and detach the unit from the mounting assembly. Use a hex wrench to rotate the impellers manually, clearing blockages. Removing debris ensures smooth operation and prevents future jams. During my last fix, I discovered a small plastic piece lodged deep—removing it restored my disposal’s grinding power instantly.
Prevent Future Jams Like a Pro
Regular maintenance is key. Avoid disposing of fibrous food scraps like celery stalks or potato peels that can tangle. Run cold water before, during, and after use to flush debris down the drain. Consider installing a mesh guard over the drain to catch larger particles. Proper setup and routine checks can extend your appliance’s lifespan and keep your kitchen running smoothly.
Installation and Installation Errors That Kill Your Warranty
If your disposal’s installation wasn’t handled correctly, it could void your warranty or cause recurring issues. Carefully follow manufacturer guidelines, and avoid common pitfalls like improper mounting or electrical wiring mistakes. For instance, incorrectly grounding your disposal can lead to electrical hazards and warranty voidance—learn more about these risks in this installation pitfalls guide. Ensuring proper setup from the start can save you time and money down the line.
When to Call a Professional
If you’ve tried these steps and your disposal remains unresponsive, or if you encounter electrical faults, it’s time to consult an expert. Do not attempt complicated repairs beyond your comfort zone, as improper handling can cause further damage or void warranties. Remember, timely professional assistance can prevent costly replacements and ensure your appliance operates safely. For professional repairs, learning how same-day appliance service can save you hundreds, especially when appliances break during busy mornings, might be advantageous. Read more about fast repair options here.While it’s common to assume that warranties and professional repairs are straightforward safeguards, the reality is far more nuanced. Many homeowners operate under misconceptions that can inadvertently undermine their protection or lead to costly mistakes. For instance, a widespread myth is that all professional installation guarantees warranty coverage. In fact, improper setup—like neglecting to follow manufacturer instructions or skipping professional inspection—can void your warranty entirely. Studies show that nearly 40% of appliance warranty issues stem from installation errors, emphasizing the importance of adhering strictly to setup guidelines.
Why Do Consumers Fail to Recognize Installation’s Impact on Warranties?
Many believe that once an appliance is installed, the warranty’s fate is sealed unless a major defect occurs later. However, installation errors often trigger warranty voidance right from the outset. Basic missteps—such as wiring faults or improper leveling—aren’t just minor oversights; they can result in immediate claim denials, forcing consumers to pay for repairs out of pocket. Professional installation, especially with certified technicians, mitigates this risk, but consumers must also ensure the installer follows all safety and setup protocols.
Another common misconception involves warranties covering all repair costs. Many assume that any repair, regardless of who performs it, is covered equally. While some extended warranties explicitly include parts and labor, others specify that only repairs performed by authorized technicians remain covered. DIY repairs or third-party service calls can unknowingly void your coverage, especially if they cause further damage or bypass manufacturer-approved procedures. This ‘trap’ underscores the importance of understanding the fine print, which often includes clause stipulations like fine print restrictions.
Advanced homeowners often overlook the critical role of regular maintenance in preserving warranty validity. Neglecting routine checks or proper cleaning can lead to premature failures and, crucially, to warranty denials if the appliance’s decline is deemed due to user mishandling. For example, neglecting to clean filters or ignoring warning signs can escalate minor issues into major repairs. Experts emphasize that proactive maintenance—such as verifying electrical connections or inspecting hoses—can prevent many failures and safeguards your warranty eligibility.
Furthermore, many don’t realize that warranties aren’t static; they come with conditions that can catch you off guard. For instance, some warranties require proof of professional installation or periodic inspections to remain valid. Missing these steps—even unintentionally—may result in losing coverage when you need it most. Following manufacturer-provided setup rules and maintaining accurate records of repairs and inspections are vital practices for ensuring ongoing warranty protection.
In essence, being aware of these nuances isn’t just about avoiding surprises; it’s about actively protecting your investment. The line between covered and voided warranty can be thin, often dictated by overlooked details or assumptions. Having the right knowledge helps you make smarter choices—whether that’s selecting a qualified installer, sticking to maintenance routines, or reading the fine print before signing extended warranty plans.
If you want to ensure your appliances stay protected without falling into these pitfalls, consider consulting expert guides on proper setup and maintenance. This proactive approach can save you a significant amount of money and frustration down the line. Remember, a little knowledge upfront can prevent major headaches later. Have you ever fallen into this trap? Let me know in the comments.
Maintaining your appliances over time requires more than just basic knowledge; it demands the right tools and a strategic approach. I personally rely on a few specialized devices that have proven invaluable in diagnosing and fixing issues efficiently. One such tool is a digital multimeter. I use mine not only to check electrical continuity but also to verify voltage levels during troubleshooting, ensuring safety and accuracy. When testing connections or diagnosing faulty wiring, a multimeter quickly pinpoints issues that would otherwise require complex disassembly or professional help.
Another essential device is a clog remover tool set, including a plumber’s snake and flexible grabs. These save me from costly service calls by allowing me to clear minor clogs in drains, which frequently cause appliance malfunctions. For example, cleaning the drain trap of my dishwasher with a drain snake prevented leaks and ensured optimal operation. Investing in quality tools saves time, money, and frustration, making DIY maintenance a viable option.
Software-wise, I recommend using diagnostic apps compatible with smart appliances. These apps can sometimes reveal error codes or fault indicators that are not immediately visible. For instance, when my smart refrigerator started acting up, an app diagnostic pointed me directly to a sensor error, saving me hours of guesswork and a potential service appointment. Staying updated with manufacturer software ensures you can leverage these tools to preempt issues before they escalate.
Looking ahead, the trend is moving toward smart diagnostic tools that integrate seamlessly with your devices, providing real-time alerts and maintenance reminders. As the IoT (Internet of Things) continues to evolve, future tools will likely offer remote diagnostics and even predictive maintenance, reducing downtime significantly. Embracing these technologies now can give you a head start in appliance care.
How do I maintain appliance tools over time?
Regular calibration and proper storage are key. Keep your multimeter batteries fresh, and store your tools in a dry, organized space to prevent damage. Cleaning tools after each use prevents contaminants from affecting future diagnostics. For software, always update your diagnostic apps to ensure compatibility and access to the latest fault codes. Based on my experience, routine maintenance of your tools not only extends their lifespan but also ensures accuracy during critical repairs.
If you’re serious about long-term appliance care, I recommend trying out a professional-grade multimeter combined with a versatile drain tool set. Quality equipment can pay for itself by enabling you to handle common issues swiftly. To learn more about avoiding installation mistakes that can void warranties, check out this comprehensive guide. Don’t wait for a breakdown—equip yourself today and stay ahead of potential problems.

Lessons from My Repair Journey That Changed How I Approach Appliances
One of the biggest insights I gained was realizing that most appliance issues, like a jammed disposal, are fixable with a little knowledge and the right tools. I used to think every malfunction required a professional, but empowering myself with DIY skills saved me time and money. I also learned that understanding warranty conditions can prevent costly mistakes during repairs, especially when considering professional installation or DIY fixes. Lastly, I discovered that routine maintenance and proactive checks can prolong appliance life and ensure warranty coverage remains intact, making me more confident to tackle problems head-on.
Equip Yourself with These Unbeatable Resources for Appliance Success
My essential tool is a digital multimeter, which helps me diagnose electrical issues quickly. I trust this guide on installation mistakes because it highlights errors that can void warranties—something I wish I had known earlier. For common clogs and drainage issues, I rely on a professional-grade drain snake, saving trips to the plumber. Lastly, I keep an updated diagnostic app linked to my smart devices, enabling me to identify faults before they become emergencies. These resources give me peace of mind and keep my appliances running smoothly.
Your Next Move Toward Confident Repair and Maintenance
Taking charge of your appliance care isn’t just about saving money; it’s about gaining confidence and control over your household. Embrace the knowledge that many repairs can be DIY with proper guidance and tools. Start small—pick up a multimeter or a drain tool—and gradually build your skills. Remember, the future holds smarter diagnostic tools and repair options that will make troubleshooting even easier. Don’t wait for a breakdown; proactive care today can prevent the headaches tomorrow. Are you ready to become the hero of your household appliance story? Let me know which repair step you plan to tackle first!