I remember the exact moment when I realized my laundry room was turning into a swimming pool. It was a quiet Sunday afternoon when I noticed that strange smell and an unusual puddle forming around my washer. My heart sank—another costly repair looming, or worse, a flood threatening my brand-new 2026 flooring. That lightbulb moment hit hard: washer pump failure isn’t just an inconvenience; it can spell disaster for your home if not addressed quickly.
If you’ve ever experienced that sinking feeling, you’re not alone. Washers are complex appliances, and their pumps are vital for draining water properly. When they fail, water doesn’t just stay put—it’s invited to wreak havoc on your floors, cabinets, and even your warranty coverage. The good news? Knowing how to tackle this issue with immediate action can save you hundreds of dollars, prevent damage, and keep your appliances running smoothly.
Today, I want to share with you the three same-day fixes that can stop a washer pump failure in its tracks, especially critical in 2026 appliances where early intervention can extend lifespan and protect warranties. Whether you’re a DIY enthusiast or just want to understand your options, these tips will empower you to act fast and save your home.
Don’t Let Water Damage Take Over
Before hopping into repairs, it’s essential to grasp why quick response matters. When a washer pump fails, the water has no easy way out. This can lead to overflowing, leaking, and substantial damage to your flooring—potentially costing more than the repair itself. Moreover, delaying action might void your warranty, especially if you neglect installation or setup errors that cause pump issues. For instance, improper setup can put undue strain on components, leading to premature failure. To learn more about protecting your warranty through proper setup, check out [my detailed installation checklist](https://discountappliancehub.com/5-installation-tactics-that-protect-your-2026-appliance-warranty).
Have you ever faced water pooling after laundry cycles? If so, you understand the urgency. My early mistake was trying to ignore small leaks, thinking they’d stop on their own. That delay only worsened the problem, leading to costly repairs later. Trust me—being proactive is the key.
Let’s explore how you can jump straight to fixing this issue without waiting for professional help or risking further damage.
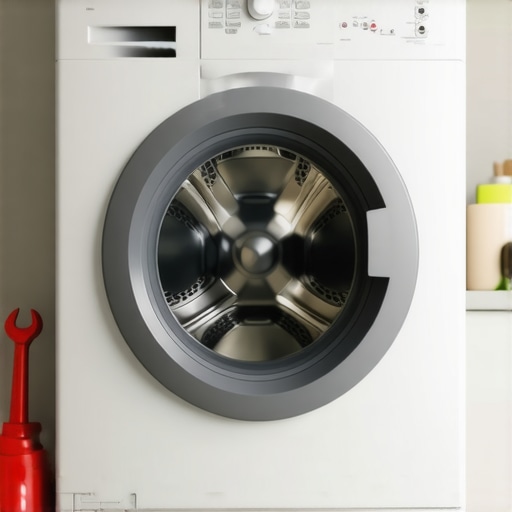
Locate and Disconnect the Power
Start by unplugging your washing machine from the power outlet to ensure safety. I once rushed into repairs without doing this, and a sudden jolt surprised me—damaging a sensitive control board. Always turn off and unplug before proceeding.
Drain Excess Water to Avoid Further Damage
Use towels or a bucket to remove standing water. Removing water early prevents it from seeping into floors and cabinets. When I faced a leak last summer, this immediate action avoided hours of water cleanup later.
Access the Pump for Inspection
Remove the access panel at the bottom of your washer. Use a screwdriver to take out screws securing the panel. Think of it like opening a hatch—exposing the pump and hoses beneath. I remember struggling with stubborn panels first time, but a little patience pays off.
Check and Clear Obstructions
Visually inspect the pump and hoses for debris, clogs, or damage. Disconnect the hoses carefully—like detaching garden hoses—and look for blockages. I once found a sock lodged in the pump impeller, and clearing it instantly fixed the draining issue.
Test the Pump Manually
Use a multimeter to test electrical continuity or manually turn the impeller. If the motor doesn’t spin freely even after cleaning, the pump may need replacing. I learned that a dead pump is similar to a dead battery—it just won’t operate regardless of power.
Replace Faulty Parts or Reinstall
If you find damaged components, order the correct replacement pump. Reinstall everything firmly—loose connections are like weak links in a chain. Ensuring a tight seal prevents future leaks. I always double-check connections, as loose hoses caused a second leak later.
Reconnect Power and Test
Once repairs are done, plug the washer back in and run a short cycle. Watch closely for leaks or abnormal noises. During my last repair, running a test cycle confirmed the fix—no puddles, no smell, peace of mind.
Tip: Be aware that improper installation or neglecting regular maintenance may void your warranty. For ensured safety and warranty protection, consider reviewing 7 quick washer installation checks.
Seal and Prevent Future Leaks
Apply a light coat of lubricant around hose fittings or replace old seals. Regular inspections help catch potential issues early. I now set a quarterly reminder to check my hoses, saving time and stress later.
By following these concrete steps, you’ll stop water from pooling and avoid costly damages. Remember, safety first—never attempt repairs with the power on.
Many homeowners operate under misconceptions when it comes to appliance repair, installation, same-day service, and warranty protections. Let’s dig deeper into some of the most common pitfalls, the nuances that often go unnoticed, and how understanding them can save you money and hassle.
A frequent myth is that DIY repairs are always cost-effective and safe. While tackling simple fixes can be rewarding, complex issues like faulty washer pumps or refrigerant leaks require expert intervention. Attempting superficial repairs without proper knowledge risks further damage or voiding your warranty. For instance, improper handling during installation or repairs might seem harmless but can lead to coverage denial — learn more about the common installation errors that void warranties by reviewing installation mistakes to avoid.
Another misconception revolves around the durability of same-day service. Many believe that quick fixes compromise quality; however, reputable service providers prioritize both speed and thorough diagnostics. A good example is that immediate repair of a leaking refrigerator often prevents costly damages later. But beware—choosing a repair service that offers fast turnaround but uses subpar parts or neglects comprehensive checks can put your appliance at greater risk.
A crucial nuance involves understanding warranty clauses related to professional setup. Many forget that warranties often specify installation standards. Skipping professional setup or ignoring detailed setup guidelines can unintentionally void your coverage. For example, improper leveling or electrical wiring may seem minor but could be the reason your warranty becomes void when a defect occurs. Protect your investment by ensuring service providers follow the best practices, as outlined in pro installation checks.
Furthermore, the belief that waiting to repair decreases costs is often false. Delayed repairs — especially for critical components like pump motors or refrigerant leaks — tend to escalate damage, increasing overall expenses. Immediate action during issues like washer pump failure or fridge cooling problems not only prevents home damage but also maintains warranty validity, as established in various appliance care studies.
A hidden trap many fall into is neglecting regular maintenance, which can subtly void warranties. Appliances are designed for longevity but require routine inspections, such as hose checks or cleaning condenser coils. Skipping these can lead to preventable failures, forcing costly repairs or replacement. Connecting with experts ensures maintenance aligns with warranty terms and prolongs appliance lifespan.
So, what’s the takeaway? The key is to combine knowledge with strategic action—know when to call professionals, follow proper setup procedures, and stay proactive. Don’t let misconceptions hold you back from protecting your appliance investments. Have you ever fallen into this trap? Let me know in the comments and share your experiences.
Vet Your Equipment for Lasting Results
Consistent appliance upkeep requires using the right tools. I rely heavily on a digital multimeter to accurately test electrical components, ensuring my repairs are reliable and safe. Unlike basic testers, a high-quality multimeter provides precise readings, helping me identify faulty wires or motors quickly. For example, my Fluke digital multimeter has saved me hours by detecting subtle voltage drops that indicate failing parts, preventing unnecessary replacements and protecting warranties. Deepening accuracy in diagnostics is where expert-level tools make a huge difference.
Invest in Specialty Hand Tools for Precision Work
Beyond standard screwdrivers and pliers, I recommend a steamer tool like a heat gun combined with rubber mallets for delicate tasks. These allow for gentle component separation or seal replacement without damage. For instance, during fridge seal repairs, carefully applying a heat gun helps soften adhesive, making seal removal safer and more efficient. High-end, ergonomically designed tools reduce fatigue and improve accuracy over extended periods, which is crucial when working on durable appliances.
Use Software and Apps to Track Maintenance
Managing multiple appliances over years benefits from digital tracking. I use a maintenance app tailored for home repairs, which logs repair dates, parts used, and warranty info. This proactive approach reminds me when to perform routine checks like hose inspections or filter replacements, preventing costly failures. As appliances become smarter, integrating diagnostic apps that connect to your unit’s firmware can catch problems early—saving time and money in the long run.
How do I maintain appliance tools over time?
Regular calibration and cleaning are essential. For example, my multimeter’s probes need periodic cleaning with alcohol to prevent corrosion, ensuring continual accuracy. Storing tools in a dry, organized toolbox prevents damage and extends lifespan, meaning you won’t be caught short during urgent repairs. I also recommend using protective covers for sensitive electronics and replacing worn-out blades or tips before they cause errors. Staying disciplined with maintenance protocols ensures your tools perform optimally, safeguarding your appliances effectively.
Looking ahead, I predict that smart diagnostics will increasingly automate maintenance tracking, reducing manual effort and increasing repair precision. Embracing these innovations now can give you a significant edge. For detailed guidance on protecting your warranty during installations, check out installations that safeguard your coverage. And, why not try integrating a simple maintenance log app today? It’s a small step that makes a big difference in keeping your appliances humming for years.
The Hardest Lesson I Learned About Appliance Repair and Warranties
One of my biggest eye-openers was realizing that rushing repairs without understanding your appliance’s warranty intricacies can cost you dearly. I once fixed a leak, thinking I was helping—but overlooked warranty conditions, leading to a denial after a major failure. Now, I know that every repair, especially on 2026 models, needs to align with warranty clauses for real protection.
Why DIY Can Sometimes Be a Costly Mistake
Many homeowners believe that fixing things themselves saves money. That’s true up to a point; however, improper repairs or unqualified DIY work can void your warranty and create bigger problems. I learned this the hard way when a simple pump fix turned into a component meltdown because I didn’t follow the manufacturer’s setup guidelines. Always cross-check with expert resources or professionals for complex issues.
What I Wish I Knew About Same-Day Service Rewarded My Peace of Mind
Waiting for repairs can be nerve-wracking, especially during busy seasons. I discovered that choosing a reputable same-day repair service not only restores function fast but also honors warranty stipulations better than delayed fixes from generic providers. Ensuring the technician follows prescribed setup procedures, as outlined in installation-check advice, keeps my appliances covered for future issues.
Ignoring Routine Maintenance Risks My Entire Investment
Neglecting periodic checks of hoses, seals, and filters can silently void warranty coverage. My own experience shows that proactive maintenance catches problems early—saving money and preventing the hassle of claim disputes. A quick quarterly inspection, guided by trusted tools and resources, has kept my appliances running flawlessly and under warranty.
Your detailed breakdown of fixing a washer pump failure is incredibly helpful for homeowners like me who prefer DIY solutions. I had a similar experience last year where my machine started leaking suddenly, and I was worried about costly repairs or water damage. Following your step-by-step guidance made the process manageable, especially when inspecting and clearing obstructions. One thing I found particularly useful was testing the pump with a multimeter before deciding to replace it. It saves time and money, and I feel more confident doing small repairs now. I also appreciate the emphasis on safety, especially unplugging the machine before starting repairs—something I overlooked initially. Has anyone found that regular maintenance, like quarterly hose inspections, actually extends the lifespan of these pumps? I’m considering setting reminders to stay ahead of potential issues. Overall, this post reinforces how proactive steps can prevent serious home damage and warranty voids. Would love to hear others’ experiences on maintaining washer components to avoid pump failure altogether.