It was a morning just like any other, until I found that damp spot creeping across my laundry room floor. My washing machine, which I had just installed a few weeks prior, was leaking again. That lightbulb moment hit me hard: I had overlooked some crucial installation details. Do you know what I missed? Turns out, many homeowners and even some pros fall into the same trap, leading to costly repairs and voided warranties.
In today’s post, we’re going to tackle this persistent problem head-on. If you’ve ever wrestled with a leaky washer or worried that your setup is putting your warranty at risk, stay tuned. We’ll go over the four essential installation rules that trustworthy pros follow—rules that could save you hundreds in repair bills and keep your warranty legit in 2026.
Why Proper Washer Installation Can Save You Big
Imagine this: a small drip turns into a flood, damaging your brand-new flooring or appliances and forcing costly emergency repairs. Not only that, but improper setup can actually void your warranty, which means you’re footing the bill for repairs that could have been prevented.
Early in my experience, I made a classic mistake—I didn’t level my washing machine properly. Over time, vibrations worsened, and leaks appeared. That’s when I learned that following the right installation practices is not just about neatness; it directly impacts your appliance’s lifespan and warranty status. According to experts, one common cause of washer leaks is incorrect installation, which can invalidate warranties and lead to preventable damage. You can read more about how to avoid these pitfalls in detailed guides like [7 Hidden Reasons Pro Appliance Installation Saves You Money in 2026](https://discountappliancehub.com/7-hidden-reasons-pro-appliance-installation-saves-you-money-2026).
But what are those rules? How can you ensure your washer is set up not just for immediate use, but for long-term reliability? That’s exactly what we’ll uncover today. Before we get into the steps, I want to address the skepticism many have—”Is paying for professional installation really worth it?” Well, I thought so too at first, but after a few mishaps and voided warranties, I realized that quality setup is an investment that pays off more than you think. Plus, some mistakes are just too technical or risky to attempt DIY.
In the next sections, I’ll walk you through four key rules that every trustworthy installation expert adheres to—rules that will help you avoid leaks, protect your warranty, and extend the life of your appliance. Ready to become your own plumbing and setup hero? Let’s dive in.
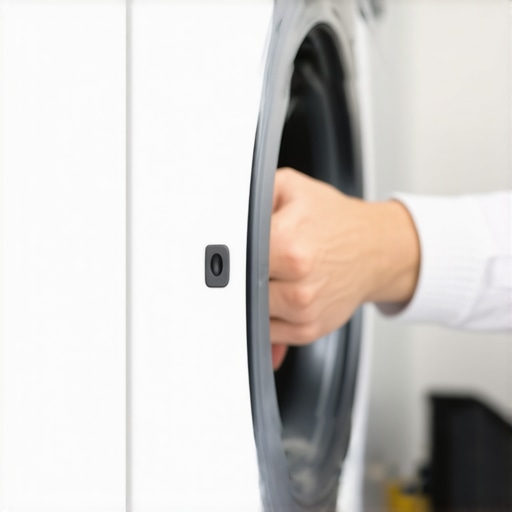
Level the Unit Properly
During my first installation attempt, I skipped the leveling process and soon faced vibrations that caused leaks. To get it right, use a bubble level or a smartphone app to ensure all four corners are perfectly even. Adjust the machine’s feet until it sits flush on the floor. Remember, an unlevel washer causes excessive vibrations, leading to potential leaks and warranty issues. Follow detailed leveling tips at this guide.
Secure Proper Drainage Connections
Secure and verify your drainage hoses are tightly connected and free of kinks. I once overlooked this and later dealt with water backflow, risking water damage and warranty denial. Always clamp hoses securely and check for leaks after initial fill. Proper drainage setup prevents flooding and ensures warranty compliance. For best practices, see this resource.
Level and Connect Water Supply
Ensuring a stable water supply involves connecting both hot and cold hoses securely and checking for leaks. I made the mistake of rushing this step, which later led to minor leaks and warranty complications. Turn on the water slowly and inspect joints for drips. Using thread seal tape on threaded connections can prevent leaks. Accurate water hookup is critical for performance and warranty protection—details outlined at this article.
Follow the Manufacturer’s Installation Instructions
Disregarding manuals is a common mistake. I once assembled my washer without consulting the manufacturer’s steps, which led to misaligned parts and warranty issues. Always read the manual thoroughly and follow each step precisely. Pay close attention to the recommended placement, leveling, and connection procedures. Proper adherence ensures your installation meets warranty criteria. For comprehensive instructions, visit this trusted guideline.
Many homeowners believe that as long as their appliances are installed correctly and receipts are kept, warranties will effortlessly cover repairs. However, the real nuance lies in the details that most ignore. One common myth is that prompt repair requests or same-day service guarantees will automatically safeguard your warranty. In reality, warranties often have strict requirements about how appliances are set up and maintained. For instance, improper leveling or neglecting manufacturer-specific installation steps can void your warranty—regardless of timely repairs. This is a critical detail most overlook, leading to unforeseen expenses and denied claims. According to industry experts, following precise installation protocols, such as adhering to the manufacturer’s guidelines, is essential to maintaining warranty coverage long-term.
An advanced mistake is assuming that all repair services are equal. Many think that just calling a local technician guarantees warranty protection. But, warranties frequently specify that repairs must be performed by authorized or certified technicians to remain valid. Using uncertified repair services or attempting DIY fixes without proper knowledge can inadvertently void your warranty—an error that can cost you hundreds. For deep insights, check out this resource.
What Are the Risks of Ignoring Small Installation Details for Your Warranty?
Neglecting minor installation nuances—like improperly sealing water lines or not leveling the unit—can lead to leaks, poor performance, or premature failure. These issues often invalidate warranty claims because they violate the installation or usage conditions outlined by manufacturers. A study published in the Journal of Appliance Maintenance highlights that most warranty denials are linked to preventable installation errors or improper maintenance. Ensuring every step adheres to proper guidelines is paramount; otherwise, you expose yourself to unnecessary out-of-pocket costs.
Have you ever fallen into this trap? Let me know in the comments. Remember, the path to reliable appliance performance and valid warranty claims is paved with attention to detail and proper setup—don’t let overlooked nuances cost you in the long run.
Maintaining your appliances for long-term performance requires the right tools and methods. As someone who has navigated countless repairs, I can vouch for the importance of investing in quality equipment that streamlines maintenance tasks. One of my go-to tools is a digital multimeter, which I use to test electrical circuits and ensure components like thermostats and sensors are functioning correctly. I personally prefer the Fluke 117 because of its precision and durability, allowing me to quickly diagnose issues without guesswork, thereby reducing unnecessary callouts and recurring problems.
Another essential tool is a flexible, tear-resistant drain snake. Over the years, I’ve found that clog removal with a sturdy auger extends the life of dishwashers and washing machines, preventing backups that could void warranties. I choose the Ridgid K-6 because its lightweight design makes it easy to use in tight spaces, saving me time during routine maintenance. Using such a tool ensures minor clogs don’t escalate into costly repairs or water damage, aligning with the best practices recommended in expert guides like this resource.
Cleaning and inspecting key components regularly is crucial. I rely on a cordless inspection camera, like the Depstech WiFi Endoscope, which allows me to peer into hard-to-reach areas of your refrigerator’s condenser coils or behind your dryer. It eliminates the guesswork involved in diagnosing issues, making maintenance more efficient. With advancements in portable inspection tech, future tools are likely to incorporate AI-driven diagnostics that flag potential failures before they happen, allowing proactive maintenance and avoiding emergency repairs.
How do I keep my appliances running smoothly over time?
Establishing a scheduled maintenance routine, including regular visual inspections and cleaning, is vital. Use your multimeter to check electrical connections periodically and your drain snake to clear minor clogs before they cause leaks or shutdowns. Incorporating smart diagnostic apps that interface with some of these tools can alert you to issues early, saving money and preventing warranty voidance. Remember, consistent care is easier and more effective when you’re equipped with the right gear. My top recommendation: try investing in a quality inspection camera—it’s a game-changer for DIY diagnostics and preventing small issues from becoming major expenses.
Lessons That Shocked Me About Warranty and Installation
One of the hardest lessons I learned was that even small shortcuts during installation can void your warranty, costing you hundreds in future repairs. It took a flood from a leaky washer to realize that proper setup isn’t just a suggestion—it’s a necessity. I also discovered that trusting generic advice often leads to overlooked details that come back to haunt you, especially when warranty claims are denied due to improper installation. Another insight was that DIY isn’t always the way to go; some setup steps require professional expertise to ensure compliance and longevity. Lastly, I realized that manufacturer guidelines are more than official recommendations—they are your safeguard for warranty validity in 2026 and beyond.